Table of Contents >> Show >> Hide
- Why DIY Wooden Carrots Are Perfect for Easter and Spring Décor
- Supplies You Will Need
- Step 1: Choose the Right Wood for Your Carrots
- Step 2: Make a Simple Carrot Template
- Step 3: Cut the Wooden Carrot Shapes
- Step 4: Sand the Edges Smooth
- Step 5: Paint or Stain the Carrots
- Step 6: Add Carrot Lines for Detail
- Step 7: Create the Green Carrot Tops
- Step 8: Seal the Finished Wooden Carrots
- Easy Variations for DIY Wooden Carrots
- How to Display DIY Wooden Carrots
- Common Mistakes to Avoid
- Budget Tips for Affordable Easter Crafting
- Personal Experience: What I Learned Making DIY Wooden Carrots
- Conclusion
If Easter eggs are the celebrities of spring crafting, wooden carrots are the charming supporting actors who quietly steal the whole show. They are cute, affordable, easy to customize, and surprisingly versatile. You can tuck them into baskets, line them across a mantel, hang them on a spring wreath, add them to a tiered tray, or give them as handmade gifts that say, “Yes, I own a glue gun, and yes, I know how to use it.”
This guide will show you how to make DIY wooden carrots for easy Easter and spring crafts using simple supplies, beginner-friendly tools, and flexible decorating ideas. Whether you love farmhouse Easter décor, bright cottage-style color, neutral spring decorations, or kid-friendly craft projects, wooden carrots can be adapted to match your style without making your wallet hop away like a nervous bunny.
The best part? You do not need to be a woodworking expert. If you can trace a triangle, sand a rough edge, paint something orange, and tie raffia without starting a household emergency, you can make these. And even if the first carrot looks more like a traffic cone with leafy dreams, that is part of the handmade charm.
Why DIY Wooden Carrots Are Perfect for Easter and Spring Décor
DIY wooden carrots have become popular because they hit the sweet spot between rustic, cheerful, and practical. Unlike paper crafts, they can be stored and reused year after year. Unlike delicate ceramic decorations, they are not likely to shatter if someone bumps the table while reaching for jelly beans. And unlike real carrots, they will not become suspiciously bendy in the back of your refrigerator.
Wooden carrots also work beautifully with several decorating styles. Paint them bright orange for classic Easter décor, stain them for a primitive farmhouse look, wrap them in jute for rustic texture, or cover them with patterned scrapbook paper for a playful spring craft. You can make one oversized carrot as a porch sign, a bundle of small carrots for a centerpiece, or a mini carrot garland for a shelf.
Supplies You Will Need
Before you begin, gather your materials. You can keep this project very simple or dress it up depending on the look you want.
Basic Materials
- Scrap wood, wood shims, craft wood blanks, wood beads, or thin plywood
- Pencil and paper for a carrot template
- Jigsaw, handsaw, or pre-cut wooden carrot shapes
- Sandpaper or sanding sponge, ideally medium and fine grit
- Acrylic craft paint, chalk paint, or wood stain
- Paintbrushes or foam brushes
- Greenery, raffia, jute twine, ribbon, moss, yarn, or fabric strips
- Hot glue gun and glue sticks
- Drill with a small bit, optional but helpful
- Clear sealer, optional for longer-lasting décor
Optional Decorative Extras
- White paint for dry brushing or distressing
- Buffalo check ribbon or gingham ribbon
- Mini wood beads for garlands
- Stencils, stamps, or vinyl lettering
- Scrapbook paper or napkins for decoupage
- Small baskets, trays, or signs for displaying the finished carrots
Step 1: Choose the Right Wood for Your Carrots
The easiest way to make wooden carrots is to use scrap wood. A leftover piece of pine, cedar fence picket, pallet wood, or a small craft board can become adorable spring décor with very little effort. Thin plywood is great for flat carrots, while thicker boards create chunky carrots that stand up nicely in baskets or on shelves.
If you want a beginner-friendly version, buy pre-cut wooden carrot shapes from a craft store. This removes the cutting step completely and lets you jump straight into painting and decorating. Another easy option is using wood beads. Paint several beads orange, string them together in a tapered shape, and add green yarn or raffia at the top. This creates cute wooden bead carrots that look great in Easter baskets or on tiered trays.
For a rustic farmhouse look, imperfect wood is actually your friend. Knots, grain lines, dents, and uneven edges add character. This is one of those magical projects where “not perfect” becomes “handmade and charming.” Finally, a craft where your crooked cut can be called artistic.
Step 2: Make a Simple Carrot Template
Draw a long triangle on paper or cardboard. The top should be wider, and the bottom should taper to a rounded or pointed end. A good beginner size is about 8 to 12 inches tall and 2 to 4 inches wide at the top. For mini carrots, go smaller. For porch décor, go bigger and prepare for neighbors to ask if you have joined a festive vegetable club.
Cut out the template and trace it onto your wood. If you are making a bundle, trace several carrots in different sizes. Slight variation makes the finished display look more natural. Real carrots are not identical, and wooden carrots do not need to be either. In fact, a little wonkiness makes them look more like something from a cozy spring market instead of a factory shelf.
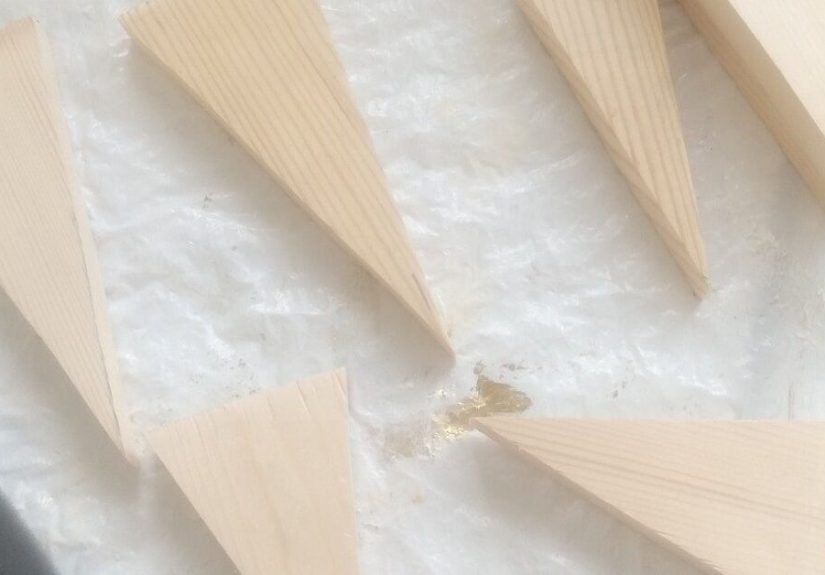
Step 3: Cut the Wooden Carrot Shapes
Use a jigsaw or handsaw to cut along the traced lines. If you are new to cutting wood, go slowly and secure the board before cutting. Safety glasses are a smart idea, and sanding or cutting should be done in a well-ventilated area. If younger crafters are helping, let them participate in painting and decorating rather than cutting or drilling.
Do not panic if your carrot shape is slightly uneven. You can soften the edges with sanding, and once paint, ribbon, raffia, and greenery are added, minor flaws practically disappear. Crafting has a wonderful way of covering tiny mistakes with moss and confidence.
Step 4: Sand the Edges Smooth
After cutting, sand the front, back, sides, and especially the edges. Start with a medium-grit sandpaper if the wood is rough, then finish with fine grit for a smoother surface. Sanding helps remove splinters and gives paint a better surface to grip. Wipe away dust with a dry cloth, tack cloth, or slightly damp rag before painting.
If you want rustic wooden carrots, do not sand them until they look like polished furniture. A little texture is perfect. If you want a clean, modern look, spend more time smoothing the surface and edges. The finish depends on your style: farmhouse carrots can be a bit rugged, while pastel spring carrots may look better with a softer, cleaner finish.
Step 5: Paint or Stain the Carrots
Now comes the satisfying part: turning plain wood into carrots. Orange acrylic craft paint is the classic choice. You can use one shade or mix red and yellow to create your own custom orange. For a deeper farmhouse look, use burnt orange, terra cotta, pumpkin, or cinnamon tones. For a softer spring style, try peach, coral, pale orange, or even whitewashed orange.
Apply one thin coat of paint, let it dry, and add a second coat if needed. Thin coats usually look better than one thick coat that leaves brush marks and dramatic little paint ridges. If you like a distressed look, lightly sand the edges after the paint dries so the wood peeks through.
Wood stain is another great option. You can stain the entire carrot first, then dry brush orange paint over it. This gives the carrot a warm, aged look. You can also paint first and then brush on a tiny amount of brown stain or antiquing wax around the edges for a primitive Easter décor style.
Step 6: Add Carrot Lines for Detail
Carrots look more realistic with a few little lines across the body. Use a small brush, paint pen, or the edge of a sponge to add short horizontal strokes in a slightly darker orange or brown. Keep the lines uneven and light. You are not drawing a barcode; you are giving your wooden carrot a little garden personality.
For a whimsical look, paint white polka dots, tiny flowers, stripes, or gingham-inspired checks. If you are making carrots for a kids’ Easter craft table, let each person decorate their own. Some carrots may become rainbow carrots. Some may have smiley faces. One may become a superhero carrot. Let it happen. Spring décor should not take itself too seriously.
Step 7: Create the Green Carrot Tops
The carrot tops are where this craft really comes alive. You can use raffia for a natural look, faux greenery for a fresh garden style, jute twine for rustic texture, yarn for a soft kid-friendly version, or strips of green fabric for a farmhouse finish.
If your wooden carrot is thick enough, drill a small hole into the top. Add a dab of hot glue, then insert the greenery, raffia, or twine. If you do not want to drill, simply glue the greens flat to the back or front top edge. Cover the glue area with a small bow, moss, ribbon, or wrapped twine.
For fuller tops, layer materials. Start with raffia, add faux greenery, then wrap the base with jute. This creates dimension and makes the carrot look more finished. Spanish moss can also be glued around the top for a natural, garden-inspired texture.
Step 8: Seal the Finished Wooden Carrots
If your DIY wooden carrots will stay indoors, sealing is optional. If they will be handled often, stored for future seasons, or displayed in a covered porch area, a clear sealer can help protect the paint. Use a matte or satin clear coat for a soft handmade finish. Glossy sealer can work too, but it may make rustic carrots look a little too shiny, like they are preparing for a vegetable beauty pageant.
Apply light coats and let each coat dry according to the product instructions. Avoid heavy layers because they may drip or leave a sticky finish. If children will handle the carrots, choose non-toxic craft materials and allow everything to dry fully before use.
Easy Variations for DIY Wooden Carrots
Farmhouse Scrap Wood Carrots
Cut chunky carrots from scrap wood, paint them burnt orange, distress the edges, and add raffia or jute at the top. Display them in a galvanized bucket, dough bowl, or wire basket. Add a small tag that says “Fresh Carrots” for a charming market-style touch.
Wood Bead Carrots
Paint wood beads orange, string them from largest to smallest, and tie green yarn or raffia at the top. These are perfect for Easter baskets, garlands, tiered trays, or small gifts. They also use fewer tools, making them a good option for crafters who do not want to cut wood.
Decoupage Wooden Carrots
Paint the carrot base white or pale orange, then apply scrapbook paper, napkins, or tissue paper using decoupage medium. Floral prints, gingham, and vintage patterns work especially well for spring. Seal the surface after it dries for a smooth finish.
Neutral Spring Carrots
Not everyone wants bright orange décor. Paint the carrots cream, beige, sage green, or dusty peach. Add linen ribbon and muted greenery for an elegant spring look that can stay out long after Easter has passed.
Carrot Sign or Wall Hanging
Attach several flat wooden carrots to a larger board and add words like “Carrot Patch,” “Bunny Trail,” or “Hello Spring.” This makes a cute entryway sign, kitchen accent, or porch decoration.
How to Display DIY Wooden Carrots
Once your wooden carrots are finished, the fun is not over. Styling them is half the joy. Place a bundle in a basket with faux grass, tuck them into a spring wreath, scatter mini carrots across a brunch table, or add them to a tiered tray with bunnies, eggs, candles, and small signs.
For a centerpiece, fill a wooden bowl with moss, faux eggs, and carrots in different sizes. For a mantel, lean a carrot sign against the wall and place small carrots around it. For a kids’ Easter party, use wooden carrots as place cards by tying a name tag around each one. They also make sweet handmade gifts for teachers, neighbors, grandparents, or anyone who appreciates seasonal décor with a little personality.
Common Mistakes to Avoid
The first mistake is skipping sanding. Even a quick sanding makes the project look cleaner and helps prevent rough edges. The second mistake is using too much hot glue. A small amount usually holds well and looks neater. The third mistake is rushing the paint. Let each layer dry before adding more paint, lines, bows, or sealer.
Another common issue is making every carrot the same size. A group of different sizes usually looks more natural and visually interesting. Also, avoid overdecorating every carrot. If one carrot has ribbon, dots, moss, and a bow the size of a small bird, let the others stay simpler so the display does not become a craft-store parade float.
Budget Tips for Affordable Easter Crafting
DIY wooden carrots are wonderfully budget-friendly. Use leftover wood from previous projects, check your craft stash before shopping, and repurpose ribbon, twine, faux greenery, or old gift wrap. Dollar stores often carry wood cutouts, beads, moss, raffia, and seasonal ribbon. Thrift stores can also be great places to find baskets, trays, and small containers for displaying your finished carrots.
If you are crafting with a group, cut the wooden carrots ahead of time and set up a painting station. Put supplies in bowls or jars so everyone can choose their own decorations. This works well for family craft nights, classroom spring crafts, church groups, or Easter parties.
Personal Experience: What I Learned Making DIY Wooden Carrots
The first time I made DIY wooden carrots, I had a very confident plan. I pictured a charming farmhouse bundle that looked like it came from a boutique spring market. I had scrap wood, orange paint, raffia, and the bold optimism of someone who had not yet discovered how quickly hot glue can attach itself to fingertips. The final result? Not perfect, but surprisingly adorable. And honestly, that is the magic of this project.
One thing I learned immediately is that carrot shapes do not need to be exact. In fact, the slightly crooked ones often look the best. My first carrot leaned a little to the left and had a bottom point that looked like it had made a questionable life choice. Once I painted it, distressed the edges, and added a messy raffia top, it became the most charming carrot in the bunch. Handmade décor has a forgiving personality.
I also learned that paint color matters more than I expected. Bright orange is fun, but mixing in a little brown, red, or yellow creates a richer carrot color. A dry brush of white or tan over the finished piece can soften the look and make it blend better with farmhouse or neutral spring décor. If your orange looks too bold at first, do not panic. A little sanding or antiquing wax can calm it down. Think of it as giving your carrot a tiny spa day.
The greenery at the top makes a huge difference. Raffia gives a rustic garden feel, faux greenery looks fresh and cheerful, and jute twine makes the piece feel handmade and cozy. My favorite version used a mix of raffia and faux fern pieces, wrapped at the base with twine. It looked full without being fussy. The secret is layering textures, not piling on every decoration you own. There is a fine line between “cute Easter craft” and “a carrot wearing a costume.”
Another useful lesson is to make more carrots than you think you need. A single wooden carrot is cute, but a bundle of three, five, or seven looks intentional. Odd numbers tend to style better in baskets and trays. I like making different sizes because they nest together nicely and create a more natural display. Small carrots work well on tiered trays, medium carrots look great in baskets, and large carrots can become signs or porch décor.
Storage is also worth thinking about. After Easter, wrap the carrots loosely in tissue paper or place them in a small box so the tops do not get crushed. If you use delicate greenery or bows, store them on top of heavier decorations, not under a ceramic bunny with a suspicious amount of attitude. A quick clear coat can help protect the paint, especially if you plan to reuse the carrots every year.
My biggest recommendation is to treat this as a relaxed craft, not a precision woodworking exam. Put on music, cover your table, pour paint into small dishes, and enjoy the process. DIY wooden carrots are easy enough for beginners but creative enough for experienced crafters to personalize. You can make them rustic, modern, colorful, vintage, playful, or elegant. And if one turns out strange? Put it in the back of the basket. That is not failure. That is styling.
Conclusion
Learning how to make DIY wooden carrots for easy Easter and spring crafts is a simple way to create décor that feels warm, personal, and reusable. With a few pieces of wood, some paint, greenery, and a little imagination, you can make carrots for baskets, wreaths, signs, garlands, centerpieces, and seasonal displays. The project is beginner-friendly, budget-conscious, and flexible enough to match almost any spring decorating style.
Whether you prefer bright orange Easter carrots, rustic farmhouse bundles, neutral spring accents, or playful wood bead carrots, this craft gives you plenty of room to experiment. Start simple, add texture, and let the handmade charm do its work. Your home gets a cheerful seasonal refresh, and you get the satisfaction of saying, “I made that,” which is always more fun than saying, “I panic-bought it next to the checkout line.”


