Table of Contents >> Show >> Hide
- What Is Butterscotch (and How Is It Different From Caramel)?
- Ingredients and Tools
- Before You Start: Quick Science, Big Payoff
- Homemade Butterscotch in 12 Steps
- Temperature Cheat Sheet: Sauce vs. Chewy vs. Hard
- Troubleshooting: When Butterscotch Misbehaves
- How to Use Homemade Butterscotch (Beyond Ice Cream)
- Storage, Reheating, and Food Safety
- Frequently Asked Questions
- Conclusion
- Real-Kitchen Experiences: 8 Lessons From Making Butterscotch at Home
- SEO Tags
Homemade butterscotch is one of those “why did I ever buy the jar?” moments. It’s buttery, brown-sugary, salty-sweet,
and dangerously good on basically anything that sits still long enoughice cream, pancakes, brownies, coffee, a spoon…
(I’m not judging. I’m just asking if you have an extra spoon.)
This guide walks you through a reliable, classic homemade butterscotch sauce using simple pantry staples, plus the
optional upgrades that make it taste like you paid for dessert at a fancy steakhouse. Along the way, you’ll learn
what’s actually happening in the pot (so you can fix problems fast), how temperature affects texture, and how to
stretch the same base into sauce, chewy candy, or hard candywithout turning your kitchen into a sugar crime scene.
What Is Butterscotch (and How Is It Different From Caramel)?
Butterscotch is a cooked-sugar confection made primarily with brown sugar and butter. That brown sugar
brings molasses notes and extra moisture, which can make butterscotch taste deeper and a bit more “toasty” than classic
caramel (which often starts with white granulated sugar). In other words: caramel is smooth and golden; butterscotch is
caramel’s richer, more dramatic cousin who always shows up wearing a scarf.
Most people mean butterscotch sauce when they say “homemade butterscotch,” and that’s what our 12 steps
focus on. But the exact same flavor profile can be cooked to different temperatures to create a pourable sauce, chewy
candy, or hard candy. Temperature is the steering wheel. Sugar is the engine. Butter is the leather interior.
Ingredients and Tools
Core ingredients (the non-negotiables)
- Brown sugar (dark for deeper flavor; light works too)
- Unsalted butter (you control the salt and the vibe)
- Heavy cream (for a silky sauce that doesn’t feel “thin”)
- Salt (makes the flavor pop; skip it and it’ll taste weirdly flat)
- Vanilla extract (added off heat so it stays fragrant)
Optional “insurance policies” (highly recommended if you want calm energy)
- Light corn syrup (a little helps reduce sugar crystallization and keeps sauce glossy)
- Lemon juice (a tiny splash can help discourage graininess)
- Flaky sea salt (for that salted-butterscotch finish people talk about for weeks)
- Bourbon or rum (optional, but it adds warmth and depthlike a sweater for your sauce)
Tools you’ll be happy to have
- Heavy-bottom saucepan (even heating = fewer scorchy surprises)
- Whisk + heatproof spatula (whisk for emulsifying, spatula for scraping and control)
- Candy thermometer (not required, but it makes you feel like a wizard who respects physics)
- Measuring cups/spoons and a heatproof jar for storage
Before You Start: Quick Science, Big Payoff
Cooking sugar is basically controlling water. As the mixture boils, water evaporates, sugar concentration rises,
and the texture changes. That’s why “boil for 4 minutes” can work in one kitchen and feel slightly off in another.
If you want consistent results, temperature is your best friend.
Butterscotch also involves a beautiful combo of caramelization and deeper browning reactions, boosted by molasses in
brown sugar and the milk solids in butter. Translation: it goes from “sweet” to “toasty, complex, and addictive.”
The trick is to get the browning you want without burning.
Homemade Butterscotch in 12 Steps
This method makes a rich, classic homemade butterscotch sauceperfect for ice cream, cakes, and coffee.
You can double it, but don’t crank the heat to “make it faster.” Sugar is petty. It will punish you.
-
Set up your “landing zone.”
Put a heatproof jar (or two) near the stove. If you’re using a thermometer, clip it on now. Measure ingredients
ahead of time. Once the sauce hits the right temperature, it waits for no one. -
Warm the cream (optional, but smart).
Cold cream can cause bubbling and temperature drops. Warm it gently in the microwave or a small saucepan until it’s
just warm to the touchnot hot. This helps the sauce stay smooth and reduces drama when you add dairy. -
Melt the butter over medium-low heat.
Use a heavy-bottom saucepan. Melt the butter slowly so it doesn’t brown too early. You’re building a flavor base,
not making popcorn. -
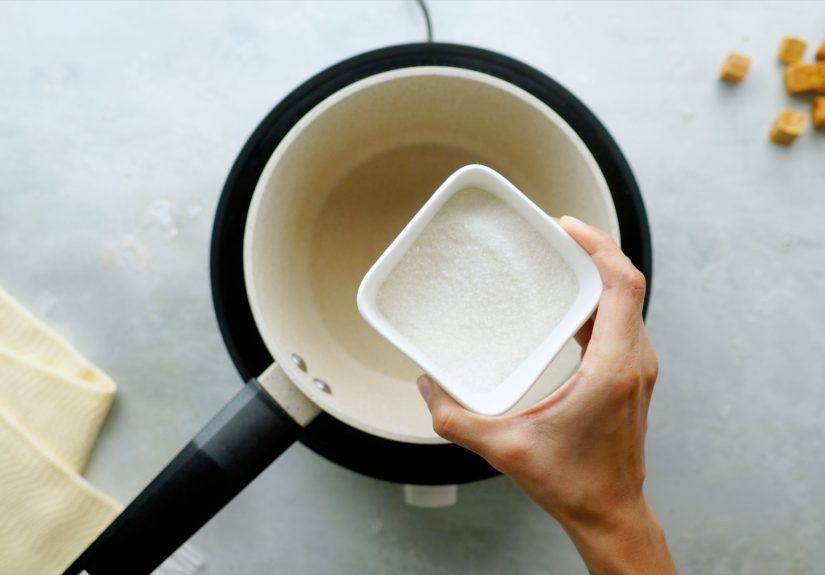
Add brown sugar and salt; stir to combine.
Add the packed brown sugar and salt. Stir until the mixture looks like wet sand turning into glossy lava. If you’re
using corn syrup or a small splash of lemon juice, add it here. -
Let the sugar dissolve and the mixture come to a gentle boil.
Keep the heat moderate. You want steady bubbling, not a wild sugar volcano. If you see sugar clinging to the sides
of the pot, brush it down with a damp pastry brush or carefully wipe with a damp paper towel (watch your fingers). -
Simmer to deepen flavor (2–4 minutes).
This is where butterscotch gets its signature “toasty” character. You’ll smell it shift from straight sweetness to
warm, buttery molasses notes. Stir occasionally and scrape the bottom to prevent scorching. -
Slowly whisk in the warm cream.
Pour in a thin stream while whisking. The mixture will bubble aggressivelythis is normal, not a sign you’ve angered
the kitchen gods. Keep whisking until smooth. -
Return to a boil and cook to your target temperature.
For a thick sauce that pours beautifully, many cooks aim roughly in the 225°F–240°F neighborhood
depending on preference. Lower temps = thinner sauce; higher temps = thicker and more set.
If you don’t have a thermometer, simmer 4–6 minutes after boiling, then evaluate thickness after it cools slightly. -
Do the “spoon test” for texture.
Dip a spoon in the sauce and run your finger across the back. If the line holds for a moment, you’re in good shape.
Remember: it thickens a lot as it cools, so don’t cook it until it looks like peanut butter (unless that’s the goal). -
Take it off heat and add vanilla (and booze, if using).
Stir in vanilla extract off heat. If adding bourbon or rum, add it now. Off heat keeps the aroma bright and reduces
the chance of the alcohol tasting harsh. -
Cool briefly, then transfer to a jar.
Let the sauce cool 10–15 minutes so it thickens slightly and stops bubbling. Pour into a jar. For the smoothest
finish, avoid scraping any crusty bits from the pan sides into the jar. -
Salt it like you mean it (optional finishing move).
Taste once it’s warm (not lava). Add a pinch more salt if needed. A small sprinkle of flaky sea salt when serving
can make the flavor feel bigger and more “grown-up dessert menu.”
Temperature Cheat Sheet: Sauce vs. Chewy vs. Hard
If you want to go beyond sauce, temperature is everything. Here’s the general idea:
| Goal | Approx. Temp Range | Texture | Best Uses |
|---|---|---|---|
| Butterscotch sauce | ~225°F–240°F | Pourable, thickens as it cools | Ice cream, cakes, lattes, bread pudding |
| Chewy butterscotch | ~240°F–265°F | Chewy/firm (like soft candy) | Wrapped candies, chewy squares |
| Hard butterscotch candy | ~300°F–310°F | Hard, brittle “crack” stage | Hard candies, shards, lollipops |
Important note: going to hard-candy temperatures is a different project with stricter safety needs (sugar burns are no
joke). If your dream is hard butterscotch candy, use a tested hard-candy formula (often including water + corn syrup),
a thermometer, and a calm, focused kitchen.
Troubleshooting: When Butterscotch Misbehaves
1) “Help, it’s grainy!”
Graininess usually comes from sugar crystallization. Try these fixes:
- Don’t over-stir once it’s boiling. Stirring can encourage crystals.
- Brush down the sides of the pan to prevent rogue sugar crystals from seeding the whole batch.
- Add a little corn syrup (or a small splash of lemon juice) next time for anti-crystal insurance.
- Reheat gently and whisk: sometimes warming the sauce and whisking can smooth minor graininess.
2) “It separatedthere’s an oily layer.”
That’s a broken emulsion (butterfat parted ways with the sugar syrup). Fix it by reheating gently and whisking hard.
If it still fights you, whisk in a tablespoon or two of warm cream to bring it back together.
3) “It tastes burnt.”
Burnt butterscotch is usually from too-high heat or hot spots in a thin pan. Use a heavier pot and medium-to-medium-low
heat. Once it smells acrid (not toasty), it’s hard to saveso prevention is the real superpower here.
4) “It’s too thick (or too thin).”
- Too thick: warm it and whisk in a splash of cream.
- Too thin: simmer a little longer next time or cook a few degrees higher.
How to Use Homemade Butterscotch (Beyond Ice Cream)
Ice cream is iconic, but butterscotch is a multitasker. Try it:
- Over pancakes or waffles with toasted pecans
- Swirled into coffee (hello, DIY butterscotch latte)
- On apple crisp instead of caramel for a deeper flavor
- Drizzled on brownies with flaky salt
- As a cake soak (brush a thin layer on warm cake layers)
- Mixed into whipped cream for a fast “butterscotch mousse” vibe
Storage, Reheating, and Food Safety
Store butterscotch sauce in a clean airtight jar in the refrigerator. It will thicken when chilled. To reheat,
microwave in short bursts (10–20 seconds) or warm gently on the stove, stirring until smooth.
How long does it last? Many home-cook recipes suggest it keeps several weeks refrigerated. For the best
flavor and texture, a practical rule is to use it within 2–4 weeks. If it smells “off,” grows mold, or
tastes weirdly sour, toss it and make a fresh batchluckily, you now know it’s quick.
Frequently Asked Questions
Do I need a candy thermometer?
Not strictly, but it makes results more consistent. If you plan to make chewy or hard candies, a thermometer stops
being “helpful” and starts being “pretty much required.”
Can I use salted butter?
Yes. Just reduce added salt, taste at the end, and adjust. Butterscotch loves salt, but it doesn’t need to be a salt
lick.
Dark brown sugar or light?
Dark brown sugar gives a deeper molasses flavormore “butterscotchy.” Light brown sugar makes a milder sauce. A mix is
also great if you want balance.
Why does my sauce harden like candy?
You likely cooked it too hot/too long. The good news: warm it and whisk in a bit of cream to loosen it. Next time,
stop a little earlier.
Conclusion
Homemade butterscotch is the rare kitchen project that feels fancy but is actually straightforward: brown sugar, butter,
cream, and a little heat management. Once you learn the cuesgentle boil, toasty aroma, target temperatureyou can make
a sauce that’s smooth, glossy, and wildly versatile. And if your first batch isn’t perfect? Congratulations, you’ve
officially joined the proud tradition of candy-making humans who learned that sugar has opinions.
Real-Kitchen Experiences: 8 Lessons From Making Butterscotch at Home
I’ve made butterscotch in the “I’m confident and relaxed” mood, and I’ve made it in the “why is it bubbling like a
swamp monster?” mood. Either way, it teaches you something every time. Here are the most useful lessons that show up
when you actually do itespecially if you plan to make it more than once.
1) The smell is your early-warning system. Before a thermometer even catches up, your nose knows.
There’s a moment when the mixture shifts from “melted sugar” to “toasty molasses butter.” That’s the sweet spot where
flavor gets deeper without tipping into burnt. If the aroma starts smelling sharp, bitter, or smoky in a bad way, lower
the heat immediately.
2) Medium heat wins. High heat feels productive right up until it doesn’t. Butterscotch can scorch fast,
especially in a thin pan. Medium or medium-low gives you control, smoother texture, and fewer “why is it separating?”
surprises. You’re not racing. You’re coaxing.
3) Warm cream is the peace treaty. The first time you pour cold cream into hot sugar, it can bubble up
violently and cool the mixture unevenly. Warm cream pours in like a polite guest, not a wrecking ball. It also makes
it easier to keep the sauce smooth and emulsified. This is one of those tiny steps that feels optional until you try
it and think, “Oh. That was… calmer.”
4) Salt isn’t optionalit’s structure. Without salt, butterscotch can taste one-note: sweet, sweet,
sweet. With salt, it suddenly tastes like dessert. I’ve learned to add salt early (for balance) and then finish with a
pinch at the end (for sparkle). The best part? You can dial it to your audience. Kid-friendly? Go lighter. “Adult
dessert table”? Sprinkle flaky salt on top and watch people pretend they’re not licking the spoon.
5) Thickness is a “cooling” decision. Hot butterscotch looks thinner than it will be once cooled. I
used to overcook because I wanted it thick immediately. Then I cooled it and got a sauce that could patch drywall.
Now I stop when it’s still pourable and trust the cool-down. If it ends up too thick, a splash of cream fixes it in
seconds.
6) Graininess is usually technique, not bad luck. When a batch gets grainy, it’s tempting to blame the
universe. But it’s often crystallization: sugar crystals on the pan sides, too much stirring at the wrong time, or
letting undissolved sugar seed the sauce. The practical move is to brush down the pot sides during boiling, stir less
once it’s bubbling, and consider a little corn syrup for insurance. It’s not “cheating.” It’s chemistry management.
7) Butterscotch is a flavor base, not just a topping. Once you have a jar in the fridge, you start
finding excuses: stir into oatmeal, drizzle on roasted apples, swirl into cheesecake batter, or add a spoonful to coffee
with a splash of milk. It turns “regular snack” into “I have my life together,” which is honestly a powerful illusion.
8) The second batch is always better. The first batch teaches you the cues. The second batch is where
confidence shows up. You’ll know what “gentle boil” looks like, what “toasty” smells like, and how quickly the sauce
changes in the last minute. If you want to feel like a pro, make it twice within a month. The learning curve is short,
and the reward is extremely edible.


