Table of Contents >> Show >> Hide
- What Meringue Is (and Why It Acts Like This)
- Ingredients and Tools You’ll Want (No, You Don’t Need a PhD)
- Pick Your Meringue: French vs Swiss vs Italian
- The Foolproof Method: Swiss Meringue for Pie (Step-by-Step)
- How to Put Meringue on a Pie (So It Doesn’t Weep or Slide Off)
- Italian Meringue for Pie (Stable, Torch-Friendly)
- Troubleshooting: Fix the Five Most Common Meringue Problems
- Food Safety Notes (Because It’s 2026 and We’re Responsible Adults)
- Flavor and Style Ideas (Beyond “Vanilla Cloud”)
- Storage: The Truth Your Fridge Doesn’t Want You to Know
- Real-Kitchen Experiences: The Extra That Make You Better at Meringue
- Conclusion
Meringue is basically a fancy way of saying “egg whites with a glow-up.” On a pie, it’s the dramatic
hat that turns a perfectly nice dessert into a showstopper. It’s also the part most likely to throw a
tantrum: weeping, shrinking, beading, slumping… meringue has range.
The good news: once you know what meringue wants (clean tools, dissolved sugar, and a little respect),
you can make a tall, glossy, swoopy topping that slices cleanly and tastes like toasted marshmallow
dreams. Below is a complete, practical guide to making meringue for pieFrench, Swiss, and Italianplus
the “no-weep” tricks that separate confident bakers from people whispering “please set” at their oven door.
What Meringue Is (and Why It Acts Like This)
Meringue is a foam: egg-white proteins unfold as you whip, then link up to trap air bubbles. Sugar
stabilizes that foam by strengthening the structure and helping it hold onto moisture the right way.
Too little structure, and the foam collapses. Too much heat or time, and sugar can push moisture out
and form beads. Too much humidity, and meringue becomes a sponge with trust issues.
Ingredients and Tools You’ll Want (No, You Don’t Need a PhD)
Core ingredients
- Egg whites (freshly separated, no yolkyolk is basically sabotage)
- Sugar (superfine dissolves faster; regular works if you’re patient)
- Acid (cream of tartar, lemon juice, or vinegar) to stabilize the foam
- Salt + vanilla (optional, but highly recommended for flavor)
Optional stabilizers (useful for pies)
- Cornstarch (a small amount helps reduce weeping and improves slice-ability)
- Pasteurized egg whites (for extra food-safety comfort)
Tools that make life easier
- Stand mixer or hand mixer (your arms deserve rights)
- Metal or glass bowl (plastic can hold greasy residue)
- Rubber spatula (for spreading and sealing to the crust)
- Thermometer (helpful for Swiss/Italian meringue, not mandatory but very nice)
- Oven or kitchen torch (to brown the top)
Pick Your Meringue: French vs Swiss vs Italian
French meringue (classic pie topping)
French meringue is the simplest: whip whites, add sugar gradually, beat to stiff peaks, and bake on the
pie until golden. It’s light and fluffy, but less stable than the other typesmeaning it’s more likely
to weep if you underbake or if your kitchen feels like a sauna.
Swiss meringue (my top pick for most pies)
Swiss meringue starts by gently heating egg whites and sugar together over simmering water until the
sugar dissolves (and the mixture is warm), then whipping to stiff peaks. It’s smoother, glossier, and
generally more stablegreat for pie topping because it holds its shape and is less prone to grittiness.
Italian meringue (the “I came to win” option)
Italian meringue is made by streaming hot sugar syrup into whipping egg whites. It’s the most stable and
is excellent if you want a tall topping you can torch quickly. It’s also the most technicalstill doable,
but it expects you to pay attention for a few minutes, like a cat near an open door.
The Foolproof Method: Swiss Meringue for Pie (Step-by-Step)
If you want the best balance of ease, stability, and “wow,” make Swiss meringue. This version is designed
for a standard 9-inch pie.
Ingredients (for one 9-inch pie)
- 4 large egg whites (room temperature is ideal)
- 1/2 to 3/4 cup sugar (start at 1/2 cup for classic sweetness; use 3/4 cup for extra stability)
- 1/2 tsp cream of tartar (or 1 tsp lemon juice or vinegar)
- Pinch of salt
- 1 tsp vanilla extract (optional)
- Optional: 1 to 2 tsp cornstarch (for extra insurance against weeping)
Step 1: Prep like a pro (this is where most meringues are won)
- Separate eggs while cold (easier), then let whites sit 20–30 minutes to take the chill off.
- Wipe your bowl and whisk with a little vinegar or lemon juice and a paper towel. No grease. None.
- Make sure your pie filling is hot and ready (more on that below). Meringue likes commitment.
Step 2: Warm whites and sugar until dissolved
- Set a saucepan with 1 inch of water to a gentle simmer (not a rolling boil).
-
In a heatproof bowl over the simmering water (bowl not touching the water), whisk egg whites, sugar,
cream of tartar, and salt constantly. -
Heat until the sugar dissolves and the mixture feels hot to the touch. If you have a thermometer, aim
for about 160°F. (If you don’t, rub a little between your fingersno grit = good.)
Step 3: Whip to glossy stiff peaks
- Move the warm mixture to your mixer and whip on medium-high until thick, glossy, and cool-ish.
-
Stop at stiff peaks: lift the whisk and the peak should stand straight with a proud
little point. If it droops sadly, keep whipping. If it looks dry and clumpy, you went too far. - Beat in vanilla at the end if using.
- Optional: whisk cornstarch with a teaspoon of sugar, then fold it in gently (this can help stability on pies).
How to Put Meringue on a Pie (So It Doesn’t Weep or Slide Off)
1) Spread meringue on hot filling
This is one of the biggest secrets in meringue-pie world: the filling should be hot when the meringue goes on.
The heat helps set the meringue from the bottom and reduces that watery layer between filling and topping.
Translation: fewer tears, more cheers.
2) Seal to the crust edge
Don’t just plop meringue in the center like it’s a decorative pillow. Push it all the way to the crust,
touching and sealing the edge. That seal helps prevent shrinking and keeps the meringue from pulling away.
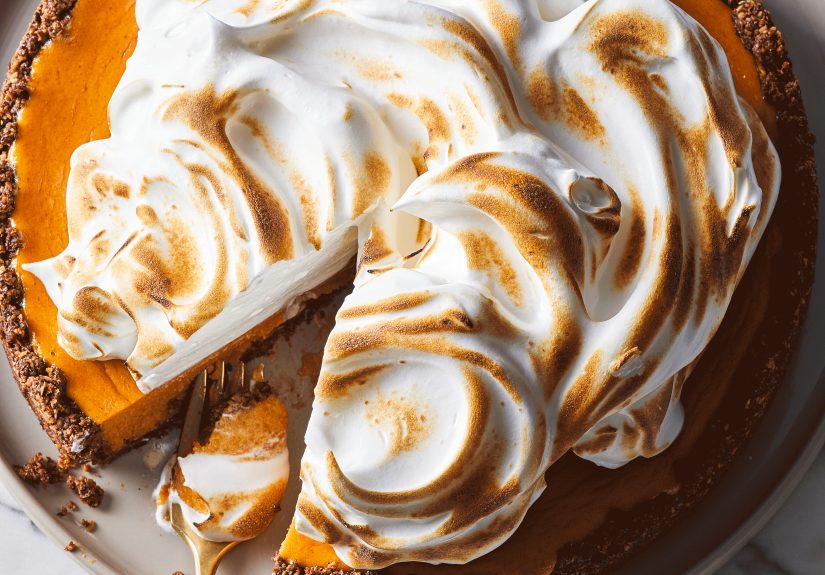
3) Make swoops and peaks (for beauty and crunch)
Use the back of a spoon to make dramatic swirls and peaks. Those peaks brown faster, so you get that
toasty marshmallow flavor without overcooking the whole topping.
4) Brown it: bake or torch
-
If using French meringue: bake it until golden (many pies brown around 325–375°F,
depending on your recipe). -
If using Swiss or Italian meringue: you can still bake briefly to brown, or use a torch for
quick, controlled color and a soft interior.
Italian Meringue for Pie (Stable, Torch-Friendly)
Want a bakery-style, tall topping that holds up like a champ? Italian meringue is your move. It’s especially
handy for pies where you don’t want extended oven time after the filling is done.
Quick method overview
- Start whipping 4 egg whites with a pinch of acid until foamy/soft peaks.
- Meanwhile, boil sugar + water to soft-ball stage (around 240°F).
- With mixer running, stream hot syrup into the whites in a thin, steady ribbon (avoid pouring onto the whisk).
- Whip until glossy stiff peaks form and the bowl feels closer to room temp.
Then spread over hot filling, seal to crust, and torch or briefly bake to brown. The structure is strong, so
it’s excellent for decorative swirlsand for impressing people who think you “just baked a pie.”
Troubleshooting: Fix the Five Most Common Meringue Problems
Problem 1: Weeping (liquid under the meringue)
- Usually caused by: undercooking, sugar not dissolved, meringue applied to cool filling, or humidity.
- Fix it next time: apply meringue to hot filling, dissolve sugar completely, consider Swiss/Italian, and add a tiny bit of cornstarch.
Problem 2: Beading (sweaty sugar droplets on top)
- Usually caused by: overbaking or baking too long.
- Fix it next time: brown faster (higher heat for shorter time) or torch; don’t leave it in the oven until it looks like a desert landscape.
Problem 3: Shrinking or pulling away from the crust
- Usually caused by: not sealing to the crust or spreading meringue over cool filling.
- Fix it next time: spread to the edges first and seal, and use hot filling.
Problem 4: Grainy meringue
- Usually caused by: sugar not dissolved.
- Fix it next time: add sugar gradually (French), use superfine sugar, or switch to Swiss to dissolve it with heat.
Problem 5: Flat or watery egg whites that won’t whip
- Usually caused by: fat contamination (yolk, greasy bowl), or adding sugar too early.
- Fix it next time: clean everything, separate carefully, start whipping whites first, then add sugar after soft peaks begin forming.
Food Safety Notes (Because It’s 2026 and We’re Responsible Adults)
Many cooks aim for egg mixtures to reach about 160°F for safety. If you’re concerned about
undercooked egg whites on a pie, Swiss meringue (heated while whisking) or Italian meringue (hot syrup method)
can be reassuring. You can also use pasteurized egg whites for extra peace of mind.
Flavor and Style Ideas (Beyond “Vanilla Cloud”)
- Citrus pop: add a little lemon or orange zest after whipping (gentle fold).
- Salted marshmallow vibe: a pinch more salt and a deeper toast on the peaks.
- Sky-high look: pipe rosettes or dollops; Italian meringue holds detail best.
- Soft vs crisp: bake longer at lower heat for a drier top, or torch for soft interiors.
Storage: The Truth Your Fridge Doesn’t Want You to Know
Meringue and moisture have a complicated relationship. Refrigerators are humid, and humidity encourages weeping.
If you can, serve meringue-topped pies the same day. If you must refrigerate, chill uncovered briefly to set,
then loosely tent (don’t press wrap onto the meringue), and plan to enjoy within about a day for best texture.
Real-Kitchen Experiences: The Extra That Make You Better at Meringue
Here’s the part nobody tells you in the recipe card: learning how to make meringue for pie is less like
“follow steps A through F” and more like “become emotionally fluent in egg foam.” The first time you whip
egg whites, you’ll probably stare into the bowl like it’s a magic trick. It starts as alien goo, turns
bubbly, then suddenly becomes glossy, cloudlike, and oddly optimistic. That moment is addicting.
Then, the meringue will humble you. Maybe it won’t whip at all. Nine times out of ten, it’s because of fat.
A speck of yolk. A whisper of butter on the whisk. A plastic bowl that looked clean but secretly wasn’t.
Bakers learn quickly to treat “clean and dry” like a sacred spell. Wiping the bowl with lemon juice feels
dramatic the first time. By the fifth time, it feels normallike putting on a seatbelt.
Another common experience: the sugar dilemma. You’ll add it and think, “Cool, sweet foam.” Then you taste a
tiny bit and it crunches like beach sand. That’s undissolved sugar, and it’s a major reason meringue weeps
later. The fix is almost boring: whip longer, use superfine sugar, or switch to a heated method (Swiss).
But in the moment, it feels like your meringue is personally rejecting your hospitality.
Pies add their own drama. The first time you spread meringue on a pie with cool filling, you may end up with
a mysterious puddle between layers. You’ll swear you did everything right. The pie will disagree. The “hot
filling” rule sounds small, but it’s huge. Think of it as giving the meringue a warm handshake so it can
settle in and behave. When you spoon meringue onto hot filling and seal it to the crust, you can almost feel
the pie exhale.
Humidity is the stealth villain that shows up uninvited. On a rainy day, even perfect meringue can soften,
weep, or look less crisp. This is not you failing; this is physics. The best “experience-based” solution is
planning: make meringue pies when the air is drier if you can, and serve sooner rather than later. When you
can’t control the weather, choose a more stable meringue (Swiss or Italian) and accept that the pie is still
going to taste fantastic even if it’s slightly less photogenic.
Finally, the confidence moment: you’ll learn to read peaks. Soft peaks are floppylike a puppy ear. Stiff
peaks stand tall and keep their shape. Overwhipped peaks look dry, curdled, or clumpy, like the foam got
tired and quit. Once you’ve seen each stage in real life, recipes stop being mysterious and start being
flexible. That’s when meringue becomes fun: you’re not just making toppingyou’re styling dessert hair.
And yes, you are allowed to feel proud when the knife cuts cleanly through a toasted swirl without the whole
cap sliding off like a hat in the wind.
Conclusion
If you remember three things, make them these: keep everything grease-free, dissolve your sugar, and spread
your meringue over hot filling while sealing to the crust. Choose French for classic simplicity, Swiss for
smooth stability, or Italian for maximum drama (the good kind). Do that, and your meringue won’t just sit on
your pieit will perform.


