Table of Contents >> Show >> Hide
- Before We Begin: “Vegetable Oil” Means Two Different Things at Home
- What You’ll Need (Choose Your Adventure)
- Method 1: Cold-Pressing Seed & Nut Oil at Home (Best Quality)
- Method 2: Stovetop “Extraction” for Small Batches (Not Truly Refined, Still Tasty)
- Method 3: Infused Oils (Flavor Rockets) + Food Safety Rules You Should Actually Follow
- Recipes: Make Vegetable Oil at Home (Pressed + Infused)
- Recipe 1: Fresh-Pressed Sunflower Seed Oil (Home Press)
- Recipe 2: Pumpkin Seed Oil (Deep, Toasty Finisher)
- Recipe 3: Quick “Toasted Sesame Oil” (Sesame-Infused Finishing Oil)
- Recipe 4: Safe Garlic-Herb Oil (Short-Term Fridge Version)
- Recipe 5: Chili Crisp-Style Infused Oil (Shelf-Friendly Flavor, If You Keep Water Out)
- Storage, Shelf Life, and How to Tell if Oil Has Gone Rogue
- Troubleshooting: When Your Oil Dreams Get Weird
- Conclusion: Homemade Oil, But Make It Smart
- Real-World Experiences & Lessons (The Extra People Don’t Put on the Label)
If you’ve ever stared at a grocery-store bottle of “vegetable oil” and thought, “What even are you?”welcome. Making vegetable oil at home can be surprisingly doable, surprisingly messy, and surprisingly satisfying. It’s also a great way to level up your cooking with fresher flavor, better aroma, and the smug joy of saying, “Oh this? I pressed it myself.”
This guide covers the practical ways real people make oil at home (and the ways the internet pretends you can), plus recipes for pressed oils and quick infused oils. You’ll learn what equipment helps, how to avoid rookie mistakes, how to store homemade oil so it doesn’t turn into “crayon-scented regret,” and how to keep flavored oils food-safe.
Before We Begin: “Vegetable Oil” Means Two Different Things at Home
1) True extracted oil (pressed from seeds/nuts)
This is the real deal: oil separated from seeds or nuts using pressure (usually a screw press). The result is typically unrefined, flavorful, and more perishable than store-bought refined oil. It’s perfect for dressings, finishing, gentle sautéing, and any time you want flavornot just lubrication.
2) Infused oil (flavor added to an existing oil)
This is where you take a safe, store-bought base oil and infuse it with herbs, chili, citrus peel, etc. It’s deliciousbut certain ingredients (hello, garlic and fresh herbs) require strict storage rules. More on that soon, because botulism is not the “spicy surprise” anyone wants.
What You’ll Need (Choose Your Adventure)
For pressing true vegetable oil
- Seeds or nuts: sunflower, pumpkin seeds, sesame, peanuts, etc.
- Oil press: manual or electric screw press (the most practical option for real extraction).
- Cleaning tools: colander, towel, and a way to remove grit/stones.
- Drying setup: dehydrator, low oven, or time + airflow (dry seed presses better).
- Collection jars (wide-mouth helps) and fine filter (cheesecloth or coffee filters).
- Dark bottles for storage (light is oil’s sworn enemy).
For infused oils
- Base oil: olive oil, canola, grapeseed, avocado oilwhatever fits your flavor goal.
- Flavor ingredients: dried herbs, dried chili, citrus zest; fresh garlic/herbs only with safety rules.
- Clean glass jar, strainer, and labels (date your creations like a responsible wizard).
Method 1: Cold-Pressing Seed & Nut Oil at Home (Best Quality)
Cold-pressing at home usually means using a screw press that extracts oil by force, not chemical solvents. You won’t create a perfectly neutral, supermarket-style refined oilbecause that neutral flavor often comes from industrial refining. Instead, you’ll get a fragrant, “alive” oil with personality.
Step 1: Pick the right seed (and set realistic expectations)
- Sunflower seed oil: mild, versatile, great starter oil.
- Pumpkin seed oil: nutty, deep flavor; best as a finishing oil (salads, soups).
- Sesame oil: intense aroma; pressing yields true sesame oil, while quick DIY often creates a sesame-infused oil.
- Peanut oil: can be high-yield, but it’s work; also watch for allergies in your kitchen.
Step 2: Clean and dry your seeds (this is where good oil begins)
Any grit, stems, or mystery debris can damage your press and make the oil taste like “field.” Clean thoroughly. Then dry your seeds wellpressing works best when seeds are dry, not damp. If seeds are too moist, presses can clog and yields drop; if too dry, the press can run hotter and yield can suffer.
Home pressers often aim for “dry enough to store well and press smoothly.” If you’re using garden-harvested seeds, take drying seriously: spread in a thin layer, keep airflow moving, and be patient. The goal is seeds that feel crisp, not spongy.
Step 3: Warm (optional), then press
Some presses allow a little heat from friction; many people also gently warm seeds to improve flow. If you’re chasing “cold-pressed” style, keep temperatures modest and avoid scorching. Follow your press manual, feed steadily, and don’t rushthis is not a margarita blender.
Step 4: Let the oil settle (your patience makes it prettier)
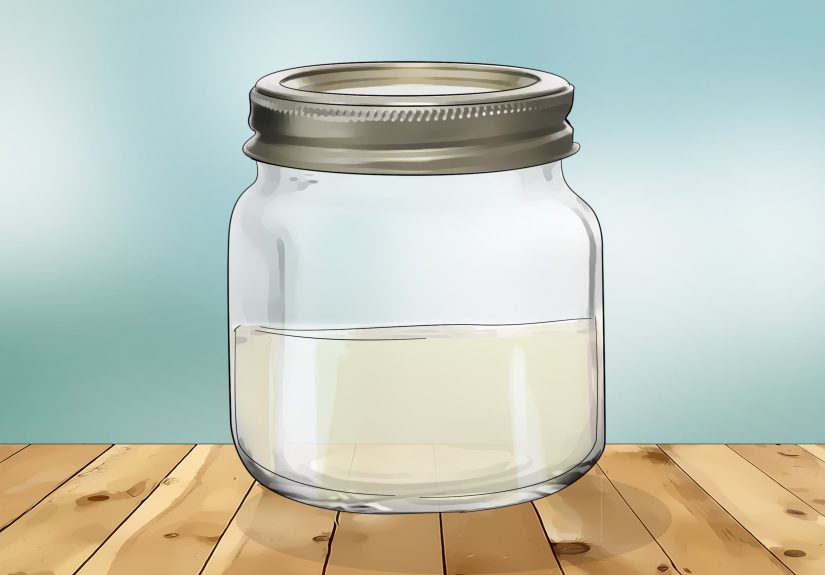
Fresh-pressed oil usually contains fine particles. Let it sit in a jar so sediment settles to the bottom. Then decant (pour off) the clearer oil on top. If you want it extra clean, filter it after settling. The cleaner the oil, the less likely it is to scorch when heated.
Step 5: Bottle and store smart
Unrefined oils are sensitive to light, heat, and oxygen. Use clean, dry containers. Store in dark bottles in a cool placerefrigeration can extend life for delicate oils, especially nut and sesame oils.
Method 2: Stovetop “Extraction” for Small Batches (Not Truly Refined, Still Tasty)
Without a press, you can still coax oil-ish goodness from oily foodsbut it’s more like a thick, flavorful culinary oil than a clear, neutral bottle of “vegetable oil.” Think: rustic, small-batch, and best used quickly.
Basic stovetop approach (works best with peanuts/sesame/coconut flakes)
- Grind nuts/seeds into a paste (food processor).
- Gently heat the paste over low heat, stirring constantly.
- Watch for separation as oil begins to release.
- Press/strain through cheesecloth while warm (carefulhot oil is not a personality trait).
- Settle and use fast; shelf life is shorter than pressed oils.
This method is labor-heavy, yields vary wildly, and filtration is tricky. But for small culinary amountslike peanut oil for a sauce or a batch of toasted sesame finishing oilit can be worth it.
Method 3: Infused Oils (Flavor Rockets) + Food Safety Rules You Should Actually Follow
Infused oils are the easiest way to get gourmet results at home. They’re also the easiest way to create a food-safety problem if you use fresh garlic or fresh herbs and store it wrong.
Safety first: the “fresh garlic/herb in oil” problem
Fresh garlic, herbs, and vegetables are low-acid and can carry spores that love oxygen-free environmentslike oil. That’s why many food safety organizations recommend making garlic- or herb-in-oil mixtures fresh, refrigerating them, and using them quickly. If you want longer storage, freezing is the safer path for most home kitchens.
Three safer infused-oil strategies
- Use dried ingredients: dried chili, dried herbs, dried garlic (still refrigerate if guidelines recommend).
- Refrigerate and date-label: treat it like a short-term condiment, not a pantry item.
- Freeze in small portions: ice cube trays work great; pop out a cube when needed.
Yes, commercial garlic-in-oil can sit on a shelfbecause it’s often acidified or formulated with inhibitors. Your homemade jar does not come with a tiny food-science team and a legal department.
Recipes: Make Vegetable Oil at Home (Pressed + Infused)
Recipe 1: Fresh-Pressed Sunflower Seed Oil (Home Press)
Flavor profile: mild, clean, slightly nutty. Best uses: dressings, mayo, sautéing at moderate heat.
Ingredients
- 3–6 cups hulled sunflower seeds (dry, clean)
Steps
- Inspect and clean seeds thoroughly; remove any stones or debris.
- Dry seeds until they feel crisp (especially if home-harvested).
- Run seeds through your oil press in steady batches.
- Collect oil in a clean jar and let it settle 12–48 hours.
- Decant the clear oil; filter if desired.
- Bottle in a dark container and store cool. Refrigerate for longest freshness.
Bonus: The leftover “meal” can be used in baking (think: hearty crackers) if it tastes fresh and isn’t scorched.
Recipe 2: Pumpkin Seed Oil (Deep, Toasty Finisher)
Flavor profile: bold, nutty, earthy. Best uses: salads, soups, drizzlesavoid high heat.
Ingredients
- 3–6 cups pumpkin seeds (pepitas), dry and clean
Steps
- Lightly toast seeds if you want deeper flavor (keep it gentleburnt seeds = burnt oil).
- Cool completely before pressing (steam + oil = cloudy sadness).
- Press, then let oil settle.
- Decant, bottle, and store cool; refrigeration helps preserve flavor.
Serving idea: Drizzle on roasted squash soup with a pinch of flaky salt. Your bowl will feel like it has a small trust fund.
Recipe 3: Quick “Toasted Sesame Oil” (Sesame-Infused Finishing Oil)
This is a practical kitchen hack: it tastes wonderfully sesame-forward, but it’s technically a sesame infusion, not pure pressed sesame oil. Perfect for noodles, dressings, and marinades.
Ingredients
- 1/4 cup sesame seeds
- 1 cup neutral oil (grapeseed, avocado, or canola)
- Optional: pinch of salt
Steps
- Toast sesame seeds in a dry skillet over medium heat until golden and fragrant; cool.
- Blend seeds with oil until the oil looks cloudy and aromatic.
- Strain through cheesecloth or a fine strainer.
- Store tightly sealed in a cool, dark place; refrigeration extends freshness if you use it slowly.
Recipe 4: Safe Garlic-Herb Oil (Short-Term Fridge Version)
This is where we do it the safe way: make a small amount, refrigerate promptly, label the date, and use quickly. If you want to keep it longer, freeze it.
Ingredients
- 1 cup olive oil (or your preferred base oil)
- 2–4 garlic cloves, peeled (or a small handful of fresh herbs)
- Optional: lemon zest (zest only; avoid adding juice unless following a tested acidification method)
Steps
- Wash hands, sanitize your jar, and keep everything clean and dry.
- Combine oil + garlic/herbs in a clean jar.
- Refrigerate immediately.
- Label with the prep date and use within a few days; discard leftovers if you won’t finish in time.
- For longer storage: freeze in small jars or ice cube trays, then transfer to airtight containers.
Recipe 5: Chili Crisp-Style Infused Oil (Shelf-Friendly Flavor, If You Keep Water Out)
Key rule: use dried chili and dry spices; avoid fresh ingredients that add water.
Ingredients
- 1 cup neutral oil
- 2–3 tbsp dried chili flakes
- 1 tsp toasted sesame seeds (optional)
- 1 tsp Sichuan peppercorns (optional)
- 1–2 cloves dried garlic slices (optional)
Steps
- Warm oil gently until it shimmers (not smoking).
- Pour over dried chili and spices in a heatproof bowl; stir.
- Cool completely, then transfer to a clean jar.
- Store cool and dark; if anything seems off (odor, fizzing, mold), toss it.
Storage, Shelf Life, and How to Tell if Oil Has Gone Rogue
Best storage rules (simple, not dramatic)
- Cool + dark: pantry away from the stove beats “next to the oven like a dare.”
- Limit oxygen: cap tightly; consider smaller bottles so there’s less air inside.
- Refrigerate delicate oils: nut oils and sesame oil often keep better cold.
- Use your senses: if it smells like crayons, old nuts, putty, or stale peanutsdon’t cook with it.
Why homemade oil may spoil faster
Store-bought vegetable oil is often refined and filtered for stability. Homemade pressed oil contains more natural compounds and tiny particles that can speed oxidation. Translation: it’s fresherand it demands slightly better care.
Troubleshooting: When Your Oil Dreams Get Weird
“My press is clogging.”
- Seeds may be too moist or not cleaned well.
- Try smaller batches and re-check dryness.
- Clean press parts per manufacturer guidance.
“My oil is cloudy.”
- Normal at firstlet it settle longer.
- Filter after settling for clearer oil.
- If you added fresh ingredients (infusion), cloudiness can be a warning signfollow safety rules.
“It tastes bitter.”
- Seeds may be old, rancid, or overheated.
- Try a gentler process and fresher seeds.
Conclusion: Homemade Oil, But Make It Smart
Making vegetable oil at home is equal parts craft and common sense. If you want true extracted oil, a home press is the most reliable path: clean, dry seeds; press steadily; settle; bottle dark; store cool. If you want big flavor fast, infused oils are a shortcutjust respect food-safety rules, especially with garlic and fresh herbs.
Do it right and you’ll end up with oil that tastes brighter than most store bottlesand a kitchen that smells like victory. (Victory, plus maybe toasted seeds. Which is honestly a better candle than anything sold in a boutique.)
Real-World Experiences & Lessons (The Extra People Don’t Put on the Label)
In real kitchens, making oil at home is rarely the serene, sun-dappled moment you see in lifestyle photos. It’s more like: “Why is the jar sweating?” and “Who approved these seeds to escape the bowl?” and “Is that… sesame in my sock?” The good news is that most of the chaos is predictable, and once you know the common pitfalls, the whole process becomes easierand funnier.
First-timers are often shocked by how much seed volume it takes to make a modest amount of oil. Pressing isn’t magic; it’s math. Seeds contain oil, but not 100% oil, and presses aren’t 100% efficient. That means your first bottle might feel like it cost twelve dollars in seeds and three hours of your life. The secret is to treat your early batches like “learning oil,” not “I will replace Costco.” Press small, press fresh, and get comfortable with the idea that homemade oil is a premium ingredientbecause it is.
Another common experience: the aroma is intense. When you press pumpkin seeds, your kitchen can smell like roasted nuts for hours. Press sesame and it’s basically instant “ramen shop energy.” This is delightfuluntil you realize oil carries aroma like a rideshare driver with strong opinions. If you store fragrant oils near delicate foods, everything in that cabinet may start smelling like it wants to be a salad. Many home cooks solve this by using airtight bottles and keeping strong oils in the fridge. Yes, the oil might cloud up; no, it’s not broken; it’s just cold and dramatic.
Settling and filtering is where people learn patience the hard way. The temptation is to pour the oil straight into a pretty bottle and call it done. But letting oil sit and clarify is like letting soup rest: it improves the final result. The oil looks clearer, cooks more evenly, and tends to taste cleaner. The “aha” moment for a lot of folks is realizing that sediment isn’t evilit’s just something you need to manage. If you’re planning to use the oil mostly for dressings, a little cloudiness might not matter. If you want to sauté, cleaner is kinder.
Then there’s infused oil reality. Many people try garlic oil once and think, “Wow, I’m basically a restaurant.” The second thought should be: “Cool, now I’m basically a food-safety manager.” The practical habit that experienced home cooks adopt is simple: make small jars, refrigerate immediately, label with a date, and freeze portions if you won’t use them fast. It’s not fearit’s just respect for how food behaves. Ironically, the more you treat infused oils like short-term luxury condiments, the more relaxed you’ll feel making them.
The best “experienced” takeaway? Homemade oil is a flavor tool, not a replacement for every bottle in your pantry. Keep a stable, neutral store oil for high-heat and daily cooking, then use your pressed or infused oils where they shine: finishing, dressings, dips, marinades, and those moments when you want dinner to taste like you tried harder than you did. And if a batch doesn’t turn out perfect, congratulationsyou’re officially doing it like a real cook.