Table of Contents >> Show >> Hide
- Why Motorcycle Painting Is Different From Painting Almost Anything Else
- What You Need Before You Start
- Step 1: Decide What Kind of Finish You Want
- Step 2: Remove the Parts and Label Everything
- Step 3: Clean Like You Mean It
- Step 4: Strip Old Paint or Sand It Down
- Step 5: Repair Dents, Chips, and Imperfections
- Step 6: Prime the Surface
- Step 7: Mask Carefully
- Step 8: Spray the Base Coat
- Step 9: Apply Clear Coat
- Step 10: Let It Cure
- Step 11: Wet Sand and Polish if Needed
- Step 12: Reassemble the Motorcycle Carefully
- Common Questions About Painting a Motorcycle
- Final Thoughts
- Real-World Experience and Lessons From Painting a Motorcycle
If your motorcycle’s paint looks tired, chipped, faded, or just plain tragic, a fresh paint job can make it feel brand-new again. And no, you do not need to be born with a spray gun in one hand and a custom pinstripe brush in the other. You do need patience, decent prep habits, and the ability to resist the classic DIY urge to say, “Eh, that’s probably smooth enough.” Because in motorcycle painting, prep is everything. Paint is just the glamorous final act.
This guide walks you through how to paint a motorcycle from start to finish, whether you are repainting a tank and fenders, freshening side covers, or giving your whole bike a new personality. We’ll cover stripping, sanding, priming, painting, clear coating, curing, and polishing, plus the real-world mistakes that turn a dream finish into an expensive lesson. If you want a smooth, durable, pro-looking result, this is the roadmap.
Why Motorcycle Painting Is Different From Painting Almost Anything Else
Painting a motorcycle is not the same as painting patio furniture, a lawn chair, or your buddy’s suspiciously rusty toolbox. Motorcycle parts are smaller, more curved, more visible, and often exposed to heat, vibration, road debris, fuel spills, and weather. A gas tank especially has no mercy. If your prep is sloppy, your paint will remind you every single time you walk into the garage.
The good news is that motorcycle parts are also manageable. You can remove them, work at a comfortable height, and focus on one piece at a time. That means a careful DIYer can absolutely get great results with the right materials, realistic expectations, and enough discipline not to rush the drying stages.
What You Need Before You Start
Basic tools and supplies
Before you paint, gather everything first. Nothing kills momentum like hunting for masking tape while your primer is drying and your gloves are glued to your soul.
- Socket set and screwdrivers for removing painted parts
- Degreaser or wax-and-grease remover
- Sandpaper in multiple grits, such as 180, 220, 320, 400, 600, 800, 1000, 1500, and 2000
- Scuff pads
- Body filler or glazing putty for dents and pinholes
- Primer, base coat, and clear coat from the same paint system if possible
- Masking tape, masking paper, and plastic sheeting
- Tack cloths and lint-free towels
- Spray gun and compressor or high-quality 2K aerosol products
- Polishing compound and finishing polish
- Buffing pads or microfiber applicators
Safety gear
This part is not optional. Automotive paints and clears can contain hazardous chemicals, including isocyanates in some products. That means your “I’ll just hold my breath” strategy is not a strategy. Use proper respiratory protection, gloves, eye protection, and good ventilation. A proper spray booth setup is ideal, but at minimum you need a well-ventilated, controlled workspace with as little dust as possible. Painting beautifully while poisoning yourself is not a win.
Step 1: Decide What Kind of Finish You Want
Before sanding anything, choose the end result. Are you going for factory-style gloss black, vintage metallic, matte military green, candy red, or a custom design that says, “I own masking tape and confidence”? Your finish determines your materials, your prep level, and how much suffering you are volunteering for.
Solid colors are the easiest for beginners. Metallics and pearls can look incredible, but they are less forgiving because uneven passes can create blotchy color or striping. Matte and satin finishes hide some imperfections, but they also cannot be polished the same way gloss finishes can. If this is your first full motorcycle paint project, a solid gloss color is the smartest place to start.
Step 2: Remove the Parts and Label Everything
Take the tank, fenders, side covers, and other painted pieces off the bike whenever possible. Painting on the motorcycle may sound faster, but it usually creates more masking, more overspray risk, and more opportunities to paint things that definitely were not supposed to become body color.
As you remove parts, label hardware in small bags. Take photos. Future-you will be grateful when it is time to reassemble the bike and you are staring at three identical bolts like they are suspects in a crime drama.
Step 3: Clean Like You Mean It
Paint hates contamination. Wax, silicone, road grime, chain fling, fuel residue, hand oils, and old polish can all ruin adhesion. Wash parts first, then use a dedicated wax-and-grease remover. Clean before sanding, and clean again after sanding. This is not overkill. This is how you avoid fisheyes, peeling, and mystery defects that magically appear right after you thought, “Looks perfect.”
If you are painting a fuel tank, make sure it is drained and safe to handle. Also pay extra attention around the filler neck and petcock area, because fuel and fumes love to cause trouble there.
Step 4: Strip Old Paint or Sand It Down
Now comes the crossroads: strip to bare metal or paint over sound existing finish. If the old paint is cracked, peeling, bubbling, heavily chipped, or hiding bad bodywork, strip it. Starting over is often faster than trying to rescue a disaster. If the original coating is stable and smooth, you can scuff and build over it.
When to strip to bare metal
- The old paint is failing
- There is rust under the coating
- You need to repair dents properly
- There are too many old layers built up
- You want the best possible finish from scratch
When you can sand and repaint
- The surface is structurally sound
- There are only minor chips or scratches
- You are doing a color change without major damage repair
- You want to save time and reduce the chance of overworking the panel
Use coarser grits to remove material and finer grits to refine scratches. Feather damaged edges so there is no visible ridge. If you leave ugly transitions, the primer and paint will not magically become your therapist and solve them.
Step 5: Repair Dents, Chips, and Imperfections
If the tank or fenders have dings, now is the time to fix them. Use body filler sparingly and shape it carefully. The goal is not to bury a crater under a pound of filler and positive thinking. Apply thin layers, let them cure, and sand them into the surrounding surface.
For tiny pinholes or shallow flaws, glazing putty works better than heavy filler. Run your hand over the part with your eyes closed. Your fingers will detect flaws your eyes miss. They are annoyingly talented like that.
Step 6: Prime the Surface
Primer is the bridge between your surface and your color coat. On bare metal, many painters use an epoxy or self-etching primer for adhesion and corrosion resistance. If you need to smooth out repairs, a primer surfacer or high-build primer helps fill minor imperfections so you can block sand the panel flat.
Spray light to medium coats according to the product instructions. Do not hammer on one soaking-wet coat and hope for the best. That is how you get runs, slow drying, and regret. Let each coat flash properly before the next one.
Primer tips that matter
- Use products from the same system whenever possible
- Apply multiple thin coats instead of one heavy coat
- Use guide coat before sanding primer flat
- Block sand to reveal low spots and surface waves
- Stop and fix flaws now, because paint will highlight them later
After the primer cures, sand it smooth. Many painters refine primer with medium and then finer grits before base coat. You want a uniform, smooth surface with no shiny low spots, no deep sanding scratches, and no dust nibs.
Step 7: Mask Carefully
Mask threads, mounting holes, fuel openings, rubber areas, badges, and any surface that should not receive paint. Clean edges make a huge difference in the final look. Sloppy masking leaves ragged lines that scream “weekend project” in the least flattering way.
If you are doing two-tone or graphics, spend extra time measuring and laying tape symmetrically. A tank stripe that drifts slightly off-center will bother you forever. You may think you can live with it. You cannot.
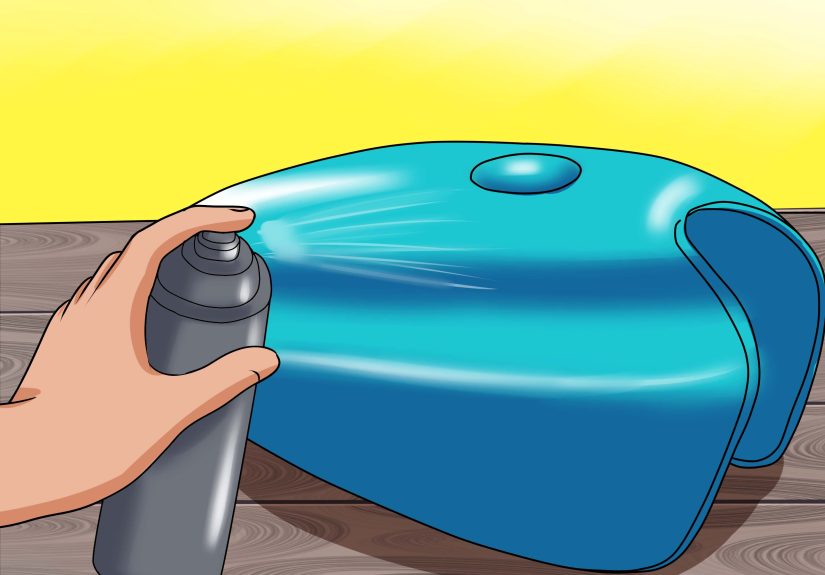
Step 8: Spray the Base Coat
This is the fun part. Also the stressful part. Also the part where the project starts to look real.
Spray your base coat in even, controlled passes. Keep the gun or can moving. Overlap each pass consistently. Stay the same distance from the surface and follow the product’s flash times between coats. Coverage usually builds over two to four coats depending on color and product.
Do not chase perfection in one pass. If a section looks slightly light, let it flash and hit it on the next coat. Trying to flood the surface will usually create striping, mottling, or runs. Metallic colors especially reward calm, consistent technique and punish panic.
Base-coat mistakes to avoid
- Spraying too close and causing sags
- Spraying too far away and creating dry spray
- Moving too slowly and overloading edges
- Ignoring flash times
- Painting in a dusty, windy, or humid space
Step 9: Apply Clear Coat
Once the base coat has flashed correctly, apply your clear. This is what gives the finish depth, gloss, and protection. On a motorcycle, clear coat matters a lot because the paint is exposed to UV, weather, road grit, and the occasional fuel splash from that one gas pump that always acts like it was designed by chaos.
Spray medium-wet coats with proper flash time between them. Usually two to three coats are common for a durable finish, but always follow the product sheet. Too dry and the finish may look textured. Too wet and you get runs. The sweet spot is glossy and even without trying to pour a lake onto the part.
If you are painting a gas tank, pay extra attention to edges near the filler area and avoid creating weak paint transitions where fuel can creep under the finish. Fuel exposure is one of the fastest ways to humble a paint job.
Step 10: Let It Cure
This is where many DIY painters sabotage themselves. The parts look dry, so they touch them. Then they move them. Then they set them on a towel that leaves texture in the clear. Then they say words not fit for a family blog.
Let the paint cure fully before sanding, polishing, or reinstalling. Dry to the touch is not the same as cured. Follow the product’s recoat, handling, and cure windows. Temperature and humidity matter. Colder conditions usually mean slower curing, and dusty environments increase the odds of a little airborne nonsense landing in your perfect clear coat.
Step 11: Wet Sand and Polish if Needed
If your clear coat came out beautifully, congratulations. You may be able to leave it alone. If you have orange peel, dust nibs, or slight texture, you can level and polish the finish after full cure.
Start with fine grit wet sanding, often in the 1500 to 2000 range, then refine further if needed. Sand carefully and evenly. You are flattening texture, not trying to break through the clear and invent new problems. Once the surface is level, compound and polish it to restore gloss.
Use light pressure, check your work often, and be especially gentle on edges and body lines. That is where clear disappears fastest. If you burn through the clear, the panel will not forgive you. It will simply demand repainting.
Step 12: Reassemble the Motorcycle Carefully
Reinstall parts only after the finish has hardened enough to handle. Use clean hands, soft towels, and patience. Do not drag bolts, tools, belt buckles, keys, or your own overconfidence across the new paint. Fresh finishes are tougher than they look in some ways, and much softer than they look in others.
Once reassembled, step back and admire the transformation. Even a relatively simple repaint can completely change how a motorcycle feels. A crisp, clean tank and matching bodywork make the whole machine look more intentional, more cared for, and much more expensive than it probably was.
Common Questions About Painting a Motorcycle
Can you paint a motorcycle with spray cans?
Yes. High-quality aerosol products can produce very respectable results, especially on smaller parts, frames, side covers, and simple color jobs. A spray gun usually offers more control and consistency, but 2K aerosols can absolutely work for DIY projects done with care.
Do you need to remove all old paint?
No. You only need to remove failing paint. Sound paint can often be scuffed, feathered, and painted over. If the old surface is unstable, strip it.
How long does it take?
The actual spraying may only take a few hours spread over stages. The full job, including disassembly, prep, primer, drying, curing, sanding, polishing, and reassembly, usually takes several days or more. Great paint jobs are built in the waiting, not just the spraying.
What is the biggest mistake beginners make?
Rushing the prep. The second biggest mistake is rushing the drying. The third biggest mistake is deciding the instructions are merely “suggestions.” They are not.
Final Thoughts
Learning how to paint a motorcycle from start to finish is part craftsmanship, part chemistry, and part self-control. The actual paint is only one phase of the job. The real magic comes from thorough cleaning, smart sanding, proper primer work, careful masking, steady spray technique, and enough patience to let everything cure before you start touching it like an excited raccoon.
If you take your time and respect the process, a DIY motorcycle paint job can look fantastic and hold up well. Start simple, use a complete paint system, protect yourself properly, and remember this golden rule: the motorcycle will only look as smooth as the surface underneath. Paint can add color, gloss, and attitude, but it cannot hide bad prep forever. Bad prep always returns, usually at the worst possible moment.
Real-World Experience and Lessons From Painting a Motorcycle
The biggest lesson most people learn from painting a motorcycle is that the project changes personality halfway through. At first, it feels exciting. You imagine the finished bike glowing in the sunlight while strangers nod in approval and ask what custom shop did the work. Then you begin sanding. And sanding. And sanding some more. At that point, the project stops being a fantasy and becomes a relationship. You find out whether you are patient, whether your workspace is actually clean, and whether you really believe “close enough” is a dangerous phrase.
One of the most common experiences is discovering that the original paint hides more problems than expected. A tank that looked pretty decent from six feet away suddenly reveals chips, old repairs, shallow dents, or a weird ridge from a long-forgotten incident with a gas pump, a wrench, or gravity. That moment is frustrating, but it is also where a better result begins. People who accept the extra repair time usually end up happiest with the final finish. People who say, “I’ll just spray over that,” often meet that flaw again later, only shinier.
Another real-world truth is that paint teaches humility. Your first coat of primer will show scratches you swore were gone. Your first color coat will reveal a fingerprint that somehow survived cleaning, sanding, wiping, and your personal insult campaign against contamination. Dust will appear from nowhere. A bug may attempt to become part of the clear coat. At least one painter in every garage has stared at a drying tank and whispered, “Please don’t run, please don’t run,” as if the paint can hear prayer and negotiate.
Experience also teaches that environmental control matters more than enthusiasm. A clean, calm, well-lit workspace beats raw excitement every time. Good lighting helps you see coverage and flaws early. Stable temperature helps the material behave predictably. Reduced dust means less polishing later. Even simple details, like hanging parts at the right height or placing them on stable stands, make the job smoother and reduce the odds of accidental damage.
Many DIY painters also discover that simpler color choices often produce more satisfying results. A deep black, classic white, rich red, or vintage silver can look stunning on a motorcycle when the prep is excellent. Fancy graphics, pearls, candies, and metallic blends are beautiful, but they magnify every inconsistency in technique. There is no shame in choosing a simple finish and executing it well. In fact, that is often what makes a bike look sharp instead of overcomplicated.
Finally, the most rewarding part of painting a motorcycle is not just the visual transformation. It is the sense that you changed the machine with your own hands. Every time you wash it, fuel it, or park it in the sun, you notice details other people never will. You know where the bodywork was rough, where the filler was shaped, where the tape lines had to be corrected, and where your confidence almost outran your skill. That connection makes the motorcycle feel more personal. Even if the result is not concours-perfect, it often means more because it came from effort, mistakes, learning, and persistence. And honestly, that is very motorcycle in spirit.


