Table of Contents >> Show >> Hide
- Plan First: The Stripe Decisions That Make or Break the Look
- Supplies You’ll Want (So You Don’t Improvise With a Butter Knife)
- Step-by-Step: How to Paint Crisp Stripes on Curtains
- 1) Pre-wash, dry, and iron (yes, really)
- 2) Set up your work surface like a calm, responsible adult
- 3) Mark your stripe layout
- 4) Tape the stripes (the “crisp line” moment)
- 5) Choose your paint approach: fabric paint vs acrylic + textile medium
- 6) (Optional but awesome) Seal the tape edge to prevent bleeding
- 7) Paint the stripes in thin, controlled coats
- 8) Peel the tape at the right time
- 9) Let it dry, then heat-set for durability
- Three Stripe Designs That Look High-End (Without High-End Behavior)
- Troubleshooting: Fixing Stripes That Misbehave
- How to Wash and Care for Painted Striped Curtains
- Smart Alternatives If You Don’t Want to Commit to Paint
- Experiences: What It’s Like to Paint Stripes on Curtains (The Real-World Version)
- Conclusion: Crisp Stripes, Custom Curtains, Zero Retail Markup
Store-bought striped curtains are gorgeousright up until you see the price tag and briefly consider learning to weave your own fabric like it’s 1840. The good news: you can paint stripes on curtains at home and end up with crisp, custom panels that look intentionally “designer,” not “I fought a roll of tape and the tape won.”
This guide walks you through the whole processfrom planning stripe spacing to heat-setting the paint so it survives real life (sunlight, washing, and that one friend who always touches everything). Whether you want subtle ticking stripes or bold cabana bands, you’ll get clean lines, flexible fabric, and a finish that doesn’t crack the first time you swish the curtains dramatically like you’re in a movie.
Plan First: The Stripe Decisions That Make or Break the Look
Pick your stripe style (and be honest about your patience)
- Ticking stripes: Skinny, classic, and forgiving. Great for beginners.
- Cabana stripes: Bold and graphic. Higher drama, higher measuring accuracy required.
- Horizontal stripes: Modern and playful, but measuring across wide panels takes care.
- Color-block bands: Fewer stripes, less taping, still a big impact.
Measure for stripes that look intentional (not accidental)
The easiest way to make DIY striped curtains look “professionally planned” is consistent spacing. Decide:
- Stripe width (e.g., 1″, 2″, 6″, 10″)
- Gap width between stripes
- Edge margins (do you want a stripe to start right at the edge, or a border?)
A simple rule: if you’re doing bold stripes, keep the pattern repeat simple (same stripe width + same gap width). If you’re doing thin stripes, you can get away with slightly more variationyour eye reads it as “texture.”
Check your curtain fabric (because fabric has opinions)
Painting stripes works best on curtains with a fairly smooth weavecotton canvas, cotton-linen blends, linen, or sturdier drapery fabrics. Very slick polyester can be trickier (paint may sit on top and feel stiff), and loosely woven fabrics can encourage bleeding under the tape.
If your curtains are blackout-lined, you’re actually in luck: thicker panels often paint more cleanly because they don’t shift as easily while you work. Just be sure you’re painting the side you’ll actually see.
Supplies You’ll Want (So You Don’t Improvise With a Butter Knife)
- Curtain panels (washed and fully dry)
- Painter’s tape (quality tape matters for crisp edges)
- Measuring tape and straightedge (yardstick, level, or long ruler)
- Pencil or tailor’s chalk (something removable)
- Fabric paint or acrylic paint + textile/fabric medium
- Foam roller or dense sponge brush (for smooth coverage)
- Small brush (for touch-ups)
- Drop cloth or kraft paper
- Cardboard or plastic sheeting (to prevent bleed-through to the back layer)
- Iron and pressing cloth (for heat-setting)
Step-by-Step: How to Paint Crisp Stripes on Curtains
1) Pre-wash, dry, and iron (yes, really)
New curtains often have sizing or finishing chemicals that can interfere with paint adhesion. Wash your panels first (skip fabric softener), dry them completely, then iron them flat. Wrinkles create tiny valleys where paint can puddle and sneak under tapelike a mischievous little liquid.
2) Set up your work surface like a calm, responsible adult
Lay your curtain panel flat on a clean floor or large table. Tape or weight the corners so it doesn’t shift. Slide cardboard or plastic inside the panel (between front and back layers) so paint doesn’t transfer through.
3) Mark your stripe layout
Decide where the first stripe starts. Use a measuring tape to mark points along the top and bottom of the curtain, then connect those points with a long straightedge. Repeat for each stripe edge.
Pro tip: If your curtains have a hem or header that isn’t perfectly square, measure stripes from the same reference edge each time (usually the top edge or a side seam) so everything stays consistent.
4) Tape the stripes (the “crisp line” moment)
Apply painter’s tape along your marked lines. Press it down firmly as you go. Once it’s placed, burnish the tape edgerun a fingernail, old gift card, or plastic scraper along the edge to seal it. This is where sharp stripes are born.
For wide stripes, tape both edges and leave the stripe area exposed. For thin stripes, you may find it easier to tape the stripe itself and paint around it (depending on your design).
5) Choose your paint approach: fabric paint vs acrylic + textile medium
You have two solid options:
- Fabric paint: Designed to stay flexible. Usually the simplest choice.
- Acrylic paint + textile/fabric medium: Great color range and coverage, but you must mix correctly so the paint flexes with the fabric instead of cracking.
If you’re mixing acrylic with a fabric medium, follow the manufacturer’s ratio. Many DIYers use ratios like 1:1 (paint:medium) or 2:1 (paint:medium) depending on the product and the look they want. The goal is a smooth, spreadable paint that soaks into the fabric slightly and dries flexible.
6) (Optional but awesome) Seal the tape edge to prevent bleeding
If you want extra-crisp lines, you can “seal” the tape edge before painting the stripe color:
- Method A (base color seal): Brush a very thin layer of the curtain’s base color (or a clear medium) along the tape edge first. Any seepage matches the base, then your stripe color goes on top.
- Method B (specialty tape): Some tapes are designed to reduce bleed and create sharper lineshelpful on textured or fibrous surfaces.
This step is especially useful on looser weaves, textured curtain fabric, or when you’re using a thinner paint mixture.
7) Paint the stripes in thin, controlled coats
Pour a little paint into a tray. Load your foam roller lightly and roll off excesstoo much paint is the #1 reason stripes bleed under tape. Roll from the tape edge inward rather than pushing paint toward the tape.
Plan on two light coats instead of one thick coat. Let the first coat dry to the touch before the second. If you’re painting dark stripes on light curtains, a third thin coat may be needed.
8) Peel the tape at the right time
For many fabric projects, the cleanest line happens when you remove tape once the paint is mostly dry to the touch but not fully curedthink “set but not rock hard.” Pull slowly at a low angle, keeping the tape close to the fabric.
If you see paint lifting, stop and use a craft knife to gently score along the tape edge before continuing.
9) Let it dry, then heat-set for durability
Dry time depends on humidity and paint thickness. Once fully dry, heat-setting helps the paint hold up to handling and washing. A common method:
- Turn the curtain so you can iron from the back side when possible.
- Use a dry iron (no steam) with a pressing cloth if ironing from the front.
- Move the iron continuously and heat each section thoroughly.
Different paints/mediums recommend different times and temperatures, so follow your product instructions. When in doubt, longer heat-setting at a fabric-safe temperature is better than a quick swipe.
Three Stripe Designs That Look High-End (Without High-End Behavior)
1) Classic ticking stripes (beginner-friendly)
Use 1/2″ to 1″ stripes in a muted color like navy, charcoal, or soft olive. Ticking hides tiny imperfections because the eye reads it as texture. If you’re nervous, start here.
2) Bold cabana stripes (maximum impact)
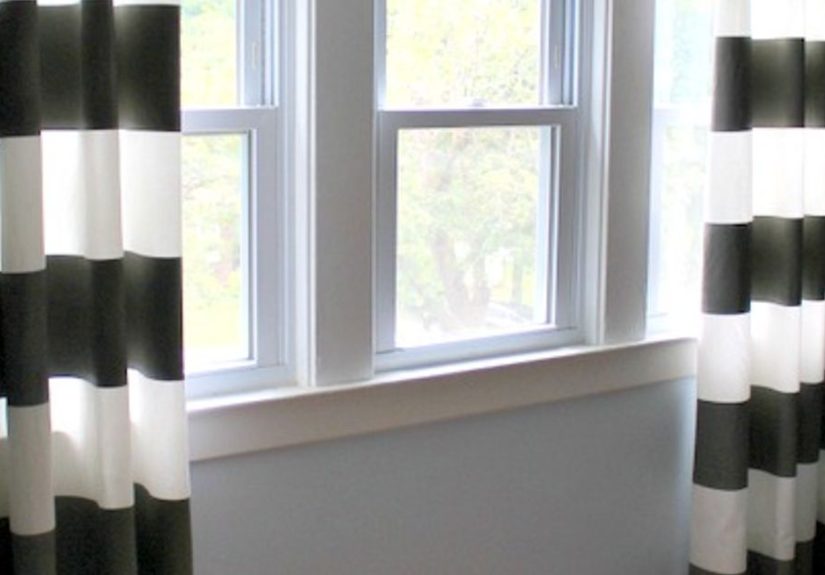
Go for 6″–10″ wide stripes in a high-contrast combo (navy/white, black/white, terracotta/cream). This looks amazing in a dining room, a sunroom, or anywhere you want your windows to say, “Yes, I have a personality.”
3) Border stripes (minimal taping, big polish)
Paint one or two horizontal bands near the bottom hemlike a custom trim effect. It’s faster than covering an entire panel and still looks intentional.
Troubleshooting: Fixing Stripes That Misbehave
Paint bled under the tape
- Next time, burnish tape edges more firmly and use less paint on the roller.
- Seal the tape edge with a thin “base coat” before your stripe color.
- For this curtain: touch up with a small artist brush and a steady hand. Put on music. Pretend you meant to do it.
Lines look wavy or uneven
- Check that your fabric was fully smoothed and taped down before painting.
- Measure from one consistent reference edge to keep spacing uniform.
- In the future, mark more guide points before taping (top, middle, bottom).
The paint feels stiff
- Use thinner coats and avoid overloading the roller.
- Consider switching to fabric paint or adjusting your fabric-medium ratio (per instructions).
- Heavier curtain fabric disguises stiffness better than lightweight sheers.
The paint cracked after drying
- This usually means the paint layer was too thick or not flexible enough.
- Use fabric paint or a textile medium designed for washable fabric projects.
- Heat-set properly and avoid folding the painted areas sharply during early curing.
How to Wash and Care for Painted Striped Curtains
Painted curtains can be durable, but they appreciate gentle treatment. General best practices:
- Wait the recommended cure time before washing (often 72 hours or longer, depending on product).
- Wash on gentle with mild detergent; avoid bleach and harsh stain treatments on painted areas.
- Air dry when possible, or tumble dry low if allowed by your paint instructions.
- Iron from the back side or use a pressing cloth on the front to protect the design.
If your curtains are mostly decorative (not frequently washed), you’re in an even better situation. Occasional vacuuming with a brush attachment and spot-cleaning can keep them fresh longer.
Smart Alternatives If You Don’t Want to Commit to Paint
- Fabric dye: Softer hand feel, but more setup and less “crisp line” control.
- Ribbon or trim: Sew or use fabric glue for stripe-like bands.
- Iron-on hem tape + trim: A no-sew option for border stripes.
- Stenciling: Not stripes exactly, but great if you want pattern without miles of tape.
Experiences: What It’s Like to Paint Stripes on Curtains (The Real-World Version)
The first time most people paint stripes on curtains, there’s a momentright after you place the first long strip of tape when confidence skyrockets. You stand back, squint one eye like a home makeover host, and think: “This is going to be flawless.” Then you start the second line and realize your floor is not level, your curtain hem is not perfectly square, and gravity is not emotionally invested in your design concept.
A very common experience is learning that fabric behaves differently than walls. On a wall, painter’s tape hugs a firm surface. On curtains, you’re taping to fibers that can shift, fluff, and quietly conspire against crisp edges. That’s why the “unsexy steps” become the hero moments: ironing the panel flat, taping it down so it can’t creep, and burnishing tape edges until your fingertips start negotiating for a snack break.
Another shared reality: paint control is everything. People often assume more paint equals faster coverage, but with stripes, too much paint is basically an engraved invitation for bleeding. Many DIYers end up loving thin coatsespecially when using a foam roller because the paint goes on smoother, the fabric stays more flexible, and the edges look sharper. It feels slower at first, but it’s the kind of slow that saves you from spending the evening doing tiny touch-ups with a detail brush and questionable language.
The most dramatic emotional swing usually happens at tape removal. You peel one edge and see a crisp line and think, “I am unstoppable.” Then you find one tiny bleedy spot and think, “I have ruined everything.” The truth is: one or two small touch-ups are normal, and once the curtains are hanging and softly folded, your eye rarely catches minor imperfections. Curtains are forgiving because they’re rarely displayed as a perfectly flat poster. They move, they drape, they live.
People also report that stripe painting changes how they shop for paint. Once you realize you can mix acrylic with a textile medium (or use dedicated fabric paint), you stop feeling boxed into whatever “navy” the fabric store carries. You can match a rug, pull a color from wallpaper, or copy the undertone of your throw pillows with surprising accuracy. That “custom match” feeling is a big part of why painting stripes is so satisfyingyou’re not just decorating; you’re editing your space like you mean it.
Finally, there’s a special kind of pride that comes from hanging your finished striped panels. The room looks pulled together in a way that feels expensive, and you know it’s because you measured, taped, painted, and heat-set like a responsible creative person. It’s also fun because you’ll start noticing stripes everywherebedding, lampshades, plantersand you’ll think, “Should I stripe that too?” (Answer: maybe. But eat dinner first. Stripe decisions are best made with stable blood sugar.)
Conclusion: Crisp Stripes, Custom Curtains, Zero Retail Markup
Painting stripes on curtains is one of those rare DIY projects that looks genuinely high-end without requiring a workshop full of tools. If you plan your spacing, use the right paint (or acrylic + textile medium), apply tape carefully, and paint in thin coats, you can get clean, bold stripes that make your windows look custom-made.
Take your time on the setup, don’t flood the tape edges with paint, and heat-set according to your product directions. Your future selfstanding in a room that looks more finished, more intentional, and more “you”will be very pleased.


