Table of Contents >> Show >> Hide
- Understanding Summer Squash
- Choosing the Right Variety
- Preparing the Garden Bed
- Planting Summer Squash
- Watering and Fertilizing
- Managing Pests and Diseases
- Harvesting Summer Squash
- Tips for a Successful Summer Squash Harvest
- 5 Common Growing Challenges and How to Overcome Them
- Conclusion
- Experiences with Growing Summer Squash
Summer squash is one of the most rewarding vegetables you can grow in your garden. With its vibrant colors and tender texture, it’s not just delicious but also easy to cultivate. Whether you’re an experienced gardener or a beginner, planting and growing summer squash can be a fun and fruitful endeavor. In this guide, we’ll walk you through the essential steps to ensure your summer squash plants thrive, from selecting the right variety to harvesting your produce.
Understanding Summer Squash
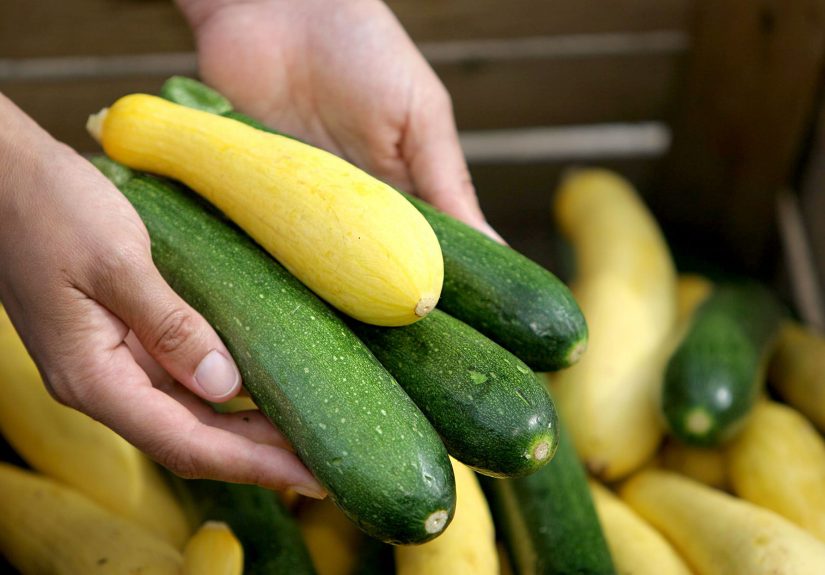
Summer squash, a type of squash harvested in the warmer months, includes varieties like zucchini, yellow squash, and pattypan. Known for their soft skins and mild flavor, summer squash is typically harvested when still immature, unlike winter squash, which is allowed to mature and harden. Its versatility in cooking, from stir-fries to baked dishes, makes it a staple in summer kitchens.
Choosing the Right Variety
Before planting, it’s essential to choose the right type of summer squash that fits your garden’s needs and your taste preferences. There are several varieties to consider:
- Zucchini: The most common type, zucchini has a mild flavor and can grow quite large. It’s perfect for sautéing, grilling, or baking.
- Yellow Squash: A popular variety with a vibrant yellow color. Its mild, slightly sweet flavor is perfect for casseroles and soups.
- Pattypan Squash: Known for its unique, scalloped shape, pattypan squash is smaller and great for grilling or stuffing.
Preparing the Garden Bed
Summer squash requires plenty of space, as the plants tend to spread out as they grow. Choose a sunny spot in your garden, as squash thrives in full sunlight. Prepare the soil by loosening it with a hoe or shovel and adding compost to improve drainage and fertility. Summer squash plants prefer soil that is rich in organic matter and slightly acidic (pH 6.0 to 7.5). It’s also essential to ensure your garden has proper drainage, as squash plants do not thrive in soggy soil.
Planting Summer Squash
Summer squash can be planted either from seeds or starter plants. While starter plants may offer a head start, growing from seeds is more cost-effective and rewarding. Here’s how to plant your squash:
- When to Plant: In most regions, summer squash is best planted after the last frost date when the soil has warmed up to at least 60°F (15°C). For a summer harvest, plant in late spring.
- How to Plant: Plant seeds directly into the soil about 1 to 1.5 inches deep. Space them about 2 to 3 feet apart in rows, leaving enough room for the plants to spread out. If you’re planting in rows, leave at least 3 feet between rows.
- Spacing: Squash plants can spread out quite a bit, so be sure to space your seeds or transplants 2 to 3 feet apart. This will give them ample room to grow without crowding each other.
Watering and Fertilizing
Watering is one of the most critical aspects of growing healthy summer squash. These plants need consistent moisture, especially during hot, dry periods. Water deeply at the base of the plant to ensure the roots receive enough moisture. It’s best to water early in the morning or late in the evening to avoid evaporation. Avoid getting water on the leaves, as this can encourage fungal diseases.
Summer squash is a heavy feeder, so they benefit from regular fertilizing. Apply a balanced fertilizer at the time of planting and continue to fertilize every 3 to 4 weeks. Organic compost or well-aged manure also works wonders for providing the nutrients needed for strong, healthy plants.
Managing Pests and Diseases
Summer squash can fall prey to a variety of pests, including aphids, squash bugs, and cucumber beetles. To manage these pests, try companion planting with marigolds, nasturtiums, or herbs like basil, which can deter harmful insects. If pest damage is severe, you can use insecticidal soap or neem oil as a safer alternative to chemical pesticides.
Squash plants are also susceptible to fungal diseases, such as powdery mildew. To prevent these diseases, ensure proper spacing between plants for good air circulation, and avoid watering the leaves. If you notice signs of mildew, remove affected leaves and consider applying a fungicide to prevent the spread.
Harvesting Summer Squash
One of the best parts about growing summer squash is the quick turnaround. Depending on the variety, summer squash can be ready to harvest in as little as 50 to 60 days from planting. Harvest your squash when they are still young and tender, usually when they are 4 to 7 inches long. Overripe squash can become tough and seedy, so it’s important to pick regularly to encourage new growth. Use a sharp knife or garden shears to cut the squash from the plant, leaving a small stem attached.
Tips for a Successful Summer Squash Harvest
- Pick regularly: Harvest your squash frequently to prevent them from becoming too large and tough. Frequent harvesting also encourages the plant to produce more fruit.
- Monitor soil moisture: During the fruiting stage, keeping the soil evenly moist helps prevent the squash from becoming bitter.
- Rotate crops: If you’ve grown squash in a particular bed for a few years, consider rotating the crops to reduce the risk of soil-borne diseases.
5 Common Growing Challenges and How to Overcome Them
1. Poor Germination
If your squash seeds aren’t germinating, it could be due to soil that’s too cold or wet. Be sure to plant your seeds in well-warmed soil (at least 60°F). If the soil is too cold, try covering the bed with plastic to warm it up.
2. Yellowing Leaves
Yellowing leaves are often a sign of nutrient deficiencies, especially nitrogen. Regular fertilizing and adding compost can help resolve this issue. Also, ensure that the plants are watered consistently and aren’t stressed.
3. Blossom End Rot
This is a common problem where the end of the fruit turns brown and rots. It’s typically caused by inconsistent watering or calcium deficiency. To fix this, maintain consistent moisture levels and add a calcium supplement to the soil.
4. Powdery Mildew
Powdery mildew appears as white, powdery spots on the leaves. This fungal disease thrives in humid conditions. To prevent it, avoid watering the leaves and increase air circulation. If mildew is present, prune affected leaves and apply a fungicide.
5. Squash Bugs
These pests can cause wilting and damage to your squash plants. To control them, manually remove the bugs and use natural pest control methods like insecticidal soap or neem oil.
Conclusion
Growing summer squash is a rewarding and relatively easy task, provided you give it the right care. By selecting the right variety, preparing your garden well, maintaining consistent watering and fertilization, and managing pests and diseases, you’ll be rewarded with a bountiful harvest. Remember, summer squash is not only versatile in the kitchen but also a great addition to any home garden.
Experiences with Growing Summer Squash
As an avid gardener, I’ve spent several seasons experimenting with growing summer squash, and I’ve learned a lot from my successes (and failures). One of the most important lessons I’ve learned is the significance of regular harvesting. Initially, I was reluctant to pick the squash too early, worried I might lose out on larger fruits. However, once I started harvesting frequently, my plants produced much more fruit and thrived better overall. Another valuable experience was learning the importance of companion planting. By adding marigolds near my squash bed, I noticed fewer pest problems, especially squash bugs. Additionally, I’ve found that having the right soilrich in organic matteris crucial. My first season was less successful because the soil lacked proper nutrients. Adding compost improved my yield dramatically. Growing summer squash has become one of the most enjoyable parts of my gardening journey, and I highly recommend it for anyone looking to add a fresh, homegrown ingredient to their summer meals!


