Table of Contents >> Show >> Hide
- What Re-Seasoning a Cast-Iron Pan Actually Means
- Signs Your Cast-Iron Frying Pan Needs Re-Seasoning
- What You Need Before You Start
- How to Re-Season a Cast-Iron Frying Pan: Step by Step
- What to Do If the Pan Is Rusty
- What to Do If the Pan Feels Sticky
- The Best Oils for Re-Seasoning Cast Iron
- Common Mistakes That Ruin Cast-Iron Seasoning
- How to Maintain Your Cast-Iron Frying Pan After Re-Seasoning
- What to Cook First After Re-Seasoning
- Real-World Experiences and Lessons From Re-Seasoning Cast Iron
- Final Thoughts
A cast-iron frying pan is the kitchen equivalent of that one friend who survives everything: high heat, open flames, awkward drops into the sink, and recipes that begin with “I’m just winging it.” But even the toughest skillet can lose its magic when the seasoning wears down. Food starts sticking. Rust shows up like an unwanted party guest. The surface turns dull, patchy, or weirdly gummy. Suddenly your beloved pan feels less like a cooking legend and more like a heavy black problem.
The good news? Re-seasoning a cast-iron frying pan is not complicated. It is part science, part kitchen ritual, and part learning not to drown the thing in oil. Once you know the right method, you can bring a tired skillet back to life and keep it cooking beautifully for years. In this guide, you’ll learn exactly how to re-season cast iron, what mistakes to avoid, which oils work best, and how to keep your pan from sliding back into seasoning trouble.
What Re-Seasoning a Cast-Iron Pan Actually Means
Seasoning is not salt, pepper, or a mysterious old-family trick. It is a thin layer of oil that has been heated until it bonds to the iron and forms a hard, protective coating. That coating helps your pan resist rust and creates the slicker cooking surface cast iron fans love so much.
When people talk about re-seasoning a cast-iron frying pan, they mean rebuilding or refreshing that baked-on layer. This is especially useful if your skillet is rusty, sticky, dull, or losing its semi-nonstick performance. A well-seasoned pan does not usually look mirror-perfect. In fact, cast iron often looks a little rugged. That is part of its charm. You are aiming for durable and functional, not beauty-pageant glossy.
Signs Your Cast-Iron Frying Pan Needs Re-Seasoning
Your skillet is probably asking for help if you notice any of the following:
- Food sticks more than usual, especially eggs, potatoes, or fish.
- The surface looks gray, dull, patchy, or uneven instead of dark and developed.
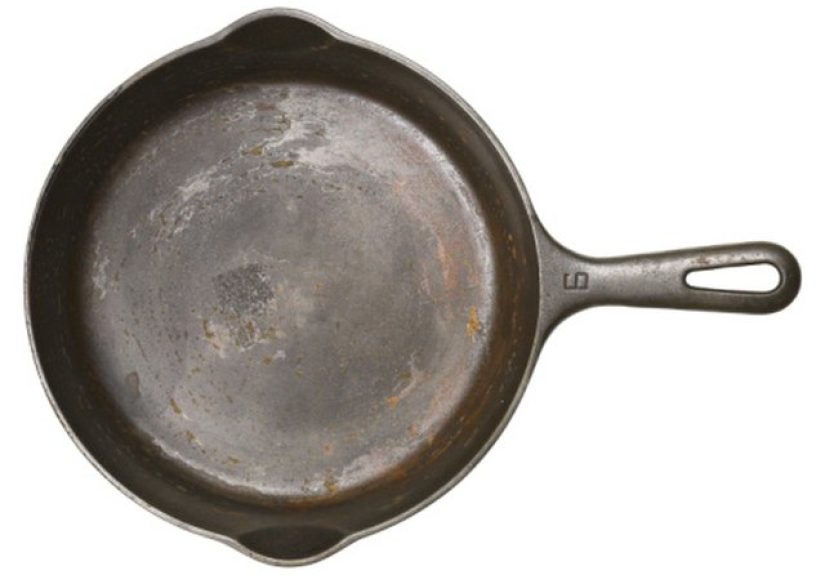
- You see orange or reddish rust spots.
- The pan feels tacky or gummy after heating.
- Old seasoning is flaking off in spots.
- The skillet has been scrubbed aggressively, left wet, or forgotten in the back of a cabinet for ages.
If your pan has only minor wear, a quick maintenance seasoning may be enough. If it is rusty or seriously crusty, you will want to do a more thorough re-seasoning from scratch.
What You Need Before You Start
- A cast-iron frying pan
- Warm water
- Mild dish soap
- A sponge, scrub brush, or nonabrasive scrubber
- Paper towels or a lint-free cloth
- A neutral oil with a relatively high smoke point, such as canola, vegetable, or grapeseed oil
- An oven
- Aluminum foil or a baking sheet to catch drips
If the pan is rusty, you may also need coarse salt, steel wool, or extra scrubbing power. If the skillet is deeply rusted, you may need more patience than usual and maybe a pep talk.
How to Re-Season a Cast-Iron Frying Pan: Step by Step
Step 1: Wash the Pan Thoroughly
Start with a clean pan. This matters more than people think. Any burnt-on crumbs, loose carbon, sticky residue, or rust left on the surface can get trapped under the new seasoning layer. That is how you end up sealing old problems into the pan like a weird archaeological project.
Wash the skillet with warm water and a small amount of mild dish soap. Yes, soap is okay here. Modern dish soap is not the cast-iron villain it is often made out to be. Scrub the inside, outside, handle, and bottom. If the pan has rough spots, sticky patches, or visible rust, scrub until those problem areas are reduced or removed.
For stubborn stuck-on residue, coarse salt can help as a gentle abrasive. For rust, use firmer scrubbing and keep going until the loose rust is gone. If your pan is extremely rusty, you may need more than one cleaning round before moving on.
Step 2: Dry It Completely
Water is the enemy of bare or under-seasoned cast iron. After washing, dry the pan immediately and thoroughly with a towel. Then place it over low heat on the stovetop for a few minutes to drive off any hidden moisture.
This step is not optional. Tiny droplets hiding around the rim, handle joint, or pour spouts can lead to fresh rust faster than you can say, “But I just fixed you.” The pan should be bone-dry before you add oil.
Step 3: Apply a Very Thin Layer of Oil
This is the part where many people sabotage themselves. The correct amount of oil is not “a healthy glug.” It is not “until the skillet shines like a wet seal.” It is a very thin, buffed-in layer.
Put a small amount of neutral oil on a paper towel or cloth and rub it over the entire pan: inside, outside, handle, and bottom. Then take a clean towel and wipe off the excess. Wipe again if needed. The pan should look lightly coated, not greasy. In fact, it should almost look like you changed your mind about oil halfway through.
If too much oil remains on the pan, it can harden into sticky, blotchy patches instead of forming a smooth seasoning layer. This is one of the most common cast-iron mistakes.
Step 4: Bake the Pan Upside Down
Preheat your oven to around 450°F to 500°F. Place a sheet of foil or a baking sheet on a lower rack to catch drips. Then place the pan upside down on the oven rack.
Baking the skillet upside down helps prevent oil from pooling inside the cooking surface. Let it bake for about 1 hour. Then turn off the oven and allow the pan to cool inside. Slow cooling is helpful, and it also prevents you from grabbing a blazing-hot skillet with misplaced confidence.
If your chosen oil smokes a little, that is normal. Open a window if needed and try not to interpret it as a personal attack from your cookware.
Step 5: Repeat If the Pan Needs More Build-Up
One round of seasoning is often enough for maintenance, but a tired pan may benefit from two or three rounds. If the surface still looks uneven, dry, or lightly rusty after the first bake, repeat the thin oil-and-bake process.
Do not expect instant perfection. A cast-iron frying pan often becomes better not just through oven seasoning, but through actual cooking over time. A restored pan usually improves with repeated use, especially when cooking foods with a bit of fat.
What to Do If the Pan Is Rusty
Rust looks dramatic, but it does not always mean your skillet is ruined. In many cases, a rusty cast-iron frying pan can be saved.
For light rust, scrub the surface thoroughly with warm water, soap, and a scrubber or steel wool until the rust is gone. Dry the skillet completely, then proceed with re-seasoning.
For heavier rust, you may need a deeper clean before re-seasoning. The important thing is to remove the rust before rebuilding the seasoning layer. Otherwise, you are just decorating corrosion.
Once the rust is gone and the pan is dry, re-season it promptly. Bare cast iron can begin oxidizing quickly if left exposed to moisture in the air.
What to Do If the Pan Feels Sticky
A sticky cast-iron skillet usually means one thing: too much oil. Instead of polymerizing into a hard coating, the oil partially baked onto the surface and created a tacky mess.
To fix it, wash the pan with warm water and soap, scrub away the gummy layer as much as possible, dry it thoroughly, and re-season using a much thinner coat of oil. When in doubt, wipe more oil off than you think you should. Cast iron rewards restraint.
The Best Oils for Re-Seasoning Cast Iron
For most home cooks, the best oil for re-seasoning a cast-iron frying pan is a neutral oil with a relatively high smoke point. Good choices include:
- Canola oil
- Vegetable oil
- Grapeseed oil
- Shortening
These oils are widely recommended because they are easy to apply, affordable, and reliable for oven seasoning. You do not need a trendy, expensive oil with a dramatic backstory. Cast iron is practical cookware, not a luxury spa client.
Some people use flaxseed oil, but it is not necessary for good results. The bigger issue is not the brand or trendiness of the oil. The bigger issue is using a tiny amount and heating it correctly.
Common Mistakes That Ruin Cast-Iron Seasoning
Using Too Much Oil
This is the number one problem. Excess oil turns sticky, streaky, and uneven.
Skipping the Drying Step
If the pan is not completely dry before seasoning, rust can return and the oil layer will not bond as cleanly.
Leaving the Pan Wet After Washing
Even a quick air-dry can invite rust. Towel dry first, then heat dry.
Storing Food in the Pan
Leaving food sitting in cast iron, especially acidic food, can wear down the seasoning and encourage rust.
Cooking Too Many Acidic Foods in a Weakly Seasoned Pan
Tomatoes, vinegar, wine, and citrus can be rough on a newly re-seasoned skillet. Once the seasoning is well-developed, short acidic cooks are less dramatic, but a young coating still deserves a gentler start.
Panicking Over an Imperfect Finish
Fresh seasoning can look blotchy at first. That does not always mean failure. If the surface is dry, firm, and improving with use, you are on the right track.
How to Maintain Your Cast-Iron Frying Pan After Re-Seasoning
Once your skillet is re-seasoned, daily care keeps it in good shape:
- Clean it soon after cooking.
- Use warm water and a gentle scrubber.
- Dry it completely every time.
- Rub in a tiny amount of oil after drying if the surface looks thirsty.
- Store it in a dry place.
- Avoid trapping moisture by storing it with a lid sealed tightly on top.
You do not need to fully re-season your cast-iron frying pan after every meal. A light maintenance oiling is often enough. Full oven re-seasoning is best reserved for bigger repairs, restoration, or noticeable performance decline.
What to Cook First After Re-Seasoning
After re-seasoning, start with foods that are friendly to building seasoning. Think roasted vegetables, cornbread, grilled cheese, burgers, bacon, or potatoes cooked with a little oil. These kinds of foods help reinforce the coating while letting the pan ease back into service.
It is usually smart to wait before attempting delicate scrambled eggs with zero fat or a sharply acidic tomato sauce simmered for half an hour. Give the pan a few wins first. Confidence matters, for both you and the skillet.
Real-World Experiences and Lessons From Re-Seasoning Cast Iron
The first time most people re-season a cast-iron frying pan, they imagine the process will end with a dramatic reveal: the oven door opens, heavenly light pours out, and the skillet emerges looking like it was forged by kitchen gods. In real life, it is usually more humble than that. The pan comes out darker, better protected, and slightly improved, but maybe not flawless. That is normal. Cast iron is not a makeover show. It is more like physical therapy for cookware. Progress is real, but it builds in stages.
One common experience is discovering that the pan looked worse right before it got better. After scrubbing off old residue or rust, the skillet can look dry, gray, and alarmingly sad. Many people assume they have ruined it. Actually, that stripped-down look often means you finally removed the stuff that was preventing a good seasoning layer from forming. The pan may look rough for a day, but that clean slate is exactly what allows the next few rounds of seasoning and cooking to work.
Another lesson almost everyone learns the hard way is that “just a little more oil” is not your friend. Plenty of home cooks have proudly rubbed down a skillet, only to discover later that the surface turned sticky and blotchy. It feels unfair because you did add oil, you did bake it, and you did follow directions mostly. But cast iron is deeply unimpressed by “mostly.” It likes thin coats, patient repetition, and a kind of boring consistency. Once people finally start buffing the oil until the pan looks nearly dry, the results improve fast.
There is also the strange emotional arc of cast-iron ownership. At first, the pan can feel intimidating. It is heavy, it rusts if you ignore it, and the internet makes it sound as if one wrong soap bubble will destroy a century of seasoning. Then, after a few rounds of re-seasoning and regular use, the fear fades. You realize the pan is actually forgiving. Rust can be scrubbed. Sticky residue can be fixed. Weak seasoning can be rebuilt. The skillet is not fragile. It just prefers not to be neglected.
Many home cooks also notice that the best improvements happen after the oven work is done. Re-seasoning in the oven gives the pan a solid restart, but everyday cooking is what really deepens the finish. A skillet that has seen a few batches of cornbread, crispy potatoes, or seared chicken often performs better than one that has been seasoned once and left alone in a cabinet like a museum piece. Cast iron likes to be used. The pan earns its slick surface through repetition, not through one heroic afternoon of kitchen repair.
Then there is the confidence boost. A freshly restored skillet changes the way people cook. Suddenly oven-to-stovetop recipes feel easier. Searing seems more satisfying. Even making breakfast feels a little more serious, in a good way. You start treating the pan less like an object and more like a reliable tool with personality. Yes, that sounds dramatic. Yes, it is still just a frying pan. But anyone who has rescued a rusty cast-iron skillet and turned it back into a dinner-making machine knows exactly what that tiny surge of kitchen pride feels like.
In the end, the most useful experience-related lesson is this: a great cast-iron frying pan is rarely born perfect. It becomes great through care, mistakes, re-seasoning, and regular cooking. The pan you fix yourself often becomes the one you trust most. It may have a few marks, a few uneven patches, and a long story behind it, but that is exactly what makes cast iron so satisfying. It is cookware with memory, and every re-seasoning is part of the story.
Final Thoughts
If you have been putting off re-seasoning your cast-iron frying pan because it seemed messy, technical, or vaguely old-timey, take this as your sign to do it anyway. The process is simple: clean the pan, dry it thoroughly, rub on an extremely thin layer of oil, bake it upside down, and repeat if needed. That is the core method. The real secret is patience and not overdoing the oil.
Once restored, a cast-iron skillet can handle weeknight dinners, weekend breakfasts, oven bakes, stovetop sears, and the occasional cooking experiment that begins with too much confidence and not enough prep. Re-season it when it needs help, maintain it with basic care, and it can last for generations. Not bad for a pan that basically just wants to be kept dry and respected.


