Table of Contents >> Show >> Hide
- Before You Start: 4 Smart Checks That Save You Time (and Drywall)
- Quick Tool List for Both Methods
- Method 1: Soak and Scrape (Best for Unpainted Wall Texture)
- Method 2: Skim Coat Textured Walls (Best for Painted Texture)
- Step 1: Prep and protect the area
- Step 2: Lightly sand glossy paint
- Step 3: Mix joint compound to the right consistency
- Step 4: Roll compound onto the wall
- Step 5: Skim it smooth with a drywall knife
- Step 6: Maintain a wet edge
- Step 7: Let dry and apply a second coat if needed
- Step 8: Light sanding and touch-up
- When Method 2 works best
- Which Method Should You Choose?
- Common Mistakes (and How to Avoid Them)
- Cost, Time, and Difficulty: What to Expect
- How to Prep the Wall for Paint After Texture Removal
- FAQ: Removing Texture From Walls
- Real-World Experiences and Lessons Learned (About )
- Conclusion
If your walls look like they were styled by a popcorn machine and a trowel having a disagreement, you’re not alone. Textured walls were popular for hiding imperfections, speeding up finishing, and adding “character.” The problem? Sometimes that character starts looking more like visual static. The good news is that you can absolutely smooth things out yourself.
In most homes, removing wall texture comes down to two practical methods: soak and scrape (best for unpainted texture) or skim coating (best for painted texture). Which one you choose depends less on your personality and more on whether paint is sealing the texture. Choose the right method, and the project becomes messy-but-manageable instead of a full-on drywall regret festival.
This guide walks you through both options, step by step, with tools, prep tips, safety checks, common mistakes, and what to do before painting. You’ll also get a bonus section with real-world experiences and lessons learned so you can avoid the classic DIY plot twists.
Before You Start: 4 Smart Checks That Save You Time (and Drywall)
1) Figure out whether the texture is painted
This is the biggest decision point. If the wall texture has never been painted, water can soften it so you can scrape it off. If it has been painted, the paint acts like a sealer, which means water usually won’t penetrate well enough to make scraping easy. In that case, skim coating is usually the faster and cleaner route to a smooth finish.
2) Do a small test patch first
Pick a hidden corner behind a door or near a closet. Mist it with water and wait 10–20 minutes. If the texture softens and scrapes off without tearing the drywall paper, greatyou’re a soak-and-scrape candidate. If it stays hard, gummy, or painty, skip the wrestling match and go straight to skim coating.
3) Check the age of the home
If your home is older (especially pre-1978 for lead paint concerns, or older textured materials that may contain asbestos), pause before sanding or scraping. Have suspect materials evaluated or tested by qualified professionals. This is not the part of the project to “just wing it.”
4) Plan for dust and mess
Texture removal is one of those jobs that seems harmless until you find drywall dust in a room you haven’t entered in two days. Protect floors, isolate the area, wear eye protection, and use a dust mask or respirator appropriate for the task. Ventilation helps, and wet methods reduce dust.
Quick Tool List for Both Methods
- Canvas drop cloths (safer than slippery plastic on floors)
- Painter’s tape and plastic sheeting (for doors, trim, vents)
- Drywall knife / taping knife (10–12 inch is ideal)
- Pump sprayer or spray bottle (for Method 1)
- Premixed joint compound + bucket + drill paddle (for Method 2)
- Paint roller + thick-nap roller cover (for Method 2)
- Drywall sanding sponge or sanding screen (light finish sanding)
- Work light or bright angled light (this reveals flaws fast)
- Safety glasses and dust mask / respirator
Method 1: Soak and Scrape (Best for Unpainted Wall Texture)
This is the classic wall texture removal method when the texture hasn’t been sealed by paint. It’s messy, but it’s straightforward. Water softens the texture, and a drywall knife lifts it off. Think of it as persuading the wall, not attacking it.
Step 1: Protect the room
Lay down canvas drop cloths and tape off baseboards, trim, outlets, and switches. Remove wall décor and as much furniture as possible. You’ll thank yourself later when cleanup takes 20 minutes instead of an existential weekend.
Step 2: Mist the wall with water
Use a pump sprayer or spray bottle to wet the textured wall evenly. Don’t flood itjust saturate the texture. Apply water in 2–3 passes, then let it sit for around 10–20 minutes. The goal is a softened surface, not a soaked drywall core.
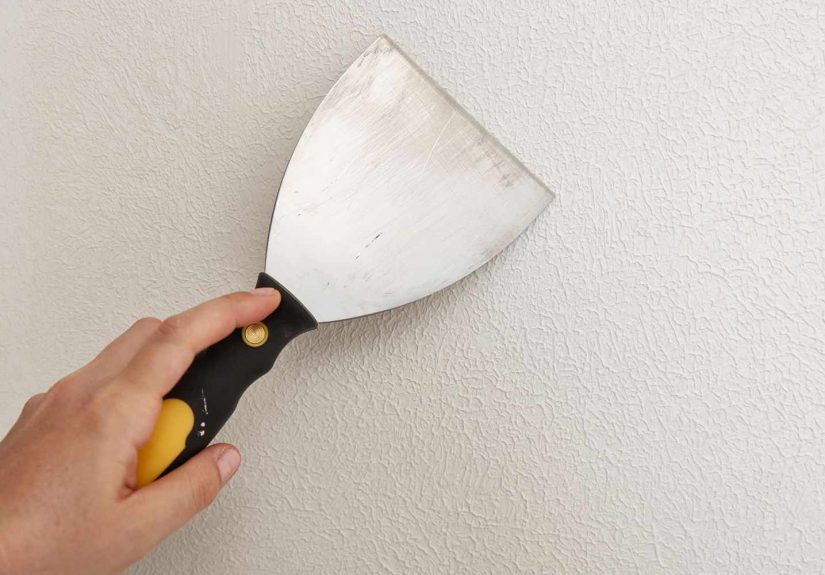
Step 3: Scrape gently with a drywall knife
Hold a taping knife at about a 30-degree angle and use long, gentle strokes. Start near the top and work down. If the knife drags or digs in, stop and re-wet the area. Resistance usually means the texture needs more moisture, not more force.
Step 4: Repeat section by section
Work in manageable areas. It’s normal for thin smears or tiny ridges to remain. Don’t obsess during scrapingyou’ll clean those up in the sanding phase.
Step 5: Let it dry completely
Before sanding, let the wall dry fully (often up to 24 hours, depending on humidity and how much water you used). Sanding damp compound is a great way to make a bigger mess and a worse finish.
Step 6: Sand lightly to smooth the wall
Use a drywall sanding sponge or sanding screen to knock down leftover texture and smooth minor marks. Use light pressure. The goal is “flat and paint-ready,” not “sanded through to next Tuesday.” Shine a work light across the wall to spot ridges and touch them up.
When Method 1 works best
- Unpainted orange peel, knockdown, or light texture
- You want actual removal, not just covering
- The texture layer is not too thick
- You can tolerate some mess and drying time
Method 2: Skim Coat Textured Walls (Best for Painted Texture)
If the wall is painted, skim coating is usually the better move. Instead of trying to remove the texture, you cover and level it with joint compound so the finished wall looks smooth. It’s the “work smarter, not harder” methodand for painted texture, often the only sane one.
Step 1: Prep and protect the area
Cover floors and nearby furniture. Remove or protect trim and faceplates. Good prep makes the rest of the job faster, especially when you’re moving quickly to keep a wet edge.
Step 2: Lightly sand glossy paint
If the wall has gloss or semi-gloss paint, lightly sand it first to dull the sheen. This improves adhesion for the joint compound. Wipe away all dust with a damp cloth and let the wall dry.
Step 3: Mix joint compound to the right consistency
Use premixed joint compound and thin it slightly with water until it reaches a smooth, spreadable consistency (many DIYers describe it as pancake batter or yogurt-like). You want it thin enough to roll and skim easily, but not so watery that it runs down the wall.
Step 4: Roll compound onto the wall
Using a roller, apply compound to a small section at a time (roughly 2–4 feet wide). Rolling it on first gives you even coverage and helps speed up larger walls.
Step 5: Skim it smooth with a drywall knife
Immediately pull a drywall knife over the wet compound to remove excess and flatten the surface. Work from bottom to top or top to bottomjust be consistent. Keep your pressure even and watch the wall in angled light. Imperfections that are invisible head-on will glow like neon under side lighting.
Step 6: Maintain a wet edge
This is the secret sauce. Don’t let one section dry before blending the next. Work in small areas so you’re always skimming into wet compound, not dragging over dried edges.
Step 7: Let dry and apply a second coat if needed
Let the skim coat dry fully (often 24–48 hours depending on humidity, thickness, and airflow). If the original texture was deep, a second skim coat may be necessary. That’s normal. Deep texture can take more than one pass to fully hide.
Step 8: Light sanding and touch-up
Once dry, lightly sand with a drywall sponge or fine sanding tool. Circle any low spots, pinholes, or lines with a pencil, patch them, let dry, and sand again. This is how walls go from “pretty good” to “wait, did a pro do this?”
When Method 2 works best
- Painted textured walls (especially where water won’t soften texture)
- You want a smooth look without aggressive scraping
- The texture is medium-to-deep and uneven
- You’re willing to do careful finishing work
Which Method Should You Choose?
Choose Soak and Scrape if…
- The texture is unpainted
- You want the texture physically removed
- Your test patch softens easily with water
- You don’t mind wet mess + scraping labor
Choose Skim Coat if…
- The wall is painted
- The texture is stubborn or patchy
- You want a more predictable finish
- You’re comfortable with mudding and light sanding
Common Mistakes (and How to Avoid Them)
Mistake 1: Scraping too hard
This can gouge drywall paper and create more repair work than the original texture. Let water do the work. If it doesn’t soften, switch methods.
Mistake 2: Skim coating over glossy paint without sanding
Joint compound may not bond well to slick surfaces. A quick deglossing sand and dust wipe makes a huge difference.
Mistake 3: Using the wrong filler for the job
For smoothing large textured walls, use joint compound (drywall mud), not a small tub of spackle. Spackle is great for little repairs, but skim coating is joint compound territory.
Mistake 4: Heavy sanding
Over-sanding can leave scratches, expose drywall paper, or create waves. Light sanding plus targeted touch-ups is better than trying to brute-force a perfect finish in one pass.
Mistake 5: Skipping primer before paint
Fresh compound and repaired areas absorb paint differently. Priming helps even out porosity, improves adhesion, and gives you a more uniform final color and sheen.
Cost, Time, and Difficulty: What to Expect
Difficulty: Beginner to intermediate (more patience than brute skill)
Time: Usually 1–2 days per room, depending on wall size, drying time, and whether a second skim coat is needed
Materials cost (DIY): Typically modest if you already have basic tools; most of the “cost” is labor and cleanup
Example: A small bedroom with lightly textured, painted walls may take one day to prep and skim, then a second day for sanding, touch-up, primer, and paint prep. A deeper texture can add another skim coat and another drying cycle.
How to Prep the Wall for Paint After Texture Removal
- Inspect in angled light: Mark ridges, pinholes, and low spots.
- Patch and re-sand lightly: Don’t overwork the whole wall if only a few spots need attention.
- Remove dust: Vacuum, wipe with a damp microfiber cloth, and let dry.
- Prime: Use a quality wall/drywall primer on skim-coated or repaired surfaces.
- Paint: Once primer is dry, apply your finish coats.
FAQ: Removing Texture From Walls
Can I remove painted wall texture by spraying water anyway?
You can test it, but painted texture often resists water because the paint seals the surface. If it won’t soften quickly, skim coating is usually faster and less frustrating.
Do I need to remove baseboards?
Not always, but removing them can make skim coating easier and cleaner, especially if you want a professional finish all the way to the floor line.
How smooth is “smooth enough” before paint?
Under normal room lighting, minor imperfections may disappearbut flat paint and side lighting can reveal everything. Use a bright work light during prep to catch flaws early.
Should I wet sand or dry sand drywall compound?
Both methods have uses. Wet sanding can reduce dust on small areas, while dry sanding often gives a smoother finish on larger surfaces. Many DIYers use a mix of both depending on the stage of the project.
Real-World Experiences and Lessons Learned (About )
One of the most common experiences DIYers report with how to remove texture from walls is discovering that the wall tells you which method it wantsusually five minutes after you confidently choose the other one. A typical example: someone starts with a sprayer and scraper because the texture “looks old,” but the first test patch barely softens. Instead of doubling down, they switch to a skim coat and save hours. The biggest lesson there is simple: test first, then commit.
Another very common experience is underestimating the role of lighting. A wall can look smooth at noon and suddenly look like a topographic map at 8 p.m. when a lamp hits it from the side. Homeowners who get the best final results almost always use a bright work light and check the wall from multiple angles during skim coating and sanding. It feels fussy in the moment, but it prevents the “why can I see every ridge after painting?” panic later.
People also frequently mention that the project becomes much easier once they stop trying to make the wall perfect in a single pass. With skim coating, the first coat often looks rough. That’s normal. The first coat is usually about filling low spots and knocking down the overall texture, not creating a museum-grade finish. The second pass (or targeted patching) is where the wall really transforms. DIYers who accept this tend to stay patient and get better results than those who keep scraping and reworking half-dried mud.
On the soak-and-scrape side, the most repeated lesson is to use more water and less force. When the texture is truly soft, it comes off surprisingly well with a drywall knife. When it’s not ready, the scraper digs in and damages the drywall paper. Many first-timers assume they need a sharper tool or more pressure, when the real answer is often: spray again, wait a little longer, and try another section.
Cleanup is another area where experience matters. DIYers who isolate doorways, cover floors properly, and keep a trash bucket nearby usually finish the job tired but happy. Those who skip prep often spend as long cleaning as they do smoothing. A smart workaround many people use is to complete the job in stages: one wall at a time, clean as they go, and vacuum before dust spreads to the rest of the house.
Finally, there’s the emotional arc of the projectwhich is very real. Most people hit a “this was a terrible idea” phase somewhere between the first sanding pass and the first primer coat. Then primer goes on, everything evens out, and the wall suddenly looks finished. That’s the moment the project pays off. If you’re in the messy middle, keep going. Smooth walls often look worst right before they look great.
Conclusion
Removing wall texture is absolutely a DIY-friendly project when you choose the right method. If the texture is unpainted, soak and scrape can work beautifully. If it’s painted, skim coating textured walls is usually the faster, more reliable path to a smooth finish. Add a little patience, good lighting, proper prep, and a quality primer, and you can turn dated textured walls into clean, modern surfaces that are ready for paint.
The biggest takeaway: don’t guesstest a small section first. That one step can save you hours of frustration and keep your drywall intact.


