Table of Contents >> Show >> Hide
- Why Replacing a PUR Water Filter Matters
- Before You Start
- How to Replace a PUR Water Filter: 10 Steps
- Step 1: Identify the Type of PUR Filter You Have
- Step 2: Wash Your Hands and Clean the Area
- Step 3: Remove the Old Filter
- Step 4: Inspect the Unit for Build-Up or Wear
- Step 5: Prepare the New Filter Correctly
- Step 6: Install the New Filter
- Step 7: Reattach the Unit and Make Sure It Is Secure
- Step 8: Flush the New Filter
- Step 9: Check for Leaks, Flow Problems, or Air Bubbles
- Step 10: Reset Your Reminder and Track the Replacement Date
- Common Mistakes to Avoid When Replacing a PUR Water Filter
- Quick Note for PUR Pitcher and Dispenser Owners
- How Often Should You Replace a PUR Water Filter?
- Real-World Experiences Replacing a PUR Water Filter
- Final Thoughts
- SEO Tags
Replacing a PUR water filter is one of those tiny home-maintenance jobs that sounds boring until your water starts trickling out like it’s late for work. The good news? It’s usually fast, easy, and far less dramatic than assembling furniture with “simple” instructions and 37 mystery screws.
If your PUR filter light has changed color, your faucet flow has slowed down, or your water just tastes a little less fresh than it used to, it may be time for a replacement. In most cases, a PUR faucet-mounted filter needs to be changed about every 100 gallons or roughly every 3 months, while many PUR pitcher and dispenser filters are replaced about every 40 gallons or every 2 months, depending on the model. That is why knowing the right process matters. A rushed swap can lead to leaks, poor flow, trapped air, or the classic “Why is the water cloudy?” panic.
This guide walks you through how to replace a PUR water filter in 10 steps, with practical tips, common mistakes to avoid, and a few real-world notes for both faucet systems and pitcher-style units. Whether you are changing your first PUR replacement filter or just need a refresher, this step-by-step guide keeps things simple and clean.
Why Replacing a PUR Water Filter Matters
A water filter is not a forever hero. Over time, the filtration media gets used up, water flow may slow, and the filter can lose effectiveness. Replacing the cartridge on time helps maintain the level of filtration the product is designed to deliver. It also helps preserve taste, odor, and day-to-day convenience. In plain English: fresh filter, better experience.
Many people wait until the water tastes odd or the filter light turns angry-looking red. That works, but a better approach is to replace the filter on schedule and keep an eye on performance. If your faucet-mounted PUR system starts running slower in filtered mode, that is often a hint that the cartridge is nearing the end of its useful life. The same logic applies to pitchers and dispensers. If fill time drags or the water seems off, the filter might be ready to retire.
Before You Start
Before replacing your PUR water filter, make sure you have the correct replacement cartridge for your specific unit. PUR makes different filters for faucet-mounted systems, pitchers, and dispensers. Using the wrong one is a little like trying to put running shoes on a toaster. Technically, you can try. Realistically, it is not going to help.
You should also have a clean towel nearby and a few minutes to flush the new filter after installation. If you are working with a faucet-mounted system, use cold water only during setup and use. That point is easy to overlook, but it matters because these systems are designed for cold water filtration.
How to Replace a PUR Water Filter: 10 Steps
Step 1: Identify the Type of PUR Filter You Have
The first step is knowing whether you have a PUR faucet filter, a PUR pitcher filter, or a PUR dispenser filter. The replacement process is similar in spirit but different in the details. Faucet systems usually involve removing the unit from the faucet or opening the back cover, while pitchers and dispensers often require rinsing or soaking the new cartridge before locking it into place.
If you still have the model packaging or manual, great. If not, look closely at the housing and replacement cartridge shape. A quick match saves frustration later.
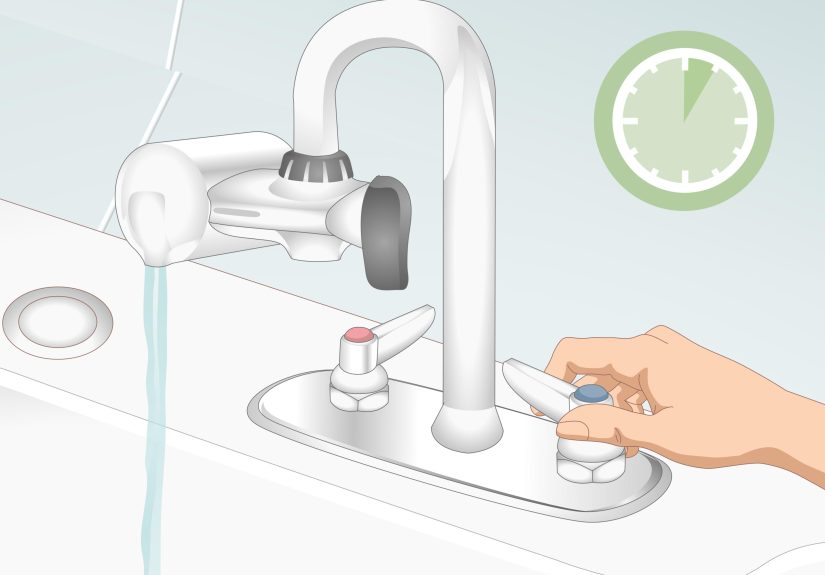
Step 2: Wash Your Hands and Clean the Area
Yes, this sounds obvious. No, people still skip it. Start with clean hands and a reasonably clean sink or counter. You are handling a part that touches your drinking water, so this is not the moment for mystery crumbs, soap scum, or leftover coffee grounds.
If you are replacing a pitcher or dispenser filter, wash the reservoir, lid, pour tray, and removable filter cover with mild soapy water if needed, then rinse well. Clean equipment helps your new filter do its job without extra debris entering the system on day one.
Step 3: Remove the Old Filter
For a PUR faucet-mounted filter, remove the filtration unit from the faucet if your model requires it, usually by unscrewing the threaded mounting nut. Then open the back cover and take out the old cartridge. Some PUR faucet filters fit a little loosely, so do not be alarmed if the old one is not locked in like a bank vault.
For a PUR pitcher or dispenser, lift out the old filter from the reservoir or pour tray. If it twists to lock, turn it gently and pull upward. Do not yank it like you are starting a lawn mower. A steady hand wins here.
Step 4: Inspect the Unit for Build-Up or Wear
Before installing the new filter, take a moment to inspect the housing. Look for mineral build-up, loose seals, worn O-rings, or trapped debris. Faucet-mounted systems can collect residue around the threaded connection or filter chamber. Pitchers can hide a surprising amount of gunk around the filter seat if they have not been cleaned in a while.
If you see residue, wipe it away with a soft cloth. If your model’s manual allows it, wash removable non-electronic parts with mild soap and water. Avoid harsh cleaners or anything abrasive that could damage the plastic or seals.
Step 5: Prepare the New Filter Correctly
This is the step people rush, and it is also where model differences matter most. For many PUR Basic pitcher and dispenser filters, you simply rinse the new filter under cold water for about 15 seconds. For many PUR Plus pitcher and dispenser filters, the filter is typically soaked in cold water for about 15 minutes, then held under cold running water for about 10 seconds before installation.
For a PUR faucet replacement filter, preparation is usually simpler: insert the cartridge according to the housing design, then perform the required post-install flush once it is installed. Always follow the instructions that match your specific replacement filter. Small differences matter more than people think.
Step 6: Install the New Filter
Place the new filter into the housing exactly as directed for your model. In a faucet system, that generally means sliding the cartridge into the unit and replacing the back cover securely. In a pitcher or dispenser, insert the filter into the reservoir opening or pour tray and twist or press until it locks into place.
If the filter does not seat properly, stop and check alignment. Forcing it is a great way to create leaks, bypass filtration, or invent new vocabulary words in your kitchen.
Step 7: Reattach the Unit and Make Sure It Is Secure
For faucet systems, reconnect the device to the faucet and tighten the mounting nut securely, but do not overtighten it. You want a snug connection, not a wrestling match. Make sure the unit sits straight and the switch between filtered and unfiltered water moves smoothly.
For pitchers and dispensers, confirm that the filter cover, reservoir, and lid are all back in place. If your filter uses a lock-fit or twist-lock design, make sure it is fully engaged so unfiltered water does not sneak around the cartridge.
Step 8: Flush the New Filter
This step is essential. For most PUR faucet filters, run cold water in filtered mode for about 5 minutes before regular use. During the flush, it is normal to see cloudy water or hear air moving through the cartridge. That first flush helps clear loose carbon particles and trapped air.
For pitcher and dispenser filters, follow the product instructions after installation. In many cases, you fill and discard the first reservoir or first few batches depending on the model. The goal is the same: prime the filter and wash away harmless loose media before drinking the water.
Step 9: Check for Leaks, Flow Problems, or Air Bubbles
After flushing, inspect the system. On a faucet unit, look around the threaded connection and filter housing for drips. Switch between filtered and unfiltered settings to make sure everything works smoothly. If water leaks, remove the unit, check the washer or adapter, and reinstall carefully.
On a pitcher or dispenser, make sure water is flowing through the filter rather than around it. If the cartridge is not fully seated, filtration performance may be reduced. A properly installed filter should feel stable and operate as expected, even if the first cycle is a little bubbly.
Step 10: Reset Your Reminder and Track the Replacement Date
Many PUR faucet systems reset the filter indicator automatically when a new cartridge is installed. The light may flash green when you begin using the fresh filter. For pitchers and dispensers, some models have a filter change light, while others rely on you remembering the date like a responsible adult with a calendar and not a vague sense of optimism.
Write the replacement date on the box, add a phone reminder, or mark it on the fridge. That tiny habit makes future maintenance much easier and helps you replace the filter before performance drops.
Common Mistakes to Avoid When Replacing a PUR Water Filter
One of the biggest mistakes is using the wrong replacement cartridge. PUR systems are not one-size-fits-all, and installing an incompatible filter can cause fit problems or poor performance. Another common mistake is skipping the flush. A new filter often contains loose carbon dust and trapped air, which is why the first water may look cloudy. That does not usually mean the filter is defective. It means you need to finish the startup process.
Another issue is using hot water with a faucet-mounted filter. Many PUR faucet systems are intended for cold water use only. Hot water can damage the filter or reduce performance. Overtightening the faucet connection is another classic error. Tight enough is good. “I now need pliers and a pep talk” is not.
Quick Note for PUR Pitcher and Dispenser Owners
If you searched for how to replace a PUR water filter and you actually own a pitcher or dispenser, do not worry. The process is even easier in many cases. Remove the old filter, prep the new one based on whether it is a Basic or Plus model, clean the container parts, lock the new filter into place, and prime the system as directed. Most newer PUR pitcher replacement filters are designed for quick installation, while certain PUR Plus versions still use a soak-and-rinse prep method before use.
The most important thing is checking your specific filter type. Some modern pitcher filters are marketed as no-soak and quick-rinse, while others still have a pre-soak step. It is a tiny detail, but tiny details are where “easy replacement” turns into “Why is this thing acting weird?”
How Often Should You Replace a PUR Water Filter?
That depends on the model and how much water you use. A common rule of thumb is that PUR faucet filters last about 100 gallons or 3 months, while many PUR pitcher and dispenser filters last about 40 gallons or 2 months. If your household uses a lot of filtered water for cooking, coffee, pets, and giant reusable bottles that somehow need refilling every 12 minutes, your replacement schedule may come faster.
Water quality also matters. Heavier sediment or mineral content can affect flow and how quickly the filter seems to wear down. If you notice reduced flow, odd taste, or visible changes in performance before the expected replacement date, check the filter and product guidance sooner rather than later.
Real-World Experiences Replacing a PUR Water Filter
In real homes, replacing a PUR water filter rarely fails because the process is complicated. It usually fails because people are in a hurry. They try to swap the cartridge in the middle of making dinner, ignore the prep instructions, skip the flush, then assume something is wrong when the water sputters like a tiny sink dragon. That is why experience matters as much as instructions.
A common first-time experience with a PUR faucet filter goes like this: the old filter has been in service a little too long, the flow has slowed to a polite trickle, and the indicator light is no longer offering friendly reassurance. The user removes the unit, swaps the cartridge, turns the water on, and suddenly sees cloudy water. Panic arrives. Then relief follows once they learn that initial cloudiness is often just trapped air and loose carbon being flushed out during the first run. In other words, the filter is not broken. It is waking up.
Another frequent experience involves the faucet connection. Many users discover that the hardest part is not the cartridge itself, but making sure the unit is attached securely without overdoing it. Too loose, and it drips. Too tight, and removal next time becomes an arm workout. People who take an extra minute to align the attachment properly tend to have fewer leak issues and a much calmer evening.
Pitcher and dispenser owners often have a different learning curve. The filter replacement itself is usually quick, but the real challenge is making sure the new filter is fully seated. If it is not locked in correctly, water may seem to bypass the cartridge or filter too quickly. Some users think the new filter is defective when the actual problem is a slightly crooked installation. A firm push, correct twist, and quick recheck usually solve it.
There is also the memory problem. People genuinely forget when they changed the filter last. Two months becomes “recently,” three months becomes “probably this season,” and before long no one knows whether the cartridge is new or a veteran of several holidays. The households that have the best experience with PUR filters are usually the ones that use a phone reminder, sticky note, or calendar alert. It is not glamorous, but it works.
One more practical observation: replacing the filter on time often improves the overall habit of drinking more water at home. Fresh-tasting water makes people more likely to fill a glass, refill a bottle, and skip expensive bottled water runs. So while filter replacement is a small task, the payoff can be bigger than expected. Clean setup, correct cartridge, proper flush, and a date reminder usually make the whole process smooth. No drama, no mystery, and no suspicious sink-side monologue required.
Final Thoughts
Learning how to replace a PUR water filter is not complicated, but doing it the right way makes a real difference. Use the correct replacement filter, prep it as directed, install it carefully, flush it thoroughly, and keep track of the date. That simple routine helps your PUR system perform the way it is meant to and keeps your filtered water tasting fresh.
If you only remember one thing, make it this: do not skip the setup steps just because the job looks easy. Water filters are one of those products where a few extra minutes now can save you a lot of confusion later. Replace it right, flush it well, and enjoy the smug satisfaction of being the person in the house who actually reads instructions.


