Table of Contents >> Show >> Hide
- What You’ll Learn
- First: What Does “Splice Two Phone Wires Into One” Actually Mean?
- Safety & Sanity Checklist
- Tools & Materials
- Know Your Phone Wire Colors (Before You Create a “No Dial Tone” Museum Exhibit)
- Step-by-Step: How to Splice Two Phone Wires Into One
- Troubleshooting: When Your Phone Line Acts Like It’s Mad at You
- When to Call the Phone Company (or a Pro)
- FAQ
- Real-World Experiences: The Stuff Guides Forget to Mention (Extra )
- Conclusion
Splicing phone wires sounds like a job for someone named “Bud” who owns three headlamps and says things like,
“Don’t worry, I’ve been shocked way worse.” But if you can match colors, use the right connector, and
test your work, you can absolutely splice two phone wires into one clean, reliable connectionwithout turning your
dial tone into modern art.
This guide walks you through the safest, most dependable ways to splice a landline (RJ11/POTS) cablewhether you’re
repairing a cut line, extending a run to a new jack, or cleaning up a questionable “twist-and-pray” splice you found
in the crawlspace.
First: What Does “Splice Two Phone Wires Into One” Actually Mean?
People say “splice two phone wires into one” in a few different ways. Let’s translate it into normal-human:
Scenario A: You’re joining two cut ends of the same phone line
This is the classic repair: the cable got cut, chewed, stapled, yanked, or “mysteriously failed” right after a
landscaping project. You’re reconnecting the same pair(s) color-to-color so the circuit is continuous again.
Scenario B: You’re extending a phone line by joining two cable segments
You’ve got one cable that ends too soon and another that needs to continue the run. You splice the matching pair
so Line 1 keeps going where you want it.
Scenario C: You have two separate pairs but only need one active phone line
In multi-pair cable (quad, Cat3, Cat5/Cat5e), there may be extra pairs. You still only connect one pair for one
line (typically “Line 1”). You do not combine two different lines onto one pair like some kind of
electrical smoothie.
Important reality check: If you mean “combine two different phone numbers/lines into one,” that’s not a spliceit’s a switching/telecom service question. Physically tying two live lines together can cause noise, service issues, or damage. This article is about safely joining/repairing wiring for one line.
Safety & Sanity Checklist
Telephone wiring is “low voltage” compared to household power, but it’s not “zero consequence.” The DC line
voltage and the higher-voltage ring signal can surprise youespecially if your hands are sweaty or you’re
half-upsidedown in an attic thinking about your life choices.
- Work at the demarcation point if you can: Many homes have a network interface device (NID) where the phone company’s line meets your inside wiring. If you unplug/disconnect the customer side, you can make the inside wiring “dead” while you work.
- Avoid storms: Don’t work on phone lines during thunderstorms. Surges and lightning are not a personality trait.
- Use eye protection: Small copper conductors can snap and flick when stripped or pulled.
- Keep it in a box when appropriate: Splices should be protected from damage and moisture. If it’s in a wall/crawlspace, consider a small low-voltage junction box or splice enclosure.
If you’re not sure whether your line is old-school analog POTS, DSL, VoIP/ATA, or a building phone system,
the safe approach is the same: disconnect if possible, handle pairs carefully, and keep splices tidy to reduce
noise and future headaches.
Tools & Materials
You can splice phone wire with everything from purpose-built gel connectors to “whatever was in the junk drawer.”
One of those approaches stays working for years. The other becomes a future-you problem.
Best options (recommended)
- Gel-filled IDC/butt splice connectors (“jelly” connectors): Great for solid copper telephone conductors, fast, moisture-resistant, and no stripping needed in many cases.
- Low-voltage punchdown block or mini terminal block: Clean, serviceable, and ideal if you might revisit the splice later.
- Heat-shrink butt splices (for small-gauge conductors): Works well when properly crimped and sealedchoose the correct size.
Good options (situational)
- Solder + heat-shrink tubing: Strong and electrically solid, but only if done neatly and protected. Not always ideal in damp areas.
- RJ11 coupler + modular plugs: Works if both cable ends terminate cleanly into modular plugs (more common for patch cords than in-wall cable).
Tools that make life easier
- Small-gauge wire stripper (many phone conductors are 22–26 AWG)
- Flush cutters or snips
- Crimp tool/pliers (or the proper IDC crimp tool if you have it)
- Multimeter (optional) or a basic phone line tester
- Tone generator and probe (optional, helpful for mystery cables)
- Electrical tape and/or heat-shrink tubing for insulation and strain relief
Know Your Phone Wire Colors (Before You Create a “No Dial Tone” Museum Exhibit)
Phone wiring is usually a twisted pair (or multiple twisted pairs). One phone line needs one pair.
Your job is simple: tip-to-tip and ring-to-ring, using the same pair on both sides.
The hard part is not guessing wrong.
Common inside wiring: “quad” cable (older homes)
- Line 1: typically red + green
- Line 2: typically yellow + black
Structured cabling (Cat3/Cat5/Cat5e) used for phone
If your “phone wire” looks like network cable (4 twisted pairs), Line 1 is often run on the blue pair
(white/blue + blue/white). The key is consistency: use the same pair end-to-end and keep the twist as close to the
termination/splice as possible to reduce noise.
Pro tip: If you open a wall plate and see Cat5e punched down, don’t untwist the pairs into spaghetti. The twist is there to fight interference. Keep it tight and tidy.
Step-by-Step: How to Splice Two Phone Wires Into One
Below is a practical, field-tested process. The steps apply whether you’re repairing a cut cable or extending a
runjust choose the splice method that matches your tools and environment.
Step 1: Disconnect the line (when possible)
If you have access to the NID/demarc box, disconnect the customer-side plug so your inside wiring isn’t carrying
voltage. If you can’t, proceed carefully and avoid touching bare conductors together.
Step 2: Confirm which pair is your active line
If the cable has multiple pairs, identify the one carrying dial tone. Quick methods:
- Plug in a known-working phone at the nearest jack and note which pair colors are connected.
- Use a basic phone line tester or a multimeter (carefully) to confirm you’re on the right pair.
- If you’re tracing a mystery cable, a tone generator and probe can save hours of “guess and regret.”
Step 3: Cut back to clean copper
If the cable is chewed/corroded, trim back until the copper looks bright and the insulation is intact.
A splice is only as good as the conductor you’re trusting.
Step 4: Prepare the cable ends
- Strip the outer jacket back about 1–2 inches (enough to work comfortably).
- Separate only the pair you need; leave other pairs twisted and untouched.
- If using a method that requires stripping individual conductors, remove only about 1/4 inch of insulation (or as specified by your connector).
Step 5: Choose your splice method
Method A (Best for most DIYers): Gel-filled IDC/butt splice connectors
These are popular for phone wiring because they’re fast, compact, and often rated for damp locations.
Many styles allow you to insert wires without stripping.
- Match the same color conductor from Cable A to the same color from Cable B (example: red-to-red, green-to-green).
- Insert the two conductors fully into the connector ports until they bottom out.
- Use pliers (or the proper crimp tool) to press the cap down firmly until it seats.
- Gently tug each wire to confirm it’s locked in.
Repeat for the second conductor in the pair. When done correctly, this method is clean and reliably resists moisture.
Method B (Strong and tidy): Punchdown/terminal block splice
If you want a splice you can service laterespecially inside a structured wiring paneluse a small terminal block
or punchdown block.
- Mount the block in a low-voltage box or enclosure.
- Terminate Cable A pair on one side and Cable B pair on the other, keeping tip/ring consistent.
- Label the pair (future-you will be delighted).
Method C (Classic): Solder + heat-shrink tubing
Soldering can be excellent for a repair in a dry, protected areaif you do it neatly.
- Slide heat-shrink tubing onto one side before soldering (this is the step everyone forgets once).
- Twist matching conductors together (keep the twist compact).
- Solder the joint quicklyavoid melting insulation back too far.
- Center the heat-shrink over the joint and shrink it evenly.
- Optionally add a larger piece of heat-shrink over both splices for strain relief.
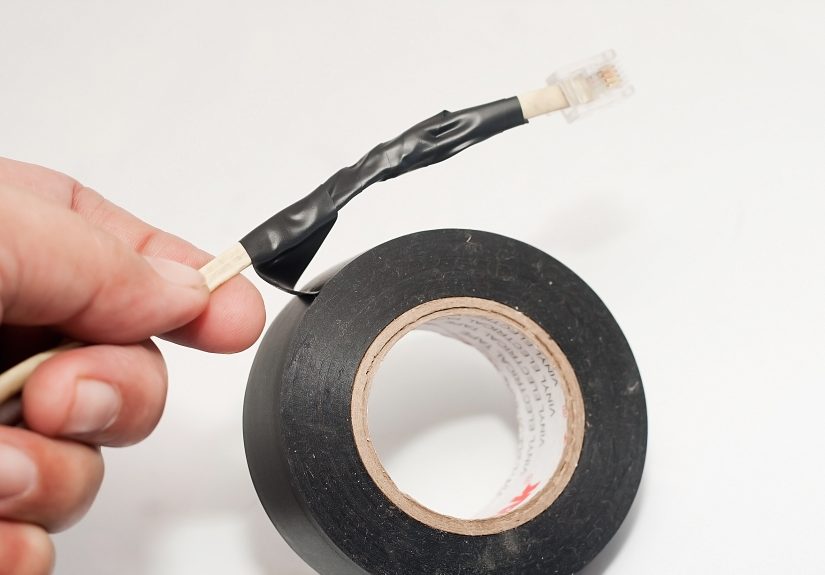
Method D (Not recommended, but common): Twist + tape
This is the “it’s Sunday night and I need dial tone” method. It can work temporarily, but it’s more vulnerable to
oxidation, movement, and noise. If you do this in an emergency, plan to redo it properly.
Step 6: Re-bundle and protect the splice
- Keep the pair twist as close to the splice as possible.
- Provide strain relief: don’t let the splice hang by the conductors.
- If the splice is in a damp area, use gel connectors or a sealed splice enclosure.
- Keep the splice away from AC power cables to reduce interference (especially if DSL is involved).
Step 7: Restore service and test
Reconnect the line at the demarc/NID (if you disconnected it). Then test:
- Dial tone: Plug in a phone and confirm you hear tone.
- Call test: Place a call out and call the number from a mobile phone to verify ringing.
- If DSL shares the line: Check modem sync stability and speed. A sloppy splice can add noise.
Troubleshooting: When Your Phone Line Acts Like It’s Mad at You
No dial tone
- Wrong pair spliced (common in multi-pair cable).
- One conductor didn’t seat fully in the connector.
- Conductors broke under insulation due to over-bending or old brittle wire.
- Service issue upstream (test at the demarc to isolate).
Dial tone but calls drop or audio is noisy
- Untwisted too much of the pair near the splice (increased susceptibility to interference).
- Splice is loose or oxidizing (especially twist-and-tape).
- Splice is near electrical wiring, a transformer, or a fluorescent/LED driver.
Phone works, but DSL is flaky
- Excessive untwist or messy splice can degrade high-frequency DSL signals.
- Moisture in an outdoor splice can introduce intermittent noise.
- Filters/splitters may be missing or miswired at jacks.
Quick isolation trick: If you can access the demarc, test there first. If service is good at the demarc but bad inside, the problem is in your inside wiring/splice.
When to Call the Phone Company (or a Pro)
- The damaged cable is on the provider side of the demarcation point.
- The drop line is buried/aerial and you’re not equipped to repair it safely or to code.
- You suspect lightning/surge damage (often more than a simple splice).
- The building uses a PBX or special phone system and you’re unsure of wiring requirements.
A neat DIY splice is great. An accidental service outage for the whole building? Less great.
FAQ
Can I use wire nuts for phone wire?
You can on thicker low-voltage conductors, but many phone conductors are small and don’t bite well in a
wire nut. For typical telephone cable, gel-filled IDC connectors or a terminal block is more reliable and compact.
Does phone line polarity matter (tip/ring reversed)?
Most modern phones tolerate reversed polarity, but some equipment (certain older devices, alarms, niche modems)
may behave better with correct polarity. Best practice is still to match color-to-color and keep tip/ring consistent.
Can I splice in the wall?
Low-voltage rules vary by location, but the smart approach is: keep splices accessible and protected. Use a low-voltage
old-work box with a blank cover if you need an in-wall splice point. Hidden splices become “archaeology projects.”
How many splices are too many?
Fewer is better. Each splice is a potential point of failure and can add noise. If you’re doing repeated repairs,
consider replacing the run or installing a proper junction/terminal point.
Real-World Experiences: The Stuff Guides Forget to Mention (Extra )
The first time I spliced a phone line, I thought, “Two wires. How hard can it be?” Ten minutes later I was holding
a flashlight in my mouth, wearing a spiderweb scarf, and listening to a dial tone that sounded like a distant
spaceship landing. Here are the practical lessons that don’t always make it into the neat diagrams.
Lesson 1: The hardest part is identifying the correct pairespecially in multi-pair cable.
If you’re in a newer home where Cat5/Cat5e is used for phone, you might assume blue/white is Line 1 (often true),
but you shouldn’t bet your Saturday on it. I’ve seen contractors use orange because “it was closest,” and I’ve seen
a whole bundle punched down in an order that made perfect sense… to a person who no longer works there. The fix is
simple: verify at the jack or test at the demarc, then splice with confidence instead of vibes.
Lesson 2: Neatness matters more than force. People love to crank down on tiny conductors like
they’re tightening lug nuts. With phone wire, over-bending or yanking can break the copper under the insulation,
leaving you with an invisible failure that behaves like a ghostworking fine until you move the cable. Make your
splice, tug-test gently, and secure it so nothing is pulling on the joint.
Lesson 3: Moisture is the silent dial-tone assassin. Outdoor splices and damp crawlspaces will
punish “twist-and-tape” repairs. They might work for a week, then slowly oxidize into crackles, drops, and mystery
issues that only happen when it rains (because of course they do). Gel-filled connectors or a sealed splice
enclosure feel like overkill until you’ve re-done the same splice three times and started naming the puddle.
Lesson 4: Keep the twist tightespecially if DSL shares the line. Voice calls might forgive a
sloppy splice, but DSL is a pickier roommate. If you untwist several inches and lay conductors side-by-side like
noodles, you can invite interference and reflections that show up as reduced speed or unstable sync. You don’t need
lab perfectionjust keep untwist minimal and joints compact.
Lesson 5: Labeling is not “extra.” It’s kindness. A tiny tag that says “Line 1 (red/green)” or
“Blue pair to office jack” can save future-you an hour of tracing. I once opened a panel where every splice was
identical and unlabeled. It felt like being handed a bowl of spaghetti and asked which noodle leads to the kitchen.
Lesson 6: Test twiceonce before you close things up. It’s tempting to shove the splice back into
the wall and declare victory. Instead, do a dial tone check, a call test, and (if applicable) a quick DSL check.
Catching a loose conductor now beats crawling back later because someone “only sometimes” gets calls.
Conclusion
Splicing two phone wires into one solid connection isn’t complicatedit’s just picky. Match the correct pair,
keep the twist tight, choose a connector that fits the environment (especially moisture), and test before you walk
away. Do it right once, and your phone line will stop acting like it has stage fright every time it needs to ring.


