Table of Contents >> Show >> Hide
- Step 1: Install Visual Studio 2022 with the Right Workload
- Step 2: Create a New Project That Makes Sense
- Step 3: Enable MASM Build Customizations
- Step 4: Add an Assembly Source File
- Step 5: Set the File’s Item Type to Microsoft Macro Assembler
- Step 6: Choose x86 or x64 Before You Write the Wrong Code
- Step 7: Build a Tiny Test Program First
- Step 8: Build, Run, and Debug the Project
- Step 9: Solve the Most Common MASM Problems in Visual Studio 2022
- Best Practices for Using MASM in Visual Studio 2022
- Real-World Experience: What Using MASM in Visual Studio 2022 Actually Feels Like
- Final Thoughts
Note: This is body-only HTML, ready to copy and publish. Unnecessary citation artifacts have been removed.
If you want to write assembly language in a modern IDE without feeling like you time-traveled into a beige computer lab, MASM in Visual Studio 2022 is still a solid setup. The trick is knowing which boxes to check, which menus to open, and which tiny project setting is quietly ruining your day. Once you get those details right, Microsoft Macro Assembler works surprisingly well inside Visual Studio, especially for x86 and x64 experiments, systems programming practice, and mixed C++ and assembly projects.
This guide walks through exactly how to use MASM in Visual Studio 2022 in nine practical steps. It also covers the most common mistakes, the difference between x86 and x64 MASM projects, how to debug your code without staring at registers like they insulted your family, and a simple example that proves your setup actually works.
Whether you are a student, hobbyist, reverse engineering beginner, or low-level programming enthusiast, this tutorial will help you build a clean MASM workflow in Visual Studio 2022.
Step 1: Install Visual Studio 2022 with the Right Workload
Before you write a single instruction, make sure Visual Studio 2022 includes the Desktop development with C++ workload. That matters because MASM support comes through the Visual C++ toolchain. In plain English: if you skip the C++ workload, MASM will not magically appear later like a helpful wizard.
Open the Visual Studio Installer, choose Modify on your Visual Studio 2022 installation, and verify that Desktop development with C++ is selected. This installs the MSVC tools that MASM depends on. It also gives you the project templates and build tools you will use for assembly language projects.
If you already installed Visual Studio and do not see C++ project templates, that is usually the problem. It is not a mysterious assembly curse. It is just an unchecked workload.
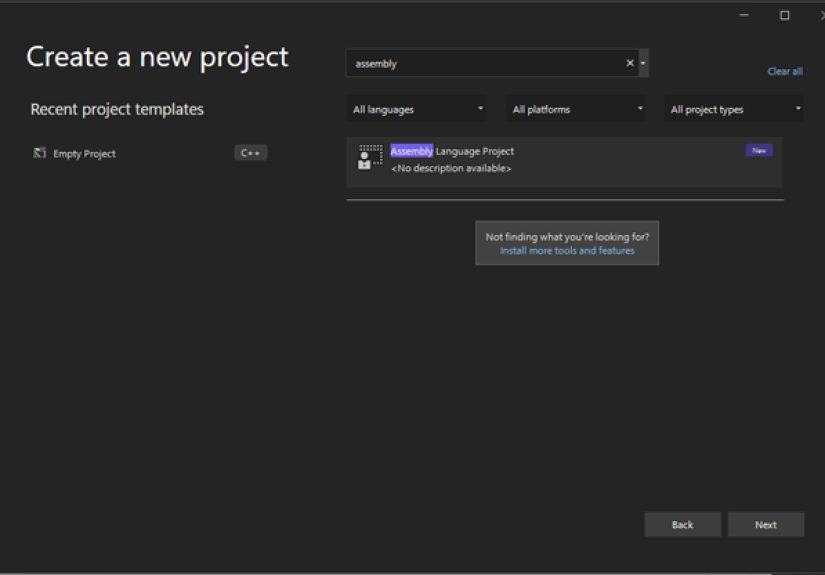
Step 2: Create a New Project That Makes Sense
The easiest way to use MASM in Visual Studio 2022 is to create either an Empty Project or a Console App in C++. Both can work, but they serve slightly different goals.
- Empty Project: best if you want a cleaner setup and plan to control the files yourself.
- Console App: best if you want a fast test harness, especially when calling assembly code from C++.
For most beginners, a Console App is the friendlier option. It gives you a ready-made executable target and an easy way to test MASM routines from a normal main() function. That means less linker drama and more actual learning.
To create one, go to File > New > Project, choose Console App for C++, name the project, and click Create. If you want a bare-bones workspace, choose Empty Project instead.
Step 3: Enable MASM Build Customizations
This is the step many people miss, and then they spend 45 minutes glaring at a perfectly innocent .asm file.
In Solution Explorer, select your project, then open Project > Build Customizations. In the dialog box, check masm(.targets, .props) and click OK.
That setting tells Visual Studio to include MASM in the project’s build process. Without it, your assembly file is basically treated like a guest who was never added to the invite list.
If you prefer context menus, some Visual Studio layouts also expose this under project build dependency options. Either way, the important part is that MASM build customizations must be enabled.
Step 4: Add an Assembly Source File
Now add the actual assembly file. Right-click the project, choose Add > New Item, and create a file such as main.asm or addtwo.asm.
Use clear file names. A project full of files named test.asm, test2.asm, and final_final_really_final.asm is a sign that chaos has entered the building.
If you already created an assembly file outside Visual Studio, you can choose Add > Existing Item instead. The file just needs the .asm extension and must be included in the project.
Step 5: Set the File’s Item Type to Microsoft Macro Assembler
This setting is what makes Visual Studio treat your .asm file as MASM input instead of random text with delusions of grandeur.
Right-click the .asm file, choose Properties, and set Item Type to Microsoft Macro Assembler. Then click Apply.
Once this is done, the file becomes part of the proper build pipeline. If this option is missing, it usually means one of two things:
- You did not enable MASM build customizations in the project.
- The project is not using the correct C++ toolchain setup.
That one dropdown menu solves an absurd number of MASM build problems.
Step 6: Choose x86 or x64 Before You Write the Wrong Code
This step saves you from one of the oldest assembly headaches: writing 32-bit code for a 64-bit build, or 64-bit code for a 32-bit build, then wondering why the assembler is suddenly offended.
At the top of Visual Studio, choose the target platform for your project. Common options are x86 and x64. Your MASM syntax and conventions need to match that choice.
For x64 projects
If your platform target is x64, Visual Studio uses the 64-bit MASM toolchain. This is the modern default for many systems projects. In x64 assembly, remember these key ideas:
.MODELis not used for x64 MASM.- Inline assembly is not supported for x64 MSVC builds, so separate
.asmfiles are the normal approach. - Calling conventions are different from x86, and register usage matters a lot.
For x86 projects
If your platform target is x86, older MASM patterns like .model flat, c or .model flat, stdcall still show up often. You will also see more stack-based argument handling and older Win32 examples online.
Neither platform is “better” for learning. x86 is often easier when you are studying classic tutorials. x64 is better when you want to work with the style used by modern Visual Studio projects.
Step 7: Build a Tiny Test Program First
Do not start with a giant assembly project that parses files, draws windows, and calculates moon phases. Start tiny. The goal is to prove that MASM, the linker, and Visual Studio 2022 all agree to cooperate.
A simple x64 example is to create a C++ file that calls an assembly function.
C++ file example
ASM file example for x64
If everything is configured correctly, building and running the project should print Result: 42. That tells you several important things at once:
- MASM is assembling the file correctly.
- Visual Studio is linking the object file into the project.
- Your x64 calling convention assumptions are working.
That is a small win, but a real one. In assembly language, tiny victories are how you stay emotionally hydrated.
Step 8: Build, Run, and Debug the Project
Once your sample builds, press Ctrl + Shift + B to build the solution. Use F5 to start debugging or Ctrl + F5 to run without debugging.
If your console window opens and closes too quickly, run without debugging so you can actually see the output. If the project behaves like a GUI app and no console appears, check the project’s subsystem under Configuration Properties > Linker > System and make sure it is set correctly for a console program.
For low-level debugging, Visual Studio gives you tools that are surprisingly useful:
- Disassembly window: great for stepping through instructions.
- Breakpoints: set them in source or disassembly view.
- Registers and memory windows: useful when your code is technically running but spiritually incorrect.
You can open the Disassembly window from Debug > Windows > Disassembly. This is especially handy when you want to verify register flow, procedure entry, return behavior, or whether your “tiny optimization” just launched your stack frame into orbit.
Step 9: Solve the Most Common MASM Problems in Visual Studio 2022
Most MASM errors in Visual Studio 2022 come from configuration mismatches, not from the assembler being evil. Here are the usual suspects.
The MASM option does not appear
Make sure the C++ workload is installed and MASM build customizations are enabled for the project.
The .asm file is ignored during build
Check the file’s Item Type. It should be Microsoft Macro Assembler.
x64 code fails with x86-style directives
If you are targeting x64, do not use .MODEL the way you would in 32-bit MASM examples. Many older tutorials are x86-specific, even when they pretend to be timeless wisdom.
Unresolved external symbol errors
This usually means your C++ declaration and assembly symbol name do not match, or your calling convention assumptions are off. Keep names simple, use extern "C" in C++ when needed, and test with a small function first.
The program builds but crashes immediately
Check your registers, stack alignment, return paths, and calling convention details. In mixed-language projects, one wrong assumption is enough to wreck the entire handoff between C++ and assembly.
You want a pure assembly executable
That is possible, but it usually requires more careful control of entry points, subsystem settings, and linking behavior. If you are just getting started, use C++ as the launcher and MASM as the function implementation. It is easier, cleaner, and much less likely to produce cryptic linker errors before lunch.
Best Practices for Using MASM in Visual Studio 2022
Once your setup works, these habits will make your life easier:
- Start with one assembly function, not a whole application.
- Keep separate notes on x86 and x64 syntax differences.
- Name procedures clearly and keep calling conventions consistent.
- Use comments generously, because six days from now even you will not remember why that register swap felt “obvious.”
- Let Visual Studio manage the build whenever possible instead of stitching together manual commands too early.
- Use the debugger often. Assembly punishes guessing.
Also, resist the urge to copy random internet code from 2008 and assume it belongs in a Visual Studio 2022 x64 project. Some old MASM snippets are excellent. Others are historical artifacts wearing a fake mustache.
Real-World Experience: What Using MASM in Visual Studio 2022 Actually Feels Like
The first real experience most people have with MASM in Visual Studio 2022 is confusion, followed by optimism, followed by one build error so strange it feels personally targeted. That is normal. In fact, it is almost part of the tradition. The good news is that once the initial setup works, the workflow starts to feel much more predictable.
A typical beginner experience goes like this: Visual Studio installs fine, the project opens, the .asm file gets added, and then nothing happens because MASM build customizations were never enabled. After that comes the second surprise: the file exists, but Visual Studio still is not assembling it because the item type was never changed to Microsoft Macro Assembler. This is the moment many developers learn that assembly language is not difficult only because of registers and opcodes. It is also difficult because the setup is unforgiving.
Once that hurdle is cleared, things get better quickly. The first successful build is weirdly satisfying. You write a tiny procedure, pass in two numbers, get a result back, and suddenly the whole environment stops feeling ancient and starts feeling powerful. Visual Studio becomes more than a text editor. It becomes a lab for experimenting with calling conventions, stack frames, registers, and low-level program flow.
Another common experience is discovering how different x86 and x64 really are. A lot of online assembly examples were written for older 32-bit systems, so beginners often paste in code with .model flat, stdcall and expect it to work everywhere. Then Visual Studio 2022 politely refuses. That frustration is actually useful. It forces you to understand that modern x64 MASM is not just “x86 but bigger.” The rules change, the register usage changes, and your mental model has to grow up a little.
Debugging is also a memorable part of the MASM experience. At first, the debugger feels intimidating because every mistake looks dramatic. A wrong register value can wreck a function call instantly. But after some practice, Visual Studio’s Disassembly window, breakpoints, and register views become incredibly helpful. You stop guessing and start observing. That shift is where real progress happens.
In longer-term use, many programmers find that the best experience comes from mixing C++ and MASM instead of trying to do everything in pure assembly. Let C++ handle the boring scaffolding, input, and output. Let MASM handle the parts where you truly want control. That balance gives you the benefits of assembly language without turning every assignment into a survival challenge.
So yes, using MASM in Visual Studio 2022 can be frustrating at the beginning. But once the project is configured correctly, it becomes a rewarding setup for learning how software works closer to the metal. And honestly, when your assembly routine finally returns the right value and the debugger confirms every instruction did exactly what you meant, it feels a little like winning a small, nerdy championship.
Final Thoughts
If you want to learn low-level programming, practice Windows assembly language, or connect handcrafted routines to a modern C++ project, MASM in Visual Studio 2022 is still an excellent toolchain. The key is to approach it methodically: install the right workload, enable MASM build customizations, add a proper .asm file, set its item type, choose the correct platform, and test with a tiny working example first.
After that, the learning curve becomes much more manageable. You will still hit errors, of course. This is assembly language. But at least they will be your errors, which is progress.


