Table of Contents >> Show >> Hide
- Table of Contents
- Why Instagram (and Why a Stranger)?
- My Ground Rules: Fun, Not Fakery
- How the Photoshop Collaboration Worked
- The Results: 18 Wildlife Photo Edits (With Commentary)
- Pic 1: “The Owl With a Tiny Hat”
- Pic 2: “Bear Selfie (From a Very Safe Distance, I Swear)”
- Pic 3: “Fox In a Coffee Shop”
- Pic 4: “Hummingbird Drone Mode”
- Pic 5: “Alligator With Sunglasses”
- Pic 6: “Deer Crowned by the Forest”
- Pic 7: “Raccoon Astronaut”
- Pic 8: “Pelican Delivery Service”
- Pic 9: “Wolf Band Poster”
- Pic 10: “Turtle With a Surfboard”
- Pic 11: “Bison in a Snow Globe”
- Pic 12: “Sea Otter Book Club”
- Pic 13: “Hawk Superhero Cape”
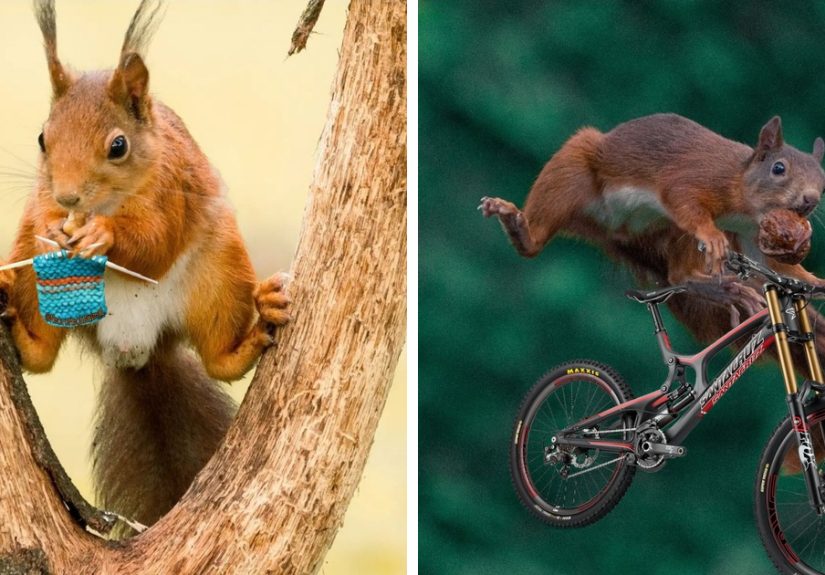
- Pic 14: “Squirrel With a Tiny Briefcase”
- Pic 15: “Moose With Neon Sign Vibes”
- Pic 16: “Coyote Dating Profile Photo”
- Pic 17: “Butterfly Stained Glass”
- Pic 18: “The Honest Edit” (A Reality-Preserving Version)
- Ethics: When “Cool Edit” Turns Into “Misleading”
- Practical Tips: Hiring an Instagram Photoshop Editor
- Bonus: of Real-World Takeaways From the Experiment
- Conclusion
I love wildlife photography for the same reason I love diner coffee: it’s best when it’s honest, a little messy, and
somehow still magical. But after years of shooting birds, mammals, and “is that a log or an alligator?” moments, I
had a question I couldn’t shake: what happens when you hand your nature shots to a stranger on Instagram with strong
Photoshop skills and even stronger chaos energy?
This is a story about collaboration, creativity, and the delicate art of not turning a perfectly innocent osprey into
a meme without telling people it’s a meme. You’ll get the 18 edited “pics” (described in detail), what I learned about
ethical editing, how to commission edits without awkward misunderstandings, and why a raccoon in a spacesuit is somehow
both ridiculous and… emotionally moving?
Why Instagram (and Why a Stranger)?
Instagram is basically a global talent show where the prize is either a paid gig or a compliment from a golden retriever
account. It’s full of photographers, retouchers, digital artists, and people who can turn a cloudy sky into a cinematic
masterpiece in roughly the time it takes me to lose my lens cap.
I’d seen accounts dedicated to “Photoshop requests,” surreal wildlife composites, and tasteful edits that look like they
were shot in-camera. So I tried the modern approach: I messaged a creator whose work consistently made me mutter,
“How is that even real?” and asked if they’d remix a handful of my wildlife photos for a mini “before/after” experiment.
The goal wasn’t to pretend the edits were documentary wildlife photography. The goal was to explore what happens when
you combine real nature moments with playful, transparent digital creativitylike a art class field trip that accidentally
becomes stand-up comedy.
My Ground Rules: Fun, Not Fakery
Before we get to the 18 edits, here’s the policy I usedbecause wildlife photos sit at a weird intersection of art,
truth, and “please don’t stress out the animals for content.”
Rule #1: The animal comes first
Good wildlife photos should never require you to crowd, bait, or disturb animals. I shot everything from a respectful
distance using a long lens, and I never used bait, call playback, or anything that could pressure the subject.
If your subject changes behavior because you’re there, you’re too closeno edit can fix that.
Rule #2: Edits are clearly “art”
The edits you’re about to read are intentionally obvious, stylized, or presented as digital composites. In other words:
no one should look at “owl wearing a tiny hat” and walk away believing owls are launching fashion lines.
Rule #3: One “truthful” edit included
Not every edit is a fever dream. I asked for one realistic versionbasic tonal work, color, cleanupbecause the contrast
is the point: small edits can preserve reality; big edits can become illustration. Both are valid if you label them honestly.
How the Photoshop Collaboration Worked
The process was surprisingly smoothmostly because we treated it like a real mini-project, not a “hey bestie fix this”
situation. Here’s what we agreed on:
- Files: High-res JPEGs (plus RAW references when needed for color and detail).
- Deliverables: 18 edited versions, optimized for social sharing and also saved at full resolution.
- Style mix: 12 playful/surreal edits, 5 cinematic “movie poster” edits, 1 naturalistic edit.
- Transparency: I’d describe these as “Photoshopped edits” everywhere they appeared.
- Credit: We agreed on a credit line and whether the editor could post the before/after.
The big lesson: even a casual Instagram collaboration works better when you clarify expectations up frontespecially
around usage rights, credit, and whether the editor can repost your original photos.
The Results: 18 Wildlife Photo Edits (With Commentary)
Since I can’t embed the actual images here, I’m giving you each “pic” as a vivid, practical breakdown:
what the original looked like, what I asked for, what came back, and what you can learn from it.
Pic 1: “The Owl With a Tiny Hat”
Original: A barred owl on a branch, soft morning light, very dignified.
My request: “Give them a tiny hat. Not a big hat. A tiny hat. Like they’re attending a formal worm gala.”
Result: A perfectly scaled miniature top hat, matched to the direction of the light, with a subtle shadow
on the owl’s head feathers. The edit looked believable for about two seconds, until your brain remembered owls do not,
in fact, RSVP.
Why it works: Realistic shadows + correct perspective sells even the dumbest idea. Photoshop wildlife photos live or die on lighting.
Pic 2: “Bear Selfie (From a Very Safe Distance, I Swear)”
Original: A black bear crossing a meadow, shot far away with a telephoto lens.
My request: “Make it look like the bear is taking a selfie, but keep the vibe respectful.”
Result: The editor added a comically oversized phone in the foreground (blurred with realistic depth-of-field)
and angled it so the bear looked like it was mid-influencer moment. The background retained natural grain and haze.
Why it works: Matching depth-of-field and film grain prevents pasted-on “sticker syndrome.”
Pic 3: “Fox In a Coffee Shop”
Original: A red fox trotting along a snowy edge of woods.
My request: “Put the fox in a cozy coffee shop window scene like it’s judging my life choices.”
Result: A warm, indoor cafe interior composited behind the fox, complete with window reflections and a
gentle orange glow on the fur edges. The fox became a tiny manager of vibes.
What to notice: Color temperature shifts are everything: cool snow + warm interior = instant story.
Pic 4: “Hummingbird Drone Mode”
Original: A hummingbird hovering near flowers, wings blurred.
My request: “Make it a futuristic drone, but keep the wings blur.”
Result: The body became sleek metallic plating with tiny LEDs, while the wings kept motion blur so the
physics still felt right. It looked like the world’s smallest sci-fi helicopter.
Why it works: The editor respected what made the original believable: motion and anatomy cues.
Pic 5: “Alligator With Sunglasses”
Original: An alligator resting near the waterline, eyes barely above the surface.
My request: “Sunglasses. But make them the kind that says ‘I have a playlist.’”
Result: Reflective aviators, slightly fogged, with tiny water droplets. The reflections matched the sky.
I laughed, then immediately respected the alligator more.
Editing note: Reflections are the fastest way to spot a fakeso when they’re right, your brain relaxes.
Pic 6: “Deer Crowned by the Forest”
Original: A white-tailed deer paused in dappled shade.
My request: “Make a crown out of leaves like nature itself elected this deer mayor.”
Result: A leafy crown with subtle translucency, integrated into the highlights on the deer’s fur.
It stayed whimsical without turning into fantasy overload.
Why it matters: “Less” often reads more premium, even in surreal edits.
Pic 7: “Raccoon Astronaut”
Original: A raccoon at dusk near a tree line, eyes glowing slightly in the low light.
My request: “Astronaut suit. But keep the raccoon’s facial expression. That’s the whole point.”
Result: A retro space helmet with soft reflections and a suit collar. The raccoon’s face stayed sharp,
because comedy lives in expressions.
What it teaches: Preserve the emotional anchor (eyes/face) and you can go wild everywhere else.
Pic 8: “Pelican Delivery Service”
Original: A pelican flying over water, wings stretched wide.
My request: “Make it look like it’s delivering a tiny package. Like ‘Pelican Prime.’”
Result: A miniature parcel dangling with realistic motion blur and wind angle. The gag was silly, but
the physics sold it.
Technical win: Motion blur direction matched the bird’s flight path, so it felt “caught,” not “added.”
Pic 9: “Wolf Band Poster”
Original: A gray wolf in snow, looking straight into the lens.
My request: “Turn this into an album cover. The wolf is the lead singer.”
Result: Dramatic typography, subtle vignette, and a cinematic sky swap that still matched the scene’s
cold lighting. It looked like a real posterminus the fact that wolves don’t sign merch.
Reality check: Sky swaps are common in art, but they should be disclosed if the image claims to be documentary.
Pic 10: “Turtle With a Surfboard”
Original: A turtle on a log, sunning.
My request: “Surfboard. Chill energy. No chaos.”
Result: A tiny surfboard leaned against the log, with soft shadows and sun highlights. It felt like a
children’s book illustration in the best way.
Why it works: The board wasn’t shoved into the scene; it was staged like a real prop would be.
Pic 11: “Bison in a Snow Globe”
Original: A bison walking through falling snow.
My request: “Snow globe effect. Make it cozy, not cheesy.”
Result: The editor built a glass edge with subtle distortion and placed the bison inside a softly lit
globe base. Snow was intensified, but kept consistent with the original direction.
What I learned: When you add effects, you have to unify them with the photo’s existing weather and light.
Pic 12: “Sea Otter Book Club”
Original: A sea otter floating on its back.
My request: “Give it a tiny book. Like it’s taking a personal day.”
Result: A small paperback balanced on the otter’s paws, with believable wet highlights and slight warping
from water reflection. The otter became a self-care icon.
Best detail: Water reflections and specular highlights were consistentsmall detail, huge believability.
Pic 13: “Hawk Superhero Cape”
Original: A hawk perched, wind ruffling feathers.
My request: “Cape. Dramatic. But keep it subtle enough that it could pass as ‘fashion.’”
Result: A fabric cape with realistic wind direction and a soft shadow on the bird’s back.
It was equal parts heroic and unnecessarily stylish.
Editing takeaway: Directional wind cues (feathers, fabric, foliage) must agree or your scene collapses.
Pic 14: “Squirrel With a Tiny Briefcase”
Original: A squirrel mid-stride on a fence.
My request: “Make it look like it’s late for a meeting.”
Result: A tiny briefcase with motion blur and a slight swing, plus a faint shadow on the fence.
The squirrel looked like it pays taxes and hates Mondays.
Comedy note: Anthropomorphism lands better when the prop obeys the photo’s motion and weight.
Pic 15: “Moose With Neon Sign Vibes”
Original: A moose in fog, moody background.
My request: “Add a neon ‘OPEN’ sign somewhere. Make it cinematic, like a mystery thriller.”
Result: A subtle neon sign glow that actually influenced nearby fog (this is the hard part). The editor
added just enough light spill that it felt integrated, not pasted.
Why it’s impressive: Light spill onto fog is a realism flex. If it’s missing, your eye notices.
Pic 16: “Coyote Dating Profile Photo”
Original: A coyote standing alert, golden-hour rim light.
My request: “Turn this into a dating profile screenshot. Make it playful, not mean.”
Result: A faux profile frame with tasteful typography and a joking bio line (“Enjoys long walks and
minding his business”). The coyote remained untouched; the humor lived in the layout.
Lesson: Sometimes the best “edit” is design around the photo, not manipulation inside it.
Pic 17: “Butterfly Stained Glass”
Original: A butterfly with strong wing pattern detail.
My request: “Make it look like stained glass without losing wing structure.”
Result: The wings became segmented panes with subtle lead lines and internal glow. It kept the original
pattern as a blueprint, which made it feel intentional rather than random.
Art tip: The best transformations respect the underlying structureyour photo becomes the sketch.
Pic 18: “The Honest Edit” (A Reality-Preserving Version)
Original: A heron at the water’s edge, great pose, messy background twigs.
My request: “No fantasy. Just clean it up like you would for a natural history print.”
Result: Subtle exposure and contrast balancing, gentle color correction, and minor cleanup that didn’t
change the story of the scene. No animal moved. Nothing was added. The photo looked like the moment I actually witnessed
just with fewer distractions.
Why it matters: This is the lane you want for documentary-style wildlife photography: polish without deception.
Ethics: When “Cool Edit” Turns Into “Misleading”
Editing is normal. Cropping, exposure, white balance, and basic cleanup are part of photography. The line gets fuzzy
when edits change the meaning of the imagelike adding animals, removing elements, or constructing a scene that never
happened. Many journalism ethics frameworks treat misleading manipulation as a major problem unless it’s clearly labeled
as illustration, and major photo contests often separate “altered” categories from “straight” categories.
Wildlife adds a second ethical layer: how the image was captured. The best rule is simple: the animal’s welfare and
natural behavior matter more than your content calendar. Keep distance, avoid baiting, and don’t pressure wildlife for a shot.
If you want a closer look, use a longer lensnot your feet.
My approach for these edits: treat them like art, label them like art, and never present a composite as a real wildlife
encounter. If you do surreal Photoshop wildlife photos, the ethical move is transparency. Your audience can handle
creativity. What they can’t handle is being unknowingly misled.
A modern option: add “nutrition labels” to your images
If you want an extra layer of transparency, tools like Content Credentials (built on industry provenance standards)
can attach verifiable metadata about how an image was made or edited. It’s not magic and it isn’t universal everywhere,
but it’s a real attempt to make “what happened here?” easier to answerespecially in a world where AI and heavy editing
are increasingly common.
Practical Tips: Hiring an Instagram Photoshop Editor
1) Ask for a tiny portfolio of similar work
If you want composites, ask for composites. If you want realistic cleanup, ask for realistic cleanup. “Good at Photoshop”
can mean anything from “subtle color grading” to “I replaced the moon with a sandwich.”
2) Define the deliverables in one paragraph
- How many edits?
- What resolution and file type (JPEG, PNG, layered PSD)?
- Any deadlines?
- Any must-keep elements (eyes sharp, background untouched, etc.)?
3) Agree on usage rights and credit
Even friendly collaborations can get weird if nobody talks about reposting, commercial usage, or “work for hire” language.
Decide whether the editor can post the before/after, whether they can use it in a portfolio, and what credit line you’ll use.
4) Keep a “truth label” for your audience
If the edit is a composite or significantly altered, say so. A simple caption like “Photoshopped edit / digital composite”
preserves trust and keeps you out of accidental misinformation territory.
Bonus: of Real-World Takeaways From the Experiment
The funniest surprise wasn’t that the edits were cleverit was how much they taught me about what makes an image feel
“real,” even when it’s obviously not. The Instagram editor didn’t just slap props onto animals; they rebuilt the logic of
light, depth, and texture so my brain would accept the new story. And once you notice that, you start seeing photography
differently.
For example, I used to think a convincing composite was mostly about cutting clean edges. That’s beginner thinking.
The real magic is environmental agreement: the shadow direction, the softness of the light, the haze in the distance,
the grain pattern, and the blur falloff from foreground to background. When those match, your eyes stop arguing.
That’s why the neon sign in the fog “worked” and why a badly matched sky swap screams “clipboard.”
The collaboration also changed how I think about authorship. A wildlife photo starts as a moment I captured, but the
edited version becomes a shared creation. That’s not just sentimental; it’s practical. If you plan to publish edits,
sell prints, or license work, you need clarity on what you’re allowed to do, what the editor is allowed to do, and how
credit will be handled. Even if you never touch lawyers, a short written agreement prevents the classic social media
misunderstanding: “I thought you meant I could post the RAWs.”
Ethically, the biggest takeaway is that intent isn’t enoughcontext matters. If I post an altered wildlife image without
a label, somebody will inevitably take it literally, repost it, and suddenly we’re all arguing about whether coyotes are
joining dating apps. I learned to treat transparency as part of the art. A clear caption doesn’t ruin the joke; it makes
the joke safer and smarter.
Finally, it reminded me why I shoot wildlife in the first place. Even the goofiest edits worked best when the original
moment was strong: a clean pose, expressive eyes, good light, and respectful distance. The edit didn’t replace the photo;
it amplified something already there. So if you’re tempted by Photoshop wildlife photos, start by making sure your
originals are solid. Composition, patience, and animal welfare do most of the heavy lifting. Photoshop is the seasoning
not the meal.
And yes, I now believe an owl could absolutely pull off a tiny hat. Not in real life. But emotionally? One hundred percent.
Conclusion
Asking an Instagram editor to remix my wildlife photos was equal parts creative exercise and trust-building workshop.
The 18 results were funny, cinematic, and occasionally suspiciously believablewhich is exactly why labeling and ethics
matter. If you want to experiment, do it: collaborate, play, make art. Just keep the animals safe, keep your audience
informed, and keep your expectations clear in writing.
Wildlife photography can be truthful documentation, imaginative illustration, or a little of both. The difference isn’t
whether you use Photoshop. The difference is whether you respect the subjectand whether you respect the viewer enough
to tell them what they’re looking at.


