Table of Contents >> Show >> Hide
- Why Rustic Vinyl Wall Art Works So Well
- Materials and Tools
- Before You Start: Choose the Right Surface Strategy
- Step-by-Step Rustic Vinyl Wall Decal Art Tutorial
- Step 1: Plan Your Design (Size, Font, Layout)
- Step 2: Prep the Surface Properly (This Prevents 90% of Problems)
- Step 3: Create the Rustic Finish
- Step 4: Cut and Weed the Vinyl Design
- Step 5: Apply Transfer Tape Like a Pro (Without Stretching It)
- Step 6: Position the Decal on Your Rustic Surface
- Step 7: Remove Transfer Tape Carefully
- Step 8: Finish and Hang Your Art
- Common Mistakes (and How to Fix Them)
- Design Ideas for Rustic Vinyl Wall Decal Art
- Pro Tips for a Cleaner, More Durable Result
- FAQ
- Experience Notes (Extended 500-Word Section)
- Final Thoughts
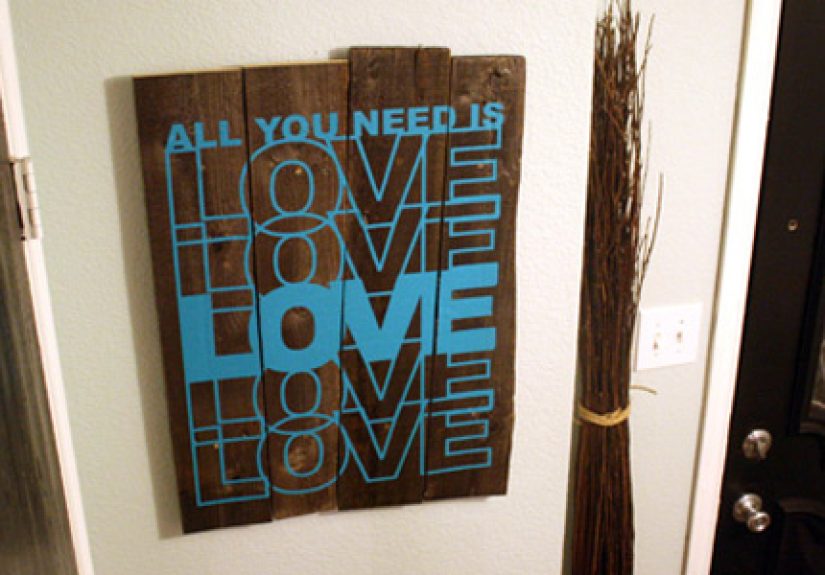
If you love the cozy farmhouse look but your budget says “maybe let’s calm down,” this rustic vinyl wall decal art tutorial is your new best friend. The idea is simple: combine a rustic-looking base (wood, faux wood panel, or painted sign board) with clean-cut vinyl lettering or graphics to create wall art that looks custom, polished, and way more expensive than it actually was.
Whether you’re making a welcome sign for the entryway, a laundry-room quote, a nursery name sign, or a kitchen accent piece, this project is beginner-friendly and surprisingly forgiving. (Yes, even if your last DIY project ended with glue in your hair and a mysterious extra screw.)
In this tutorial, you’ll learn how to prep your surface, create a rustic finish, cut and apply vinyl cleanly, avoid bubbles and crooked placement, and make your finished piece look intentionally handmadein the good way.
Why Rustic Vinyl Wall Art Works So Well
Rustic decor is popular because it feels warm, textured, and lived-in. Vinyl decals, on the other hand, are crisp, precise, and modern. Put them together and you get the best of both worlds: handmade charm plus clean typography.
This project also scales beautifully. You can make a tiny 8×10 sign for a shelf, a medium wall piece for a hallway, or a large statement board for over a couch or bed. You can also choose between removable vinyl (great for temporary decor or testing layouts) and permanent vinyl (great for sealed boards and long-term projects).
Materials and Tools
Core Materials
- Wood board, plywood panel, MDF sign blank, or canvas panel
- Vinyl (permanent or removable, depending on your project surface)
- Transfer tape
- Wood stain and/or paint
- Clear topcoat (optional, depending on finish style)
- Sandpaper (120 grit, plus finer grits)
- Lint-free cloth, tack cloth, or microfiber cloth
- Mild cleaner (and water)
- Ruler or tape measure
- Level
- Pencil (for light guide marks)
Helpful Tools
- Cutting machine (such as Cricut or similar) or pre-cut vinyl decal
- Weeding tool
- Scraper / burnishing tool (a plastic scraper or even a card edge in a pinch)
- Paint brush, foam brush, or stain cloth
- Drop cloth
- Protective gloves and eye protection
Before You Start: Choose the Right Surface Strategy
There are two common ways to make rustic vinyl wall decal art:
- Rustic Sign Board Method (recommended for beginners): You create a rustic-looking board first, then apply vinyl lettering/art to the board, then hang the board on the wall.
- Direct-to-Wall Decal Method: You apply the vinyl directly to a painted wall and style it in a rustic room setup.
If you’re new to vinyl, start with the sign board method. It gives you more control, fewer wall-adhesion surprises, and a much lower chance of saying, “Well… that corner looked straight from over there.”
Step-by-Step Rustic Vinyl Wall Decal Art Tutorial
Step 1: Plan Your Design (Size, Font, Layout)
Start with the message or graphic. Rustic style works best with a mix of:
- Script + serif fonts
- Simple botanical elements (leaves, branches, wreaths)
- Barn, cabin, kitchen, family, welcome, and farmhouse themes
- Muted color palettes (cream, black, charcoal, sage, weathered blue)
Use a layout rule that saves projects: mock it up at full size. Tape paper pieces to your board or wall and test the spacing before cutting vinyl. This is especially helpful for long quotes and multi-line designs.
Step 2: Prep the Surface Properly (This Prevents 90% of Problems)
Rustic doesn’t mean dirty. Vinyl adhesive wants a surface that is clean, dry, and reasonably smooth. Dust, oil, and flaky paint are the fast lane to bubbles, lifting, and crooked reapplication drama.
If you’re working on a wood sign board:
- Sand rough areas first (120 grit is a common starting point).
- Wipe away all sanding dust with a tack cloth or microfiber cloth.
- Repair deep dings if needed (unless you want that distressed look on purpose).
If you’re applying directly to a wall:
- Clean with a gentle cleaner and let it dry fully.
- Make sure the wall is flat and free of dust or patch debris.
- Test adhesion in a hidden spot if the wall is textured or delicate.
Important paint-curing note: “Dry” and “cured” are not the same thing. A wall can feel dry but still be curing. For adhesive products, many manufacturers and paint brands recommend waiting until paint is fully cured (often around 2–3 weeks for latex paint). When in doubt, follow the paint can and decal brand instructions.
Step 3: Create the Rustic Finish
Now for the fun partthe “old wood, charming cottage, definitely not bought yesterday” look.
Option A: Stained Rustic Wood Look
- Sand the board lightly and remove dust.
- Apply stain using a brush, foam brush, or cloth.
- Wipe off excess stain with a clean cloth in the direction of the grain.
- Let it dry completely before applying vinyl.
For deeper color, you can leave stain on a bit longer or apply another coat (per product directions). Test stain on a scrap piece firstwood species can dramatically change the final color.
Option B: Painted + Distressed Farmhouse Finish
- Paint the board with a chalk-style or matte paint.
- Let it dry fully (and ideally cure enough for light sanding).
- Distress edges and raised spots with fine sandpaper to reveal wood or undercoat.
- Wipe off dust and decide whether to seal with a clear protective topcoat.
This method works beautifully for signs with white lettering on weathered gray or cream backgrounds. If you want a super-soft vintage look, distress less than you think you need, then step back and check. It’s easier to sand more than to unsand. (Science remains stubborn on this point.)
Step 4: Cut and Weed the Vinyl Design
Cut your design according to your machine/material settings, then weed away the negative pieces. For text, go slowly around script letters and tiny punctuation. The little center of an “e” will absolutely try to escape. Stay alert.
Place the vinyl on the cutting mat with the liner side down (for standard adhesive vinyl workflows), and confirm your material settings before cutting. If you’re using a new vinyl line or brand, do a test cut first.
Step 5: Apply Transfer Tape Like a Pro (Without Stretching It)
Apply transfer tape by attaching a small section first (center or one end), then burnish outward. This reduces wrinkles and trapped bubbles. Burnish the front and then the back of the design for better pickup.
For larger decals, unroll transfer tape gradually instead of dropping the whole sheet at once. It gives you more control and keeps the tape from grabbing where you don’t want it.
Step 6: Position the Decal on Your Rustic Surface
Lightly mark center lines on the board (or use a level and guideline on the wall). For straight quotes, this step matters more than your optimism.
Use a “hinge” approach if the decal is large:
- Place the decal where you want it.
- Tape the top edge in place temporarily.
- Lift the decal, peel the liner, then lower and burnish gradually from center outward.
Work slowly and use a scraper tool to press the decal down. Burnish from the center toward the edges to push air out as you go.
Step 7: Remove Transfer Tape Carefully
Peel the transfer tape back slowly at a low/acute angle. If any vinyl lifts, lay the tape back down, burnish again, and retry. Do not yank it straight upward unless you enjoy redoing corners.
If you’re applying to a textured or distressed surface, expect a slower peel. Press extra firmly around edges of letters and delicate line art before removing the tape.
Step 8: Finish and Hang Your Art
Once the decal is on, inspect for bubbles or lifting:
- Small bubbles often settle over time.
- Stubborn bubbles can be gently worked outward with a scraper.
- On heavily textured boards, press edges down again after a few hours.
Then hang your piece using sawtooth hangers, D-rings, command-style strips (if appropriate), or lean it on a shelf for a layered rustic decor look.
Common Mistakes (and How to Fix Them)
1) Vinyl won’t stick to the surface
Likely causes: Dust, oil, low-sheen/matte paint, fresh paint, heavy texture, or unsealed rough wood.
Fix: Clean again, allow more cure time, test a small piece, or switch to a smoother/sealed board.
2) Transfer tape pulls the vinyl back up
Likely causes: Not enough burnishing, peeling too fast, wrong transfer tape strength.
Fix: Burnish more, peel at an acute angle, and match tape strength to vinyl type.
3) Crooked text
Likely causes: Eyeballing the placement (we’ve all been there).
Fix: Use a level and center marks. For long quotes, use a paper template first.
4) Rustic finish looks muddy instead of vintage
Likely causes: Over-distressing, too many dark layers, or not wiping stain consistently.
Fix: Sand lightly, use controlled stain timing, and test on scrap pieces before committing.
Design Ideas for Rustic Vinyl Wall Decal Art
- Entryway: “Home Sweet Home” with a wreath graphic on stained pine
- Kitchen: Pantry labels or a faux market sign with distressed white paint
- Laundry Room: Simple typography sign with black vinyl on weathered gray
- Nursery: Name sign with soft script and leaf accents
- Bedroom: Minimal quote in white vinyl on deep walnut-stained board
- Seasonal: Interchangeable mini signs using removable vinyl
Pro Tips for a Cleaner, More Durable Result
- Use a sample/test piece for both stain color and vinyl adhesion.
- Don’t skip dust removal after sandingfine dust causes visible imperfections.
- If painting the background, let it cure before applying adhesive vinyl.
- Use a smoother/scraper with controlled pressure; too much force can stretch materials.
- For textured walls or delicate finishes, test in an inconspicuous area first.
- Measure twice, center once, and only then remove the backing paper.
FAQ
Can I use permanent vinyl on a wall?
You can, but it’s risky for paint removal. For direct-to-wall applications, removable wall-safe products are usually the safer choice. For rustic signs/boards, permanent vinyl is often a great option.
Do I need to seal over the vinyl?
Not always. Many indoor signs look best without a topcoat over the vinyl. If you want extra durability, test a compatible clear coat first because some finishes can affect sheen or edge appearance.
What if my board is very rough?
Either sand and seal the surface first or embrace a stencil-style painted approach instead of a direct vinyl finish. Adhesive vinyl prefers smoother contact points.
Experience Notes (Extended 500-Word Section)
One of the most common real-world experiences with a rustic vinyl wall decal project is that the prep stage feels slowand then suddenly becomes the reason the project looks amazing. DIYers often want to jump straight to the “cute quote on wood” part, but the projects that turn out best usually come from people who spent extra time sanding, dusting, and dry-fitting the layout. The difference is obvious: cleaner letter edges, fewer bubbles, and a finish that looks intentionally handcrafted instead of rushed.
Another very relatable experience is the “my stain looks different than the can” moment. This is almost a rite of passage. Pine, oak, plywood, and reclaimed boards all absorb stain differently, and even two boards from the same store can produce different color results. People who test on the back or on a scrap first usually save themselves a lot of stress. The ones who don’t? They often become experts in creative recovery techniques by dinner time. (Still counts as learning.)
A lot of crafters also report that transfer tape feels intimidating the first time, especially on longer phrases. The decal can look perfect on the liner, and then suddenly one tiny script tail folds over itself like a gymnast. The best experience-based fix is simple: slow down, burnish more than you think you need, and peel the transfer tape at a low angle. Once you do it once or twice, the process becomes much more predictableand weirdly satisfying.
Textured surfaces are another area where expectations and reality sometimes have a dramatic meeting. Rustic decor often includes rough wood, brick-look panels, and heavily textured painted walls, which look fantastic but can be tricky for adhesive vinyl. A common success pattern is using a smoother board for the main sign face while keeping the rustic vibe through stain, distressing, frame trim, or layered paint. In other words, you can still get the rustic aesthetic without forcing vinyl to behave on a surface that resembles a tiny mountain range.
People making giftswedding signs, housewarming pieces, nursery name boardsoften mention that spacing is harder than cutting. The design itself may be easy, but placing it visually centered can take several tries. A practical habit that consistently helps is taping the decal in place and walking away for a minute. Come back, look from a distance, and check balance relative to the board edges. It sounds simple, but it prevents that classic “why does this look crooked even though the ruler says it’s straight?” puzzle.
Finally, one of the best parts of this project is how repeatable it becomes. After one successful sign, people often start making seasonal decor, pantry labels, laundry room signs, and small gifts. The experience shifts from “I hope this works” to “I know how to troubleshoot this.” That confidence is the real upgrade. Rustic vinyl wall decal art is not just a one-off craftit’s a practical DIY skill set you can reuse across rooms, styles, and occasions.
Final Thoughts
A rustic vinyl wall decal art project is one of those rare DIY wins: affordable, customizable, beginner-friendly, and genuinely stylish. If you focus on surface prep, patient placement, and the right finish for your space, you can create wall art that looks polished and personal without needing a workshop full of tools.
Start simple, test before committing, and don’t panic if you need to re-burnish a few letters. That’s not failurethat’s just the decal asking for a little attention.


