Table of Contents >> Show >> Hide
- The Step You’re Skipping: Letting Bathroom Cleaner Sit
- Why Experts Say Dwell Time Matters So Much
- Why This Step Gets Skipped So Often
- How to Use This Expert-Approved Step the Right Way
- Where This One Step Makes the Biggest Difference
- Bathroom Cleaning Mistakes That Make This Step Less Effective
- A Smarter Bathroom Cleaning Routine That Actually Works
- What Happens When You Stop Skipping This Step
- Extra Experiences: What This Cleaning Step Feels Like in Real Life
- Conclusion
Bathroom cleaning has a funny way of turning otherwise reasonable adults into speed runners. You spray the sink, swipe the mirror, wave a brush at the toilet, and call it a day like you just won a gold medal in household survival. The room looks cleaner for about 14 minutes, and then somehow the soap scum is back, the toilet still looks suspicious, and the faucet has the nerve to be spotty again.
According to cleaning experts, there is one bathroom cleaning step many people skip: letting the cleaner sit long enough to work. In other words, people spray and immediately wipe. It feels productive. It also quietly ruins the whole mission.
This skipped step is often called dwell time or contact time. It is the period a cleaner or disinfectant needs to stay on a surface before you scrub or wipe it away. If you rush it, you do not give the product enough time to loosen soap scum, break down grime, lift mineral deposits, or disinfect properly. You are basically sending your cleaner into battle and recalling it before it has even tied its shoes.
If your bathroom never seems truly clean no matter how often you attack it, this is probably the missing piece. Here is why experts care so much about it, how to use it correctly, and how one small change can make your bathroom cleaning routine faster, easier, and more effective.
The Step You’re Skipping: Letting Bathroom Cleaner Sit
Letting bathroom cleaner sit sounds almost too simple to matter, which is exactly why people ignore it. We tend to think good cleaning means more scrubbing, more product, more force, and maybe one dramatic sigh for effect. But cleaning pros consistently point out that the product often does a large part of the work for you, if you give it enough time.
That matters in the bathroom because this room is a perfect storm of mess. You have humidity, soap residue, body oils, toothpaste splatter, hard-water minerals, mildew, and plenty of high-touch surfaces. Some of those problems need cleaning. Some require disinfecting. Most need more than a two-second cameo from a spray bottle.
For example, a toilet bowl cleaner may need a few minutes to loosen rings and residue. A shower spray may need time to soften soap scum before scrubbing. A disinfectant on the toilet handle, faucet handles, or vanity top needs the surface to stay wet for the full label time if the goal is to kill germs, not just perfume them.
That is the difference between a bathroom that looks passably clean and one that actually is clean.
Why Experts Say Dwell Time Matters So Much
It helps break down grime instead of just smearing it around
Soap scum does not disappear because you glared at it with a microfiber cloth. Mineral stains do not evaporate because you wiped in a very committed circle. Bathroom buildup needs chemistry and time. When you spray and wait, the cleaner begins dissolving residue so you do less aggressive scrubbing later.
This is especially helpful on shower walls, around faucets, along the sink basin, and inside the toilet bowl, where grime tends to cling. The right pause can be the difference between “quick wipe, still dingy” and “one pass, actually impressive.”
It reduces wasted effort
One of the biggest bathroom cleaning mistakes is confusing motion with progress. If you have ever scrubbed a tub until your forearm filed a complaint with management, only to see streaks and residue still hanging on, you have met the cost of skipping dwell time. The cleaner could have been doing part of that work while you emptied the trash, dusted the baseboards, or cleaned the mirror.
In other words, waiting is not lazy. It is strategy.
It matters for disinfection, not just appearance
If you are using a product as a disinfectant, the label directions matter. A surface generally needs to remain visibly wet for the full contact time listed on the packaging. Wiping a disinfectant away immediately may leave the surface smelling “clean” without delivering the disinfecting result people assume they are getting.
That is especially important for bathroom touchpoints like faucet handles, toilet flush levers, light switches, cabinet pulls, and doorknobs. These are the places hands hit all day, often right before snacks, skincare, or dramatically scrolling while pretending to get ready.
Why This Step Gets Skipped So Often
The short answer is impatience. The more honest answer is that bathroom cleaning usually happens in a rush. It gets squeezed between school pickup, work calls, dinner, bedtime routines, and the universal human desire to do literally anything else.
Some people also assume all cleaners work instantly. Others use the same spray-and-wipe method on everything, whether they are cleaning glass, treating mildew, freshening the counter, or disinfecting the toilet seat. That one-size-fits-all routine feels efficient, but bathrooms are not that cooperative.
Then there is the packaging problem. Many people simply do not read product directions. They know what the bottle is for, so they assume they know how to use it. Cleaning experts would like a word.
How to Use This Expert-Approved Step the Right Way
1. Start with a quick reset
Remove rugs, towels, empty bottles, and random countertop clutter. If there is visible dust or hair, get rid of that first. Dry debris turns into gross little streaks when you introduce liquid cleaner too soon.
2. Pre-clean visibly dirty surfaces
If the surface has obvious dirt, residue, or grime, wipe that away first. This is a smart rule for toilets, counters, sink edges, and floors. A disinfectant is not magic fairy mist. Heavy buildup can interfere with how well it works.
3. Apply cleaner generously but intelligently
Spray the shower walls, tub, sink, toilet exterior, and other bathroom surfaces according to the product instructions. The goal is coverage, not flooding the room like you are filming a dramatic cleaning commercial. Spread product where needed so surfaces are evenly coated.
4. Let it sit for the label-recommended time
This is the important part. Walk away. Seriously. Let the product sit for however long the label tells you. For some cleaners, that may be under a minute. For others, it may be several minutes. If the directions say the surface should remain wet, do not let it dry out halfway through and call that close enough.
Use that waiting period wisely. Clean the mirror. Shake out the trash can. Swap towels. Dust the vent cover. Wipe the base of the toilet. Suddenly, your “waiting time” becomes productive time.
5. Scrub, rinse, and wipe in the right order
After the dwell time is up, scrub the spots that need agitation, rinse if the product requires it, and wipe dry with a clean cloth. A microfiber cloth usually gives better results than paper towels, especially on counters, chrome, mirrors, and fixtures.
And yes, please use separate cloths or disposable materials for the toilet and the sink area. Cross-contamination is not a personality trait you need in your cleaning routine.
6. Finish the forgotten high-touch surfaces
Once the main surfaces are done, hit the details people commonly forget: the flush handle, faucet handles, light switch plate, cabinet knobs, door handle, toilet seat hinges, and the area around the trash can. Experts also frequently flag bathroom vents, toothbrush holders, showerheads, and toilet brush holders as neglected zones.
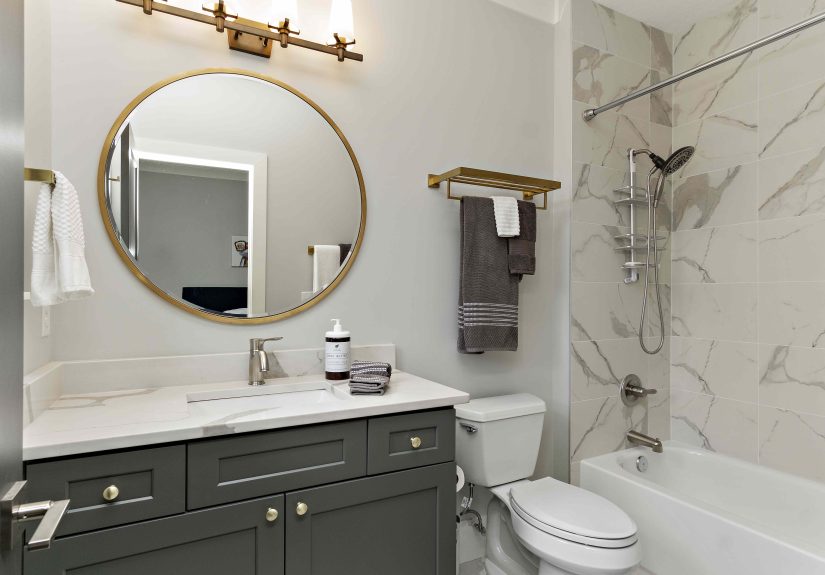
Where This One Step Makes the Biggest Difference
Toilets
The toilet may be the clearest example of why rushing backfires. Bowl cleaner needs time to cling, soften stains, and loosen buildup under the rim and around the waterline. On the outside of the toilet, disinfecting sprays also need proper contact time on the seat, lid, handle, and surrounding surfaces.
If your toilet looks clean only from a flattering angle, dwell time is probably the missing fix.
Showers and tubs
Soap scum is clingy, stubborn, and frankly a little smug. Spraying and wiping immediately often leaves behind that cloudy film that makes a shower look dirty even after you “cleaned” it. Letting the product sit gives it a chance to loosen residue so you spend less time scrubbing tile, grout, and glass.
Sinks and countertops
Bathroom sinks collect toothpaste, skincare drips, hand soap residue, and hard-water spotting. A cleaner that sits for the right amount of time has a better chance of lifting that mess, especially around the drain, faucet base, and backsplash.
Overlooked detail areas
Dwell time also helps on the weirdly gross spots nobody wants to think about: the toothbrush holder with mystery buildup, the vent cover wearing a fur coat of dust, the showerhead with mineral crust, and the base of the toilet where odor likes to linger. These areas often improve dramatically when cleaner is allowed to work before you wipe.
Bathroom Cleaning Mistakes That Make This Step Less Effective
Using too much product: More is not always better. It can leave residue and make surfaces attract grime faster.
Using the wrong product for the surface: Stone, metal, grout, glass, acrylic, and porcelain do not all respond the same way. Match the cleaner to the material.
Letting bleach become your entire personality: Bleach has specific uses, but it is not an all-purpose answer for every bathroom issue. Use products as directed and never mix chemicals.
Not keeping the surface wet for the full contact time: This is the big one. If the label says the surface must stay wet, believe it.
Skipping tool hygiene: A dirty sponge, funky cloth, or damp toilet brush holder can reintroduce odors and grime. Clean your cleaning tools too.
A Smarter Bathroom Cleaning Routine That Actually Works
If you want a bathroom that stays cleaner between deep cleans, build your routine around the dwell-time trick. Spray first. Then do other tasks while the cleaner works. That single shift makes the whole process more efficient.
Try this order:
First, remove clutter and shake out washable items. Next, spray the toilet, shower, and sink areas. Then clean mirrors, swap towels, empty the trash, and dust vents or shelves while the cleaner sits. After that, come back to scrub and wipe. Finish with the floor last.
This top-to-bottom, let-it-sit approach saves effort and gives better results than scrubbing everything immediately in random order. It is less dramatic than some viral cleaning hack, but much more useful in real life.
What Happens When You Stop Skipping This Step
The bathroom feels cleaner longer. The sink shines instead of looking hazy by lunchtime. The shower loses that sticky, dull film. The toilet requires less brute force. And your cleaning sessions start feeling less like punishment and more like a system that actually pays off.
Just as important, you begin noticing the room differently. Once you stop racing, you catch the hidden grime on hinges, the dust on the vent, the fingerprints on the switch plate, and the splash marks on the cabinet front. The room stops looking “mostly fine” and starts looking truly finished.
That is why experts keep repeating this advice. The one bathroom cleaning step you are probably skipping is not glamorous, expensive, or complicated. It is simply this: spray the cleaner, follow the label, and let it sit long enough to do its job.
It turns out your bathroom did not need more elbow grease. It needed a little patience.
Extra Experiences: What This Cleaning Step Feels Like in Real Life
Anyone who has ever cleaned a bathroom in a hurry knows the strange disappointment of finishing the job and realizing the room somehow still looks tired. The counter is technically wiped, but the faucet has a chalky ring. The shower wall is technically clean, but it still has that cloudy film that catches the light in the rudest possible way. The toilet smells better, but the bowl still has a faint stain that seems emotionally attached to the porcelain. In many homes, that frustration is not caused by a lack of effort. It is caused by rushing the product off the surface before it has time to work.
A very common experience happens with shower walls. People spray, scrub immediately, and assume the grime is just stubborn. Then one day they spray the walls, leave the cleaner alone for several minutes, and come back to find the soap scum much softer and easier to remove. The change is not subtle. What used to take repeated circles of aggressive scrubbing suddenly lifts with far less pressure. That moment tends to create an immediate convert.
The toilet is another place where this lesson shows up fast. If bowl cleaner is spread around the rim and left alone for the proper time, the brush does not have to work nearly as hard. Instead of fighting every mark like it is a personal rivalry, you are mostly guiding loosened residue away. Many people do not realize how much time they were wasting until they stop doing the wipe-too-soon routine.
Small bathrooms make the difference even more noticeable. In a tight space, every smudge, drip, and streak is on display. When the sink, faucet, mirror, and toilet are only a few feet apart, half-clean surfaces make the whole room feel dingy. Letting products sit creates that more polished result people usually associate with a professional clean. The room looks brighter, the fixtures look clearer, and even old tile seems less tired.
There is also a mental shift that comes with this step. Instead of treating bathroom cleaning like a frantic emergency, you start treating it like a sequence. Spray first. Do other tasks. Come back and finish. That alone makes the job feel less exhausting. You are no longer trying to win by speed. You are using timing to your advantage, which is a much better arrangement for everyone involved, including your wrists.
Over time, this habit also changes maintenance. When surfaces are actually cleaned well, buildup does not stack up as quickly. Weekly bathroom cleaning becomes easier because last week’s residue is not still quietly living there. The room stays fresher, quick touch-ups become truly quick, and deep cleans stop feeling like a full-contact sport.
So if your personal bathroom-cleaning history includes over-spraying, over-scrubbing, and mildly resenting your grout, this is good news. You probably do not need a dozen new products or a more complicated routine. You may simply need to stop wiping the cleaner away before it has had a chance to earn its paycheck.
Conclusion
The most overlooked bathroom cleaning step is also one of the easiest to fix: let your cleaner sit for the full dwell or contact time recommended on the label. That one habit helps loosen soap scum, lift mineral buildup, improve disinfection, and reduce how much scrubbing you need. Once you build your routine around that pause, the entire bathroom gets cleaner with less effort, fewer streaks, and better long-term results. In a room that collects grime fast and gets judged harshly, that is a pretty excellent return on a few extra minutes.


