Table of Contents >> Show >> Hide
- Quick Prep: How to Make Any DIY Fall Wreath Look “Store-Bought (But Better)”
- Wreath-Making Toolbox: The Only Supplies You’ll Actually Use
- 12 Easy DIY Fall Wreaths (Step-by-Step)
- 1) Classic Pumpkin + Berry Grapevine Wreath
- 2) Farmhouse Sunflower + Burlap Bow Wreath
- 3) Wheat Sheaf Wreath (Minimal, Textured, Stunning)
- 4) Foraged Acorn + Pinecone Wreath (Nature-Lover Edition)
- 5) Corn Husk + Twig Wreath (Rustic Harvest Vibes)
- 6) Preserved Leaf Wreath (Bold Color, Real Texture)
- 7) Felt Leaf Wreath (No Mess, Big Impact)
- 8) Cozy Yarn-Wrapped Wreath (Soft, Modern, Unexpected)
- 9) Modern Fall Hoop Wreath (15-Minute “Designer” Look)
- 10) Dried Citrus + Eucalyptus Wreath (Warm, Fresh, Not Too Pumpkin-y)
- 11) Thrifted “Not-a-Wreath” Wreath (Grain Sifter or Tray Base)
- 12) Apple Orchard Wreath (Crisp, Cheerful, Great for September–November)
- How to Hang and Care for Your Fall Wreath
- Common DIY Wreath Mistakes (and How to Fix Them Fast)
- Conclusion: Pick a Style, Start Simple, and Let Fall Do the Rest
- Experiences and Lessons Crafters Commonly Share (An Extra of Real-World Wisdom)
Fall is the season where your front door gets judged. Not by you (you’re a kind, reasonable person), but by delivery drivers,
neighbors walking dogs, and that one friend who “just happened to be in the area” and definitely noticed your door decor.
The good news: you don’t need a crafting degree or a glue-gun burn collection to make a fall wreath that looks boutique-level.
You just need a solid base, a little strategy, and permission to call it “rustic” whenever something turns out slightly… charming.
Below are 12 easy DIY fall wreathsfrom classic pumpkins to modern hoops and thrifted baseseach with simple steps,
budget-friendly options, and pro tips to keep your wreath looking intentional (not like a tumbleweed with feelings).
Quick Prep: How to Make Any DIY Fall Wreath Look “Store-Bought (But Better)”
Choose a base that matches your vibe
- Grapevine: Natural, forgiving, and hides mistakes like a best friend.
- Wire frame: Great for ribbon, fabric strips, mesh, and anything you tie on.
- Foam/straw: Perfect for pinning and gluing (especially pinecones, acorns, dried items).
- Hoop ring: Modern, minimal, and the fastest way to look “designer.”
Use the “3-2-1 rule” for a balanced wreath
- 3 textures: leaves + berries + something chunky (pumpkins/pinecones/corn husks).
- 2 focal pieces: one main star + one supporting accent (like a bow or a secondary cluster).
- 1 consistent direction: angle stems and greenery the same way to avoid “craft store explosion” energy.
Adhesive cheat sheet
- Floral wire: best for heavy items (pumpkins, thick stems, pinecones) and outdoor durability.
- Hot glue: best for lightweight accents (berries, mini leaves, small pinecones) and quick builds.
- Zip ties: best for “I want this to survive wind and opinions.”
Wreath-Making Toolbox: The Only Supplies You’ll Actually Use
- Wreath base (grapevine, wire, foam/straw, hoop)
- Wire cutters or strong scissors
- Hot glue gun + glue sticks
- Floral wire (or paddle wire) + optional zip ties
- Floral picks (faux or real) in fall tones
- Ribbon (wired ribbon is easiest to shape)
- Door hanger or removable wreath hook (protects your paint job and your sanity)
12 Easy DIY Fall Wreaths (Step-by-Step)
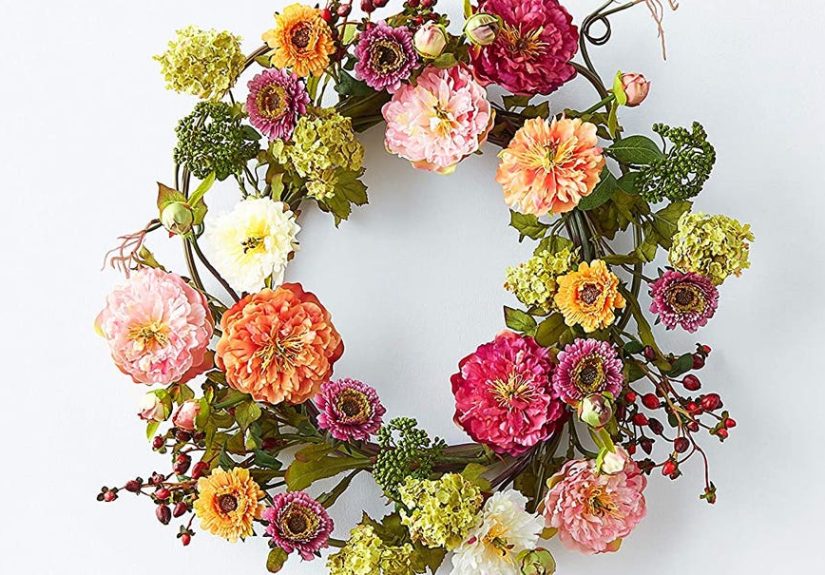
1) Classic Pumpkin + Berry Grapevine Wreath
This is the crowd-pleaser: pumpkins, berries, and leafy stems on grapevine. It’s the “pumpkin spice latte” of wreathspopular for a reason.
Materials: grapevine wreath, 1–3 faux mini pumpkins, faux berry picks, fall leaves/greenery, wired ribbon, floral wire/hot glue.
- Pick a “top” of the wreath and lay it flat on a table.
- Wire your largest pumpkin slightly off-center (asymmetry looks more expensive).
- Create a cluster of berries + leaves and wire it near the pumpkin, angled in the same direction.
- Fill gaps with smaller picks; keep most of the decor on one side for a modern look.
- Add a bow or trailing ribbon tails (trim tails at an angle or in a V-notch).
Time: 25–40 minutes. Pro tip: Wire first, glue secondglue is the frosting, wire is the cake.
2) Farmhouse Sunflower + Burlap Bow Wreath
Sunflowers are basically autumn’s way of smiling at you politely while the temperatures drop.
Materials: grapevine wreath, 3–5 sunflower stems (faux), burlap ribbon, cotton stems or eucalyptus, small berry accents.
- Wrap burlap ribbon loosely around one section of the wreath and secure on the back.
- Arrange sunflowers in a tight cluster (odd numbers look best) and wire in place.
- Add cotton stems or eucalyptus behind the flowers for height and softness.
- Finish with a large burlap bow or plaid bow for peak “cozy porch” energy.
Time: 20–35 minutes. Pro tip: Mix one “wild” stem that sticks out a bitinstant florist look.
3) Wheat Sheaf Wreath (Minimal, Textured, Stunning)
If your aesthetic is “neutral fall” (aka: pumpkin, but make it beige), wheat is your best friend.
Materials: wooden craft ring or hoop ring, dried wheat bundles, hot glue or floral wire, optional ribbon.
- Trim wheat stems so bundles are a consistent length.
- Glue or wire wheat in overlapping layers around the ring (like shingles on a roof).
- Keep the wheat direction consistent for a clean, polished look.
- Add a small bow or leave it plain and let texture do the talking.
Time: 30–45 minutes. Pro tip: Work in small sections so glue doesn’t cool mid-dream.
4) Foraged Acorn + Pinecone Wreath (Nature-Lover Edition)
This one screams “I take autumn walks” even if your walk is mostly from the couch to the snack drawer.
Materials: foam wreath form, burlap ribbon, pinecones, acorns, twine, hot glue.
- Wrap foam form with burlap ribbon; glue ends on the back.
- Glue larger pinecones first, spacing them evenly.
- Fill gaps with acorns and smaller pinecones.
- Wrap a little twine around a few sections for rustic texture.
Time: 35–60 minutes. Pro tip: Use bigger items firsttiny items are gap-fillers, not structure.
5) Corn Husk + Twig Wreath (Rustic Harvest Vibes)
Corn husks add that golden “end-of-summer” glow and look amazing against dark doors.
Materials: twig wreath or grapevine wreath, dried corn husks, preserved leaves or faux leaves, mini pumpkins, hot glue/wire.
- Soften dried husks by lightly misting them (optional, helps shaping).
- Attach husks in layers around part of the wreath for a full, feathery texture.
- Add mini pumpkins and a few leaf picks to give it fall color.
- Finish with dried grasses or a simple ribbon loop for hanging.
Time: 30–50 minutes. Pro tip: Keep husks mostly on one side for a modern “swag” look.
6) Preserved Leaf Wreath (Bold Color, Real Texture)
Want real fall leaves that don’t crumble the moment you look at them? Preserve them so they stay flexible and rich-looking.
Materials: grapevine wreath, preserved leaves (or faux), floral wire, optional berries and ribbon.
- Make small leaf bundles (5–7 leaves) and secure stems with floral wire.
- Wire bundles onto the wreath, overlapping like roof shingles.
- Add berries or pinecones sparingly so the leaf color stays the star.
- Finish with a simple bow or leave it leaf-forward and dramatic.
Time: 45–75 minutes. Pro tip: If using real leaves, choose sturdy varieties and avoid super fragile ones.
7) Felt Leaf Wreath (No Mess, Big Impact)
Felt is beginner-friendly, forgiving, and won’t shed like a real leaf that’s emotionally unstable.
Materials: foam or twig wreath, felt sheets (fall colors), scissors, hot glue, optional feathers/berries.
- Cut leaf shapes in 4–6 coordinating colors (vary sizes).
- Start gluing larger leaves first, angled in the same direction.
- Layer medium and small leaves to create depth.
- Add a few feathers or berry picks for a fancy pop.
Time: 45–90 minutes (cutting takes time). Pro tip: Fold leaves slightly before gluing for dimension.
8) Cozy Yarn-Wrapped Wreath (Soft, Modern, Unexpected)
This one is perfect for apartment doors, indoor decor, or anywhere you want a softer autumn look.
Materials: foam wreath form, chunky yarn, hot glue, optional mini felt pumpkins or fabric bow.
- Glue yarn end to the back of the form.
- Wrap tightly, adding a dab of glue every few wraps to prevent slipping.
- Decorate with a small cluster: felt pumpkins, leaves, or a simple bow.
- Keep embellishments minimal so the texture stays the star.
Time: 25–45 minutes. Pro tip: Chunky yarn covers faster and looks plushier.
9) Modern Fall Hoop Wreath (15-Minute “Designer” Look)
Half-wreath hoop designs are everywhere because they’re fast, chic, and don’t require a full commitmentlike dating in your twenties.
Materials: 14–16 inch embroidery hoop, faux florals (mums/dahlias), wheat stems, eucalyptus, ribbon, floral wire.
- Tighten hoop and decide where your floral cluster will sit (usually bottom-left or bottom-right).
- Bundle stems and wire them to the hoop in one tight cluster.
- Trim excess stems and hide wire with leaves or ribbon wrap.
- Add a ribbon hanger at the top.
Time: 15–25 minutes. Pro tip: Use fewer stems than you think; negative space is the whole point.
10) Dried Citrus + Eucalyptus Wreath (Warm, Fresh, Not Too Pumpkin-y)
Dried oranges are fall’s secret weapon: cozy color, natural pattern, and they look fancy without trying too hard.
Materials: grapevine or twig wreath, dried orange slices, eucalyptus (faux or dried), cinnamon sticks (optional), floral wire/hot glue.
- Wire eucalyptus around one side of the wreath as your base layer.
- Add dried orange slices in a small cluster (odd numbers look best).
- Optional: tuck cinnamon sticks for a subtle “spice market” vibe.
- Finish with a simple linen or velvet ribbon loop.
Time: 30–50 minutes (plus drying time if you dry citrus yourself). Pro tip: Keep citrus on a protected porch to extend life.
11) Thrifted “Not-a-Wreath” Wreath (Grain Sifter or Tray Base)
Want a wreath nobody else has? Start with a thrift-store base: a vintage sifter, tray, basket, or even an old frame.
Materials: thrifted base, dried florals or faux picks, wheat/berries, hot glue, optional ribbon.
- Clean your base and decide where the decor cluster will sit (top or bottom corner works well).
- Build a tight cluster of wheat + berries + leaves and glue it down.
- Add one unexpected element (feathers, small gourds, or a metal tag) for personality.
- Attach a strong hanger on the back (Command strips or wire, depending on weight).
Time: 25–45 minutes. Pro tip: The weirder the base, the simpler the decor should be.
12) Apple Orchard Wreath (Crisp, Cheerful, Great for September–November)
Apples feel like early fallbright, classic, and perfect if you want something that works before Halloween season takes over.
Materials: grapevine wreath, faux apples (small), leafy stems, small white flowers (optional), wire/hot glue, ribbon.
- Wire 3–5 apples into a cluster on one side of the wreath.
- Build greenery behind and around apples for fullness.
- Add tiny flowers or berries to soften the look (optional).
- Finish with a plaid ribbon bow or a simple hanger loop.
Time: 25–40 minutes. Pro tip: Use two shades of green leaves so it looks less “plastic.”
How to Hang and Care for Your Fall Wreath
Hanging tips
- Use a wreath hanger or removable hook to avoid paint scratches.
- If your door gets direct sun, rotate the wreath occasionally to prevent uneven fading.
- On windy porches, secure the wreath with a discreet ribbon tie around the back of the door or add a small adhesive bumper to prevent swinging.
Keeping live or preserved elements looking good
- Keep wreaths out of harsh sun and away from indoor heat vents for longer life.
- Mist greenery lightly if it’s live and displayed in a cooler, shaded area.
- If using real leaves, preserve them before crafting for flexibility and longevity.
Common DIY Wreath Mistakes (and How to Fix Them Fast)
- It looks flat: Add one taller element behind your main cluster (grasses, eucalyptus, wheat).
- It looks messy: Remove 1–2 random picks. Less is usually more.
- It’s too symmetrical: Shift your focal cluster off-center and concentrate decor on one side.
- Things keep falling off: Reinforce heavy items with wire or zip ties. Glue alone is brave, but not always wise.
- Colors clash with your door: Choose either warm (orange/rust/gold) or cool (burgundy/plum/olive) and stick with it.
Conclusion: Pick a Style, Start Simple, and Let Fall Do the Rest
The best fall wreath isn’t the most complicated oneit’s the one that feels like you: cozy, welcoming, and just festive enough to say,
“Yes, I have my life together,” even if your kitchen counter says otherwise. Start with a base you like, pick a color palette,
and build one strong focal cluster. After that, it’s just filling gaps and pretending you planned the whole thing.
Experiences and Lessons Crafters Commonly Share (An Extra of Real-World Wisdom)
If you ask a group of DIYers about making fall wreaths, you’ll notice a pattern: nearly everyone’s first attempt teaches the same
lessonsusually while holding a glue gun and questioning their choices. Here are the most common “I learned this the hard way”
experiences people talk about, so your wreath journey can be slightly more peaceful (and slightly less sticky).
1) The first layout is never the final layout. A lot of crafters start by attaching everything immediatelybecause the supplies are cute
and patience is a myth. Then the wreath looks crowded, lopsided, or oddly formal (like it’s dressed for a wedding).
The fix is simple: do a dry-run first. Lay the wreath flat, place your biggest pieces without attaching them, step back, and take a quick photo.
For some reason, a photo will instantly reveal that your “balanced design” is actually “one-sided vegetable arrangement.”
People who build in layers (big pieces first, medium second, small last) almost always end up happier.
2) Outdoor doors are ruthless. Sun fades, wind tugs, and humidity can warp or loosen lightweight items. Crafters often say their wreath looked
flawless indoors, then spent a week outside and came back looking like it had “been through something.”
That’s why heavier items need wire (or zip ties) as a primary anchor. Hot glue is amazing, but outdoors it’s best as reinforcementnot the only plan.
A good rule people repeat: if you’d be sad to find it on the porch floor, wire it.
3) Texture is what makes it look expensive. Many beginners try to get the look with color aloneorange leaves, red berries, done.
But seasoned DIYers talk about mixing finishes: matte leaves + shiny berries + fuzzy wheat + rough pinecones.
Even a simple hoop wreath looks elevated when it has at least three textures working together.
If your wreath feels “fine but flat,” add one tactile elementwheat, pampas, twine, velvet ribbon, or dried podsand it suddenly reads boutique.
4) Minimal wreaths are harder than they look (but worth it). People love the clean, modern half-wreath style, then discover the cruel truth:
with minimal designs, every piece matters. The trick many crafters swear by is creating one tight, intentional cluster and leaving the rest open.
When in doubt, remove one stem. Then remove another. Negative space is not “empty”it’s the part that makes the wreath look curated.
5) You’ll make it faster the second timeand you’ll want to. After finishing a fall wreath, lots of people immediately want to tweak it:
swap ribbon, add berries, change the focal piece. That’s normal. The best “experience tip” is to build your wreath like it’s seasonal modular decor:
wire your core cluster so you can remove it later, then change accents for Halloween or Thanksgiving.
One base can become three wreaths, and suddenly you’re the neighbor with “effortless seasonal style” instead of “someone who owns 47 wreaths.”
(No judgment. Wreaths are fun. We’ve all been there. Metaphorically.)


