Table of Contents >> Show >> Hide
- What Is Mail Merge in Publisher?
- Before You Start: Prepare Your Data Source
- Way 1: Create a Standard Print Mail Merge in Publisher
- Way 2: Create an Email Merge in Publisher
- Way 3: Create a Catalog Merge in Publisher
- Best Practices for a Smooth Publisher Mail Merge
- Common Publisher Mail Merge Problems and Fixes
- Specific Examples of Publisher Mail Merge Projects
- Experience Notes: What Creating Mail Merges in Publisher Teaches You
- Conclusion
Creating a mail merge in Microsoft Publisher is one of those office tasks that sounds like it was invented by a committee wearing beige shoes. But once you understand how it works, it becomes surprisingly useful. Instead of typing the same postcard, label, flyer, newsletter, invitation, certificate, or product sheet again and again like a very patient robot, you build one design and let Publisher pull personalized details from a list.
That list might be an Excel worksheet, Outlook contacts, an Access database, a text file, or another structured data source. Publisher then replaces placeholders such as First Name, Company, Address, Email, or even picture file paths with the correct information for each recipient or item. The result is a batch of customized publications that look personal without requiring you to personally lose your afternoon.
This guide explains three practical ways to create a mail merge in Publisher: a standard print mail merge, an email merge, and a catalog merge. Each method has a slightly different purpose, but the core idea is the same: design once, personalize many times, and avoid manually copying addresses until your eyes start filing complaints with management.
What Is Mail Merge in Publisher?
A mail merge in Publisher combines a publication template with a data source. The publication is the design: a label, postcard, flyer, newsletter, brochure, envelope, certificate, invitation, or other layout. The data source is the list: names, addresses, emails, product details, membership numbers, coupon codes, event dates, or any other information that changes from one copy to the next.
Publisher is especially handy when the final piece needs a polished layout. Word is often the first tool people think of for mail merge, but Publisher gives you stronger page-design control. If you are producing printed postcards, multi-up labels, promotional flyers, product sheets, membership cards, event invitations, or a small catalog, Publisher can make the result look less like “office document” and more like “someone meant to do this.”
Before You Start: Prepare Your Data Source
The success of a Publisher mail merge depends heavily on the quality of your data source. Think of the data file as the kitchen pantry. If it is organized, labeled, and clean, dinner goes well. If it contains three mystery jars named “final_final_REAL_final.xlsx,” the recipe may become emotionally complicated.
Use Clear Column Headings
Publisher reads the first row of your data source as field names. Use simple headings such as FirstName, LastName, Company, Address1, City, State, ZIP, Email, and ProductName. Avoid blank column headers, merged cells, decorative title rows, or random notes at the top of the sheet.
Keep One Record Per Row
Each row should represent one recipient, customer, member, guest, household, product, or catalog item. For example, if you are creating event invitations, each invited person should occupy one row. If you are creating a product catalog, each product should occupy one row.
Clean the List Before Connecting It
Remove duplicate entries, fix misspellings, standardize ZIP codes, and check that email addresses are valid. If you are printing physical mail, confirm that addresses are complete. Publisher can make your design look beautiful, but it cannot magically know that “123 Main Stret” was supposed to be “123 Main Street.”
Use Picture Paths for Image Merges
If your merge includes images, such as product photos or staff headshots, do not place the actual images inside the spreadsheet. Instead, include a column containing the file name or file path for each picture. Publisher uses that path to find and insert the correct image during the merge.
Way 1: Create a Standard Print Mail Merge in Publisher
The standard print mail merge is the best choice for labels, postcards, letters, flyers, coupons, certificates, invitations, name tags, envelopes, and other printed pieces. This is the classic “I have one design and many people to send it to” method.
Step 1: Open or Create Your Publisher Design
Start with the publication you want to personalize. You can use a blank page, a built-in template, or an existing Publisher file. For labels, begin with the correct label template or page size. For postcards, choose a postcard layout that matches your printer and paper stock. For flyers or letters, create the design as you normally would.
Place all fixed text and graphics first. Fixed content is anything that stays the same for every version: your logo, headline, offer, disclaimer, event details, background images, brand colors, and decorative elements. Save the changing parts for merge fields.
Step 2: Connect to a Recipient List
Go to the Mailings tab and choose Select Recipients. Publisher can connect to several types of data sources, including an existing list, Outlook contacts, or a new list you create during the process. Excel is one of the most common options because it is easy to edit, sort, and share.
If you use an Excel workbook with multiple worksheets, Publisher may ask which worksheet contains the data. Choose the sheet with your clean recipient list. This is where clear sheet names become heroic. “Customer_List_2026” is helpful. “Sheet7” is less helpful, though still better than “DoNotDeleteMaybe.”
Step 3: Insert Merge Fields
Click inside a text box where personalized information should appear. Then use Insert Merge Field, Address Block, or Greeting Line to add fields from your data source. For example, a postcard might include:
Hello <<FirstName>>, your exclusive neighborhood offer is waiting!
A mailing label might include:
<<FirstName>> <<LastName>>
<<Address1>>
<<City>>, <<State>> <<ZIP>>
If Publisher does not match your fields correctly, use the matching option to connect your custom column names with Publisher’s expected fields. For example, if your spreadsheet says PostalCode but Publisher expects ZIP, field matching helps bridge the gap.
Step 4: Format the Merge Fields
Merge fields are not just placeholders; they can be styled like regular text. Select the field and apply font, size, color, alignment, spacing, or other formatting. This is important because the merged result follows the formatting of the field in the publication.
For names and addresses, keep readability first. Fancy script fonts may look charming until the postal carrier has to decode them like an ancient map. For business mail, clean sans serif or serif fonts usually work better.
Step 5: Preview the Results
Use Preview Results to move through records and check the output. Look for names that are too long, missing address lines, awkward spacing, and fields that do not appear correctly. This step is the office equivalent of checking the oven before serving dinner. Skipping it can lead to burnt lasagna, except the lasagna is 500 misprinted postcards.
Step 6: Finish and Print
When everything looks right, use Finish & Merge. Publisher can create a new merged publication, add merged pages to an existing publication, or send the job to print depending on the merge type and setup. If you are printing labels, name tags, or postcards, check the print settings carefully. A common mistake is printing a full sheet for each record instead of printing different records on one sheet.
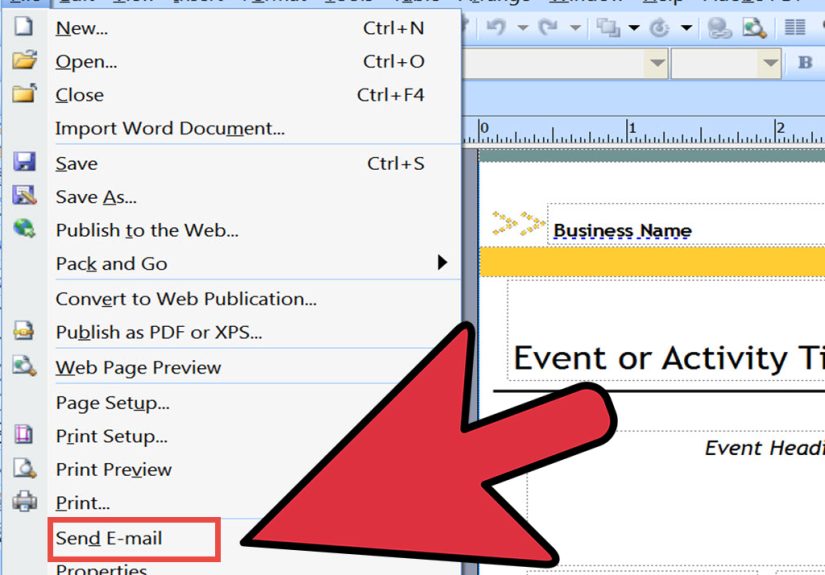
Way 2: Create an Email Merge in Publisher
An email merge in Publisher is useful when you want to send a designed message to multiple recipients while personalizing names, details, or subject lines. It can work well for announcements, simple newsletters, event reminders, customer updates, and small promotional campaigns.
However, there is one practical warning: email merge depends on your mail setup. In many Microsoft workflows, classic Outlook is more reliable for mail merge than the newer Outlook experience. Before sending an important campaign, test with a small list. Your future self will thank you, possibly with snacks.
Step 1: Create the Email Publication
Design your message in Publisher. Keep it clean and simple. Email layouts are not the place to prove that your design software has 87 font options and you intend to use 86 of them. Use a clear headline, a short message, a strong call to action, and personalized details only where they add value.
For example, an email invitation might say:
Hi <<FirstName>>, we saved you a seat for our open house on <<EventDate>>.
That feels more personal than “Dear valued recipient,” which has the emotional warmth of a parking ticket.
Step 2: Connect the Email List
Your data source should include an email column. Name it clearly, such as Email or EmailAddress. Connect the list through the mail merge tools and confirm that Publisher recognizes the correct recipient field.
If your list includes multiple audience segments, add columns such as CustomerType, Region, or MembershipLevel. These fields can help you filter recipients before sending.
Step 3: Insert Personalized Fields
Add merge fields into the email body. You can personalize greetings, event names, coupon codes, renewal dates, account representatives, city names, or membership information. The best personalization is helpful, not creepy. “Hi Sarah, your membership renews June 15” is useful. “Hi Sarah, we noticed you opened our last email at 9:42 p.m.” is how marketing departments accidentally become haunted houses.
Step 4: Filter and Sort Recipients
Use the recipient list tools to include or exclude people. You can filter by city, state, customer type, membership status, blank fields, nonblank fields, or other criteria in your data source. Sorting can also help you review the list alphabetically or by region.
This is especially helpful when sending targeted emails. Instead of blasting everyone with the same announcement, you can send a message only to people in a specific location, customers with a certain status, or subscribers who requested a particular type of update.
Step 5: Send the Email Merge
When you finish an email merge, Publisher gives you the option to send email messages. Choose the field that contains recipient email addresses, enter the subject line, and review any additional options such as Cc or Bcc if available in your setup.
Always test first. Send the merge to yourself and maybe one trusted coworker before using the full list. Check the subject line, greeting, links, images, spacing, and merged fields. A test message can catch problems before they become a group email with “Hi <<FirstName>>” sitting proudly at the top like a tiny digital disaster.
Way 3: Create a Catalog Merge in Publisher
Catalog merge is the best option when you want to merge multiple records onto publication pages. It is ideal for product catalogs, directories, photo albums, price lists, staff profiles, donor lists, menu sheets, real estate sheets, event programs, classroom directories, and any publication where each record becomes a repeated block of content.
The difference between mail merge and catalog merge is simple. A standard mail merge usually creates one personalized publication per recipient. A catalog merge creates repeated sections from many records, often placing several items on the same page.
Step 1: Prepare Product or Directory Data
Create a spreadsheet or database with one row per item. For a product catalog, you might include columns such as ProductName, Description, Price, SKU, Category, and ImagePath. For a staff directory, you might use Name, Title, Department, Email, Phone, and PhotoPath.
If images are part of the merge, use file paths or file names in the data source. Keep image files in a stable folder location. Moving the folder after connecting the data source can break the image merge faster than someone saying “just one tiny design change” five minutes before printing.
Step 2: Start a Catalog Merge
In Publisher, choose the catalog merge option from the mailings and catalog tools. Connect the product list or directory list as the data source. Publisher will ask you to define the catalog merge area, which is the repeating layout section for each record.
Design one item block the way you want every record to appear. For example, a product block might include a picture frame, product name, short description, price, and item number. A directory block might include a headshot, name, title, department, and email address.
Step 3: Insert Text and Picture Fields
Add text fields for names, descriptions, prices, titles, or any other changing information. For images, insert a picture field rather than placing the file path as text. If Publisher cannot locate images, specify the folder where the image files are stored.
Make sure the layout can handle variation. Product descriptions may be different lengths. Names may be short or surprisingly long. Prices may include sale notes. Leave enough room so the final pages do not look like the data is trying to escape the design.
Step 4: Preview the Catalog
Preview several records, not just the first one. The first record may be perfectly behaved while record 47 contains a product name so long it appears to have been written by a committee. Check image placement, text overflow, spacing, and page breaks.
Step 5: Complete the Catalog Merge
When the preview looks good, complete the merge. Publisher can create a new publication with the merged pages or add them to an existing publication. After the merge, you can edit the resulting pages like a normal Publisher file. This is useful for final touch-ups, section headers, cover pages, or special notes.
Best Practices for a Smooth Publisher Mail Merge
Start With the Final Output in Mind
Before building the merge, decide whether the final result will be printed, emailed, exported as a PDF, or added to an existing publication. A postcard, label sheet, email newsletter, and product catalog all have different layout needs. Choosing the right merge type early prevents “why is this doing that?” moments later.
Use a Small Test List
Create a test data source with five to ten records. Include normal examples and difficult examples: a long name, a missing company, a long address, a blank field, and a record with an image. Testing with messy-but-real data helps reveal layout problems before the full merge.
Keep the Original Template Safe
Save your merge template before finishing the merge. Then create the merged publication separately. This lets you reuse the template later with an updated list. It also protects you from accidentally editing the merged output and losing the reusable structure.
Watch for Blank Fields
Blank fields can create awkward gaps. For example, if some contacts have a company name and others do not, the address block may need adjustment. Preview records with missing data so you can fix spacing before printing.
Proofread the Data, Not Just the Design
A beautiful template cannot rescue bad data. Check names, addresses, emails, dates, prices, and codes. If a customer’s name is misspelled in the spreadsheet, Publisher will faithfully reproduce the mistake with professional-looking confidence.
Remember Publisher’s Timeline
Microsoft Publisher is scheduled to reach end of support after October 2026. If your organization depends on Publisher mail merge templates, it is smart to export important files, document your workflow, and plan alternatives such as Word, PowerPoint, PDF-based workflows, or another desktop publishing tool. Publisher can still be useful now, but long-term planning is the adult thing to do, even if adulting remains suspiciously overrated.
Common Publisher Mail Merge Problems and Fixes
Problem: Fields Show Incorrectly
If fields appear in the wrong place or show the wrong information, check your column headings and field matching. Make sure the data source has clear names and that Publisher is pulling from the correct worksheet or table.
Problem: Images Do Not Appear
For picture merges, confirm that the data source contains file names or paths, not embedded images. Also make sure Publisher can access the folder where the images are stored. If the project is shared across computers, use a consistent shared folder path.
Problem: Labels Print One Full Sheet Per Person
This usually happens because of the print setup. When printing labels, postcards, or name tags, make sure Publisher is set to print multiple different records on one sheet when that is your intended output.
Problem: Long Text Breaks the Design
Resize text boxes, reduce font size slightly, shorten the data, or create a layout with more flexible spacing. Always preview records with long names, long company names, and long descriptions.
Problem: Email Merge Does Not Send as Expected
Check your Outlook configuration, email account settings, and whether your mail client supports the workflow you are using. Test with a small list before sending the full merge. For important email campaigns, consider whether a dedicated email marketing platform is more appropriate.
Specific Examples of Publisher Mail Merge Projects
Example 1: Local Business Postcard
A dental office wants to send appointment reminder postcards. The spreadsheet includes first name, last name, address, appointment month, and phone number. The Publisher postcard includes a friendly greeting, office branding, and a personalized line such as “Your next cleaning is due in <<AppointmentMonth>>.” The office prints the cards in batches and saves the template for future reminders.
Example 2: School Event Name Tags
A school needs name tags for a parent night. The Excel file includes parent names, student names, classroom numbers, and teacher names. Publisher uses a label template and merges each record into a name tag. The final sheet prints different name tags on one page, saving time and preventing the classic “write names with a marker at the entrance while everyone waits” situation.
Example 3: Small Product Catalog
A bakery wants a seasonal cookie catalog. The data source includes product names, descriptions, prices, allergens, and photo paths. Publisher’s catalog merge creates repeated product blocks with images and details. The bakery exports the finished publication as a PDF for email and prints a few copies for the counter. Everyone wins, especially the cookies.
Experience Notes: What Creating Mail Merges in Publisher Teaches You
The first experience most people have with Publisher mail merge is a blend of confidence and mild panic. You open the program thinking, “This should be simple,” and then suddenly you are staring at fields, text boxes, recipient lists, print settings, and a spreadsheet that appears to have been organized by a raccoon with a keyboard. The good news is that the process becomes much easier once you treat it like a system instead of a one-time trick.
One of the biggest lessons is that the data source matters more than the design at the beginning. Many beginners spend an hour adjusting fonts and colors, then discover that half the addresses are missing ZIP codes or that the email column contains personal notes instead of email addresses. The smarter approach is to clean the list first. Remove empty rows, check the headings, standardize phone numbers, and make sure every record has the information required for the final publication. This is not glamorous work, but neither is reprinting 300 labels because “Apt 4B” was hiding in the wrong column.
Another useful experience is learning to preview like a suspicious detective. Do not preview only the first record. The first record is often polite. It has a normal name, a normal address, and a normal amount of text. The trouble usually lives deeper in the list. Preview the longest name, the longest street address, a blank company field, a record with special characters, and an entry with an image. If the design survives those records, it will probably survive the real job.
Publisher also teaches the importance of flexible layouts. A text box that looks perfect with “John Smith” may collapse emotionally when it meets “Alexandria Montgomery-Washington.” Give personalized fields room to breathe. Avoid placing merge fields too close to decorative elements. Leave enough space for multi-line addresses. When working with catalog merge, design product blocks that can handle longer descriptions and different image proportions. Real data is rarely as tidy as a sample template.
Printing is another area where experience pays off. Always print one test sheet before committing to the full batch. This is especially important for labels, postcards, folded cards, and name tags. Printer settings, paper orientation, margins, and multiple-record layout options can change the outcome. A test print can reveal alignment issues that are invisible on screen. It may feel slow, but it is much faster than holding a stack of misaligned labels and wondering whether this is how villains are made.
Email merge requires its own patience. Because email sending depends on your Outlook setup and account configuration, testing is essential. Send the campaign to yourself first. Check the subject line, images, links, personalization, and spacing. Also think about whether Publisher is the best tool for the message. For small, designed announcements, it can be useful. For large marketing campaigns, tracking, unsubscribes, compliance, and deliverability may require a dedicated email platform.
The final lesson is to save reusable templates. Once you build a working Publisher mail merge, protect it. Save the template separately from the merged output, keep a sample data file, and write down the basic steps. Future you may not remember which worksheet, folder, or field names made everything work. A short note can turn next month’s merge from a mystery novel into a five-minute task.
Note: This article is based on current Microsoft Publisher mail merge, email merge, catalog merge, recipient filtering, picture merge, data connection, label printing, and Publisher lifecycle guidance. Because Publisher support is scheduled to end after October 2026, users who rely on recurring Publisher merge projects should also plan future export and migration options.
Conclusion
Mail merge in Publisher is a practical way to create personalized print and email materials without rebuilding the same design over and over. The three main approaches are standard print mail merge, email merge, and catalog merge. Use standard mail merge for labels, postcards, certificates, invitations, and address-based projects. Use email merge for personalized digital messages when your mail setup supports it. Use catalog merge when you need repeated product, directory, or photo blocks from a structured list.
The secret is not wizard-level technical skill. It is preparation. Clean the data, choose the right merge type, insert fields carefully, preview with real-world records, and test before printing or sending. Do that, and Publisher mail merge becomes less of a scary office ritual and more of a quiet productivity superpower.


