Table of Contents >> Show >> Hide
- Why Carpet Stains Get So Difficult So Fast
- The 12-Step Method for Cleaning Carpet Stains
- Step 1: Act Fast Before the Stain Settles In
- Step 2: Figure Out What Kind of Stain You Are Facing
- Step 3: Remove Solids or Excess Liquid First
- Step 4: Blot, Never Scrub
- Step 5: Vacuum Dry Debris Before You Add Moisture
- Step 6: Spot-Test Any Cleaner in a Hidden Area
- Step 7: Choose the Right Cleaning Solution
- Step 8: Apply Cleaner Gently and Work From the Outside In
- Step 9: Give the Cleaner Time to Work
- Step 10: Rinse Lightly to Remove Residue
- Step 11: Dry the Area Thoroughly
- Step 12: Vacuum Again and Know When to Call a Pro
- Quick Examples for Common Carpet Stains
- Common Mistakes That Make Carpet Stains Worse
- Final Thoughts
- Extra: Real-World Experiences and Lessons From Cleaning Carpet Stains
- SEO Tags
Carpet stains have a special talent for showing up at the worst possible time. Coffee lands five minutes before a meeting. Red wine appears exactly when you decided to wear confidence. Mud arrives courtesy of children, pets, or one overly optimistic trip through the backyard. The good news is that most carpet stains are not the end of your flooring’s dignity. The bad news is that panic-cleaning usually makes them worse.
If you want to know how to clean carpet stains the right way, the secret is not brute force. It is speed, patience, the right cleaner, and a stubborn refusal to rub like you are trying to erase a bad memory. In this guide, you will learn a practical 12-step method for carpet stain removal, plus smart examples for common messes like coffee, grease, mud, pet accidents, and wax. Whether you use a commercial carpet stain remover or a homemade carpet cleaner, the goal stays the same: lift the stain, protect the carpet fibers, and avoid turning a small spill into a full-blown home improvement subplot.
Why Carpet Stains Get So Difficult So Fast
Carpet is soft, cozy, and extremely good at grabbing onto spills. That is wonderful when you want a warm floor under your feet and less wonderful when tomato sauce drops into the fibers like it has signed a lease. Many stains sink below the surface quickly, especially on plush carpet. Sugary drinks leave sticky residue that attracts more dirt. Greasy stains cling to fibers. Pet stains can seep into the backing and padding, creating both a visible mark and an odor problem. Even when a stain looks gone, leftover soap or moisture can invite the spot right back for an encore.
That is why effective carpet cleaning is about more than making the spot look better for ten minutes. You want to remove the stain, rinse away residue, dry the area thoroughly, and restore the texture so the carpet does not look crunchy, matted, or suspiciously shiny. Think of it as stain removal with manners.
The 12-Step Method for Cleaning Carpet Stains
Step 1: Act Fast Before the Stain Settles In
Fresh stains are dramatically easier to remove than old ones. The longer a spill sits, the more time it has to bond with carpet fibers, soak into the backing, or leave behind sugar, protein, dye, or oil residue. As soon as you notice the mess, pause the dramatic sighing and start cleanup. Even a one-minute response can make a major difference with coffee, wine, juice, and pet stains.
Step 2: Figure Out What Kind of Stain You Are Facing
Not every stain should be treated the same way. Water-based stains like juice, soda, and mud usually respond well to mild dish soap and water. Oil-based stains like gravy, butter, or makeup often need an absorbent powder first and then a more targeted cleaner. Protein stains such as blood or pet accidents usually do better with cool water and an enzyme cleaner. Wax and gum play by their own weird little rules and need hardening before removal. If you know your enemy, you have a better shot at winning without damaging the carpet.
Step 3: Remove Solids or Excess Liquid First
If the mess is chunky, scrape away solids gently with a spoon, dull knife, or the edge of a credit card. If it is liquid, blot up as much as possible with a white cloth or plain paper towel. Do not press hard enough to grind the stain deeper. Your job here is to lift, not mash. Imagine you are persuading the mess to leave, not arguing with it.
Step 4: Blot, Never Scrub
This is the golden rule of carpet stain removal. Scrubbing can fray carpet fibers, spread the stain outward, and push it deeper into the pile. Blotting absorbs the spill without roughing up the texture. Use a clean white cloth so you do not transfer dye onto the carpet. Blot from the outer edge toward the center to keep the stain from growing like a tiny terrible universe.
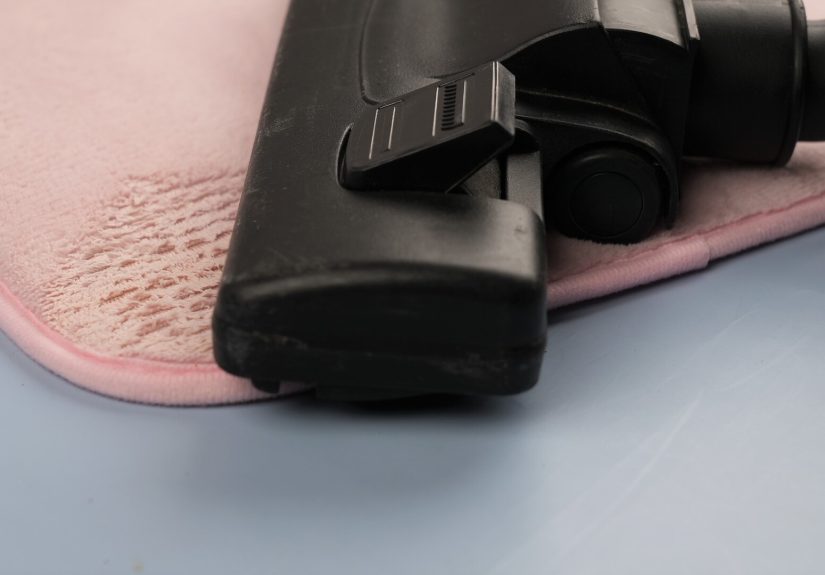
Step 5: Vacuum Dry Debris Before You Add Moisture
If the stain is dry dirt, dried mud, crumbs, or any flaky residue, vacuum first. Adding cleaner to dry debris often turns it into muddy paste, which is a truly unnecessary plot twist. A good vacuum also lifts loose particles before treatment and helps you see what the real stain looks like underneath the surface mess.
Step 6: Spot-Test Any Cleaner in a Hidden Area
Before using a carpet stain remover, homemade solution, hydrogen peroxide mix, or even a “gentle” DIY trick from the internet, test it in an inconspicuous spot. A closet corner works nicely. Some cleaners can lighten color, roughen fibers, or leave rings. This matters even more for wool, natural-fiber carpets, patterned carpet, and older flooring that has already seen things. If the test area looks fine after drying, proceed.
Step 7: Choose the Right Cleaning Solution
For many everyday stains, a mild mix of dish soap, white vinegar, and water works well. A common homemade carpet cleaner is a small amount of dish soap plus water, sometimes with vinegar added for extra cleaning power. For pet urine and other odor-heavy organic stains, use an enzyme cleaner designed for carpet. For greasy messes, start with baking soda or cornstarch to absorb oil before using liquid cleaner. For stubborn set-in discoloration, a product with oxygen-based stain-fighting ingredients may help. The big rule is simple: use enough cleaner to treat the stain, not enough to baptize the carpet.
Step 8: Apply Cleaner Gently and Work From the Outside In
Do not pour cleaner straight onto the carpet unless the product label specifically says to. Apply it to a cloth or lightly mist the stained area instead. Then blot from the outer edge inward. This method keeps the stain from spreading and gives you more control over how wet the carpet gets. If the stain lifts slowly, repeat several light passes rather than using one heavy, soggy assault.
Step 9: Give the Cleaner Time to Work
Many people spray, wipe once, and then act betrayed when nothing magical happens. Most effective carpet cleaning takes a little dwell time. Let the solution sit for a few minutes if the instructions allow it. That gives surfactants, enzymes, or oxygen-based ingredients time to loosen the stain. Just do not let the area stay wet forever. You want active treatment, not a miniature indoor swamp.
Step 10: Rinse Lightly to Remove Residue
Once the stain is lifted, blot with a cloth dampened in clean water to remove any leftover cleaner. This step matters more than people realize. Soap residue can attract dirt and cause the area to look dingy again faster than the rest of the carpet. A light rinse helps prevent stickiness, re-soiling, and that annoying “it looked clean yesterday” problem.
Step 11: Dry the Area Thoroughly
Moisture left in the carpet can lead to odors, browning, mildew, or a stain that resurfaces from below. After rinsing, blot with dry towels until the area feels only slightly damp. Then let it air dry completely. You can speed things up with a fan, open window, or air conditioning. For a wetter cleanup, place clean white towels over the spot and weigh them down with something flat and heavy for extra absorption. Glamorous? No. Effective? Absolutely.
Step 12: Vacuum Again and Know When to Call a Pro
Once the carpet is fully dry, vacuum the area to lift the pile and restore texture. This small final step helps the cleaned spot blend back into the rest of the carpet. If the stain remains after a few careful attempts, or if you are dealing with ink, paint, old pet urine, heavy grease, or a stain that has reached the padding, it may be time for professional carpet cleaning. There is no shame in calling reinforcements. Some stains are not “DIY problems”; they are “someone with extraction equipment should handle this” problems.
Quick Examples for Common Carpet Stains
Coffee and Tea
Blot immediately, then use a mild dish soap solution. If a brown shadow remains, a carefully tested hydrogen peroxide-based treatment may help on colorfast carpet. Rinse lightly and dry well. Coffee loves to leave a tan reminder of your bad morning, so patience matters.
Red Wine and Juice
Blot fast, then treat with a suitable carpet stain remover or a mild cleaning solution. Club soda is a popular first response for fresh stains, but it still needs blotting and follow-up cleanup. Letting wine dry on carpet is basically sending an engraved invitation to trouble.
Mud and Dirt
Let mud dry before treating it. Then vacuum thoroughly, apply a mild cleaner, and blot. Wet mud smeared into carpet is the home-care version of making your own life harder for free.
Grease, Butter, and Oily Food
Sprinkle baking soda or cornstarch on the stain first to absorb oil. Vacuum after it sits, then follow with a dish soap-based cleaner. Grease stains need both absorption and cleaning, because oil does not care about your water-only approach.
Pet Stains and Odors
Blot up as much moisture as possible, rinse with cool water, and use an enzyme cleaner. This is one of the few times a specialized product is usually worth it. Enzymes help break down the organic material that causes both the stain and the smell. Without that step, your carpet may look improved while still quietly broadcasting “something happened here.”
Candle Wax and Gum
Harden the material with ice first, then gently scrape and vacuum. For leftover waxy residue, use the appropriate spot treatment and minimal moisture. Some people also use a cloth and gentle heat for wax, but always be careful with carpet fibers and backing.
Common Mistakes That Make Carpet Stains Worse
The first mistake is scrubbing. The second is over-wetting the spot. The third is using too much soap and failing to rinse it out. The fourth is grabbing bleach, ammonia, or some mystery cleaner from the back of the cabinet and hoping for the best. The fifth is ignoring the stain until it becomes part of the room’s character.
Another common mistake is using colored towels, which can transfer dye to the carpet. Yet another is skipping the test spot because “it will probably be fine.” Famous last words. Good carpet cleaning tips are rarely dramatic. They are just consistent: use the right cleaner, use a little at a time, blot gently, rinse, dry, and repeat if needed.
Final Thoughts
Learning how to clean carpet stains is mostly about respecting the process. Fast action beats panic. Blotting beats scrubbing. Light treatment beats soaking. The right carpet stain remover beats random experimentation with every bottle under your sink. If you approach stains with patience and a plan, most of them can be handled before they become permanent décor.
And if you remember only one thing from this article, let it be this: your carpet is not a frying pan. Do not attack it like one. Treat the stain gently, clean smart, and your floor has an excellent chance of surviving coffee, mud, pets, party guests, and whatever else everyday life throws at it.
Extra: Real-World Experiences and Lessons From Cleaning Carpet Stains
Real-life carpet cleaning rarely happens in a calm, beautifully lit room with one tidy little stain in the center. It happens while dinner is burning, the dog is investigating, someone is saying “it’s not that bad,” and the paper towels are somehow almost gone. That is exactly why a simple system works better than a fancy one. In real homes, the people who get the best results are usually not the ones with the most expensive supplies. They are the ones who respond quickly, stay methodical, and do not turn a stain into a chemistry experiment.
One of the most common experiences homeowners describe is the “I rubbed it and made it bigger” moment. It happens with coffee, juice, foundation, salsa, and just about everything else. The stain looks small at first, so people scrub hard, hoping speed will fix it. Instead, the spot spreads, the fibers fuzz up, and suddenly the carpet looks both stained and annoyed. That single experience teaches the blotting rule faster than any manual ever could.
Another familiar lesson comes from pet stains. Many people think the job is done when the visible mark fades, but then the odor returns on a humid day or the pet keeps revisiting the same area like it is a personal historical landmark. That usually means the stain reached deeper layers or the wrong cleaner was used. In real-world carpet stain removal, pet accidents are where enzyme cleaners often earn their place. They do not just make the stain look better for an hour; they address the source of the smell, which is what actually matters.
Grease stains teach a different lesson: not everything should be hit with water first. A buttery food spill or oily cosmetic stain can spread fast if you jump straight to a wet cloth. People who have dealt with these stains more than once often learn to slow down, use baking soda or cornstarch first, vacuum carefully, and only then move to a mild cleaning solution. It is not dramatic, but it works. Carpet care is full of these unglamorous wins.
Then there is the matter of old stains. Almost everyone has one mysterious carpet mark that predates current leadership, previous furniture, and possibly modern civilization. Set-in stains can improve, but they often require repeated light treatments instead of one aggressive pass. This is where patience becomes the unsung hero of carpet cleaning tips. A homeowner may see little change on the first attempt, more on the second, and real progress after the area fully dries and gets vacuumed. Sometimes the lesson is that persistence matters. Sometimes the lesson is that it is time to call a professional and stop emotionally investing in a 2019 grape juice incident.
People also learn quickly that residue is a sneaky troublemaker. A carpet can look spotless right after cleaning, then attract dirt over the next week because too much soap was left behind. That experience tends to convert people into firm believers in the rinse-and-dry steps. It is not the exciting part of the process, but it is often the difference between a truly clean carpet and a spot that becomes a dirt magnet.
Finally, real-life experience teaches that prevention is gloriously boring and wildly effective. Entry mats, quick vacuuming, a white cloth kept under the sink, and a reliable carpet stain remover nearby can save a lot of drama. The best carpet cleaning habits are small, repeatable, and not very glamorous. But they are the reason one home’s carpet looks fresh after years of daily life while another looks like it has been through several minor wars.


