Table of Contents >> Show >> Hide
- What “Setting” Tie Dye Really Means (And Why Your Colors Fade)
- Step 1: Start With the Right Fabric (Because Dye Has Standards)
- Step 2: Pre-Wash Like You Mean It
- Step 3: Pick Your Dye Type (This Changes Everything)
- Step 4: Soda Ash 101 (For Fiber-Reactive Tie Dye)
- Step 5: Apply Dye Strategically (Because Gravity and Capillary Action Have Opinions)
- Step 6: “Batching” (Letting Dye React) The Secret to Maximum Pop
- Step 7: Rinse and Wash Out Correctly (This Is Where Most Tie-Dye Goes to Cry)
- Step 8: Can You Heat-Set Tie Dye?
- Step 9: First Wash Rules (So Your Tie-Dye Doesn’t Prank Your Entire Laundry Load)
- Long-Term Care: How to Keep Tie-Dye Vibrant for Years
- Troubleshooting: Quick Fixes for Common Tie-Dye Problems
- FAQ: The Questions Everyone Googles at 1:00 a.m. With Dye-Stained Fingers
- Real-World Experiences: What Tie-Dye Fans Learn the Hard Way (So You Don’t Have To)
- Conclusion
Tie-dye has a magical talent: it can make a plain white tee look like a summer festival RSVP’d “yes” to your closet.
But there’s one unglamorous truth hiding behind every glorious spiralif you don’t set tie dye correctly,
those colors can fade, bleed, or turn your crisp whites into “mysterious pastel sadness.”
This guide walks you through how to set tie dye the right waymeaning: brighter color, better colorfastness,
cleaner rinses, and fewer laundry surprises. We’ll cover what actually makes dye “stick,” the best washout method,
and fabric-care habits that keep your tie-dye vibrant for the long haul.
What “Setting” Tie Dye Really Means (And Why Your Colors Fade)
“Setting” isn’t one single stepit’s the whole process that turns loose dye into color that stays put.
Most tie-dye fading comes from one of these issues:
- Wrong dye for the fiber: Cotton and rayon love fiber-reactive dyes; polyester does not (it wants heat + disperse dyes).
- Not enough time/warmth: Many dyes need hours to fully reactespecially when it’s cool.
- Fabric wasn’t prepped: Oils, sizing, and softener residue can block absorption.
- Washout was rushed: Excess dye left in the fabric will keep bleeding and dulling lighter areas.
- Harsh aftercare: Hot dryers, too much sun, and fabric softener can shorten a tie-dye’s glow-up era.
Step 1: Start With the Right Fabric (Because Dye Has Standards)
If you want bold, long-lasting color, choose fibers that bond well with common tie-dye dyes:
- Best: 100% cotton, rayon/viscose, linen, hemp (cellulose fibers = tie-dye’s best friends).
- Okay: Cotton blends (expect lighter shades if there’s polyester).
- Tricky: 100% polyester (needs disperse dye and heat to truly set).
Quick reality check: even “50/50 cotton-poly” can look great, but it usually won’t be as saturated or as colorfast as 100% cotton.
If your dream is “neon that could guide ships at night,” go cellulose.
Step 2: Pre-Wash Like You Mean It
New shirts often have invisible finishes (sizing) that make them feel smooth in-storebut those finishes can resist dye.
Pre-washing removes residue and helps the fabric absorb dye more evenly. Skip fabric softener and dryer sheets
(they leave behind coatings that dye doesn’t love).
Pre-wash checklist
- Wash with a normal detergent (no softener).
- Rinse well.
- Dye while slightly damp or drydepending on your method.
Step 3: Pick Your Dye Type (This Changes Everything)
“Tie-dye dye” is not one thing. The way you set tie dye depends heavily on what you used.
Option A: Fiber-Reactive Dye (Procion MX-type) Best for Vibrant, Colorfast Tie-Dye
Fiber-reactive dyes chemically bond to cellulose fibers (like cotton). This is the gold standard for bright, lasting tie-dye.
The catch? They need an alkaline environmentusually soda ashto activate and fix properly.
Option B: One-Step Tie-Dye Kits (Common Craft Kits)
Many one-step kits include soda ash in the dye powder, making them beginner-friendly. You still need
time (often 6–8 hours or longer) and moisture to get maximum intensity.
Option C: All-Purpose Dyes
All-purpose dyes can work, but they’re generally not as wash-fast on cotton as fiber-reactive dyes.
Some brands recommend a post-dye fixative to reduce bleeding. If you’re using all-purpose dye,
follow your brand’s aftercare closely and expect a little more maintenance.
Step 4: Soda Ash 101 (For Fiber-Reactive Tie Dye)
If you’re using fiber-reactive dye on cotton/rayon/linen, soda ash is the MVP. It raises the pH so the dye can bond
with the fiber (translation: your colors get brighter and stay put).
How to use soda ash (soak method)
- Mix soda ash into warm water (common guidance is roughly 1 cup per gallon).
- Soak your item for about 15–30 minutes.
- Wring/squeeze so it’s damp, not dripping.
- Do not rinse out the soda ash before applying dye.
Safety note: soda ash is alkaline and can irritate skin/eyes. Gloves are your friend. Your future self,
who would like to keep having fingerprints, also thanks you.
Step 5: Apply Dye Strategically (Because Gravity and Capillary Action Have Opinions)
Dye application affects vibrancy more than people think. A few pro moves:
- Use enough dye: Pastel dreams require intention; bold color requires concentration.
- Get penetration: Flip the bundle and apply dye to both sides so the center isn’t left out like an awkward third wheel.
- Keep it damp: Dye reacts while wet. If it dries out too soon, the reaction slows and color can weaken.
Step 6: “Batching” (Letting Dye React) The Secret to Maximum Pop
After dyeing, your project needs time for the dye to react with the fiber. This is where vibrancy is born.
General batching rules
- Keep it damp: Put the tied item in a plastic bag or wrap in plastic.
- Give it time: Many processes recommend at least 6–8 hours, and often up to 24 hours for brightest results.
- Warm helps: If your room is cool, reaction time increases. Aim for comfortably warm conditions when possible.
If you’re impatient (no judgment), remember: you’re not waiting for paint to “dry.”
You’re waiting for chemistry to finish its little Broadway finale.
Step 7: Rinse and Wash Out Correctly (This Is Where Most Tie-Dye Goes to Cry)
Washout is the most underestimated step in keeping colors vibrant. The goal is to remove
unbonded dye without muddying your light areas.
The best rinse sequence (especially for fiber-reactive dyes)
- Rinse while still tied in cold water to stop/slow the reaction and flush excess dye on the surface.
- Untie gradually and keep rinsingstill cool to lukewarmuntil runoff is much clearer.
- Move toward warm, then hot rinses to remove the last “loose” dye.
- Machine wash hot with a dye-friendly detergent (or a textile detergent designed for washout) to finish the job.
Why hot water after the initial cold rinse? Hot water is excellent at removing dye that did not bond, which helps prevent future bleeding
and keeps colors looking crisp instead of “everything is slightly purple now.”
Detergent matters (a little)
A low-foam textile detergent or dye washout detergent can help strip excess dye more effectively than a typical gentle laundry soap.
The key is a thorough washoutdetergent is a helper, not a replacement for rinsing properly.
Step 8: Can You Heat-Set Tie Dye?
It depends on the dye.
Fiber-reactive dyes (cotton/rayon/linen)
For fiber-reactive dyes, the “set” happens primarily through the chemical bond created in an alkaline environment over time.
Heat can speed reactions in some scenarios, but the big wins are: correct soda ash use, enough time, staying damp, and proper washout.
Some all-purpose or kit methods
Some tie-dye methods use heat (for example, certain brand techniques) to encourage dye uptake.
If your kit specifically recommends a heat method, follow that exactlyespecially safety notes (no metal parts, proper wrapping, etc.).
Step 9: First Wash Rules (So Your Tie-Dye Doesn’t Prank Your Entire Laundry Load)
- Wash separately for the first 1–3 washes (or with similar dark colors).
- Avoid fabric softener early on (and honestly, often altogether for tie-dye).
- Use a color catcher sheet if you’re nervous about bleeding.
- Check your garment label for what the fabric can handle.
Long-Term Care: How to Keep Tie-Dye Vibrant for Years
Once the dye is properly set and washed out, keeping colors vibrant is mostly about smart laundry habits.
Do this
- Wash inside out to reduce abrasion on the dyed surface.
- Use cool to warm water for routine washes (hot isn’t necessary foreversave it for the initial washout).
- Use mild detergent and don’t overdo it.
- Skip bleach (unless your aesthetic is “accidental galaxy fade”).
- Dry low or line-dry when possible to reduce heat stress.
Avoid this
- Hours of direct sun while drying (UV can fade dyes over time).
- Overcrowded wash loads that don’t rinse well.
- Fabric softener buildup that can make colors look dull.
Troubleshooting: Quick Fixes for Common Tie-Dye Problems
Problem: Colors look dull or faded
- Likely causes: weak dye mix, insufficient batching time, fabric dried too soon, or using the wrong dye type for the fiber.
- Fix: increase dye concentration, keep items warmer/damper while batching, and ensure soda ash is used correctly (for fiber-reactive dyes).
Problem: Whites look tinted (“muddy” background)
- Likely causes: inadequate rinse/washout or stacking items so dye transfers during rinsing.
- Fix: rinse more thoroughly (cold → warm → hot), and keep items separated during early rinses.
Problem: Color keeps bleeding after multiple washes
- Likely causes: excess loose dye not removed, or dye type that is less wash-fast on that fiber.
- Fix: repeat hot wash with a dye washout detergent; consider a dye fixative if using all-purpose dye.
Problem: Center of folds stayed white
- Likely causes: dye didn’t penetrate, bundle too tight, or not enough liquid dye.
- Fix: apply dye to both sides, slow down, and use enough liquid to saturate where you want color.
FAQ: The Questions Everyone Googles at 1:00 a.m. With Dye-Stained Fingers
How long should tie dye sit before rinsing?
Many kits recommend 6–8 hours; fiber-reactive dye processes often look best with longer batching (commonly up to 24 hours),
especially in cooler temperatures. Longer (within reason) usually means deeper color.
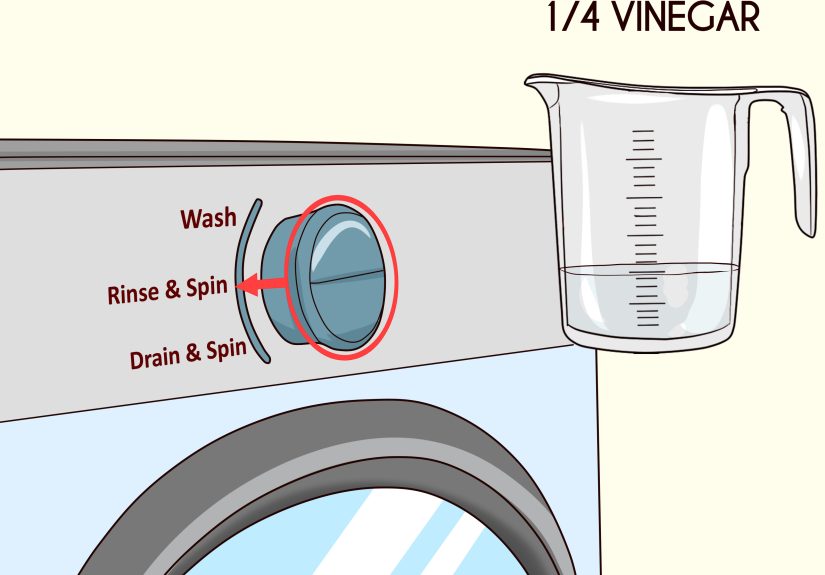
Do I need vinegar to set tie dye?
Vinegar is often used for certain dye types and for neutralizing or rinsing steps, but for fiber-reactive dyes on cotton,
soda ash + time + proper washout are the main factors that create colorfastness. If a tutorial suggests vinegar as an optional
step, treat it as a supporting playernot the star of the show.
Can I set tie dye in the dryer?
A dryer can help dry the garment, but it’s not a magic “set button,” especially for fiber-reactive dyes where bonding happens during batching.
Focus on correct batching and washout first; then dry as your fabric label allows.
Real-World Experiences: What Tie-Dye Fans Learn the Hard Way (So You Don’t Have To)
Ask a group of tie-dye enthusiasts what made their colors finally pop, and you’ll hear a theme:
it’s rarely the spiral technique. It’s the unsexy stuffprep, patience, and rinse discipline.
Crafters often start out thinking tie-dye is “apply color, rinse, done,” and then wonder why their masterpiece fades like a
celebrity apology tour. The good news is that the learning curve is fastand kind of funny in hindsight.
One common early experience: using a brand-new shirt straight out of the package. It looks clean, feels soft, and screams,
“I’m ready for art!” But after dyeing, the colors come out unevenbright in some spots, weak in others. Later, they learn the shirt
had a finish on it, and pre-washing would’ve helped the dye soak in evenly. Another classic: the “I rinsed it for 30 seconds” reveal.
The pattern looks amazing at first… then the next wash turns the white areas a gloomy tint. That’s not bad luckit’s leftover dye
still hanging around. Once people switch to a cold rinse while tied, then warm/hot rinses, then a proper hot washout,
the muddy backgrounds usually disappear.
Temperature is another sneaky villain. Tie-dye looks like a summer craft, but plenty of people dye indoors in winter or in chilly basements.
They bag the shirt, wait a few hours, rinse, and feel disappointed by muted shades. The “aha” moment comes when they try again and simply
keep the bundle warmer and wetter for longer. Suddenly the same colors look deeper and more saturated. It’s not that their dye “was bad.”
The reaction just needed better conditions. Many crafters start keeping their bagged items in a warm spot (not scorchingjust cozy)
and timing their dye sessions so the piece can batch overnight without drying out.
Then there’s the hydration lesson: dye can’t react well if it dries too fast. People who live in dry climates often notice their bundles
dry out around the edges. They’ll describe it like, “My color is great on the outside but weak in the folds.” The fix tends to be simple:
wrap well, bag well, and don’t be stingy with moisture (especially with fiber-reactive dye mixes). Some even learn that a slightly damper
starting garment can help dye flow and react more evenlythough too wet can cause extra spreading if crisp white lines are the goal.
It becomes a balancing act, and that’s where the craft gets addictive: you tweak one variable, and the results change.
Finally, many tie-dye fans report a “laundry confidence milestone.” At first, they wash everything separately forever,
terrified their rainbow shirt will bully the rest of the hamper. But once they nail washoutrinsing until clear-ish,
then hot washing with an appropriate detergentthe bleeding calms down dramatically. That’s when tie-dye stops being a one-time project
and becomes a reliable wardrobe staple. The overall takeaway from these shared experiences is comforting: if your tie-dye didn’t come out
vibrant the first time, you’re not “bad at tie-dye.” You’re just one better rinse and one longer batch away from looking like a pro.
Conclusion
If you remember only three things about how to set tie dye, make it these:
use the right dye for the fiber, give it time while damp (and warm),
and wash out thoroughly. Those steps do more to keep dyes and colors vibrant than any “secret hack.”
Do it right once, and your tie-dye will stay bright through real lifelaundry days, summer sweat, and the occasional “oops” hot cycle.


