Table of Contents >> Show >> Hide
- What Is Beer Can Chicken, Really?
- Why This Method Can Make Chicken Juicier
- Equipment You’ll Need
- Ingredients
- Recipe at a Glance
- Step-by-Step: Juicy Beer Can Chicken on the Grill
- How to Keep Beer Can Chicken Juicy (The “Don’t Mess This Up” List)
- Beer Choice: Does Fancy Beer Matter?
- Flavor Variations (Pick a Vibe)
- Oven & Pellet Grill Options
- Troubleshooting
- Food Safety Notes (Because Delicious Shouldn’t Be Dangerous)
- What to Serve with Beer Can Chicken
- FAQ
- Conclusion
- Real-World Experiences: Lessons from the Beer Can Chicken Trenches ()
Beer can chicken is the backyard BBQ equivalent of showing up to a party wearing sunglasses at night: a little ridiculous, oddly impressive, and somehow it works. You get a whole chicken that’s juicy inside, bronzed outside, and flavored like you meant to do that on purpose. Even better, it’s forgivingperfect for grillers who like their food delicious and their stress levels low.
This guide walks you through a juicy beer can chicken recipe that actually delivers: crisp skin, tender meat, and real technique (not just “stick chicken on can and pray”). We’ll cover the why, the how, the temps, the gear, and the little details that separate “pretty good” from “why is this chicken better than mine?”
What Is Beer Can Chicken, Really?
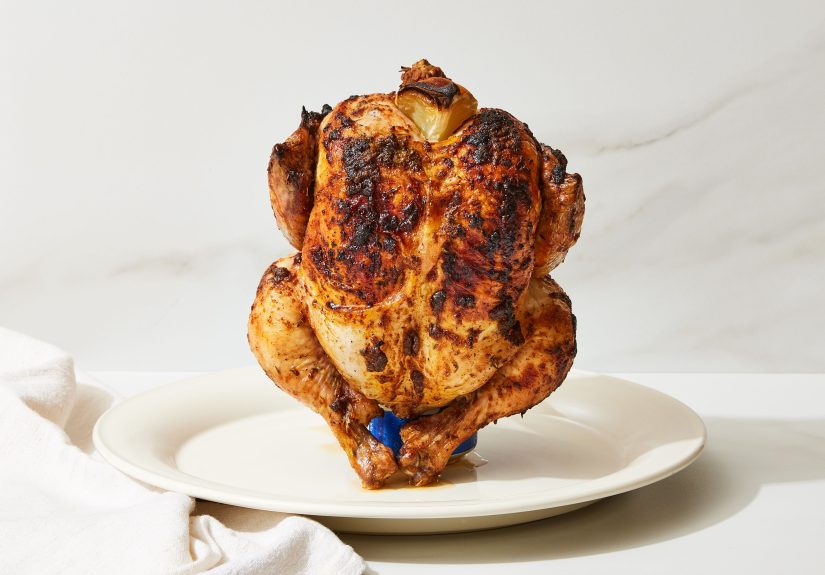
Beer can chicken (also called beer butt chicken) is a method where a whole chicken is cooked upright, usually over indirect heat, with a partially filled beer can (or a purpose-built stand) in the cavity. The upright posture helps the bird cook evenly and lets fat render and drip away for better skin texture.
Here’s the honest truth: the “beer steaming up and basting the chicken from the inside” story is… romantic. The chicken is the star. The can is mostly a stand. The real magic is upright roasting + controlled heat + not overcooking the breast.
Why This Method Can Make Chicken Juicier
1) Even cooking (breast vs. thighs)
Chicken breasts dry out when they overshoot the ideal finish line. Upright cooking can help the legs and thighs (which like higher temps) cook efficiently while the breast reaches doneness without going bone-dry.
2) Indirect heat = gentle roasting with grill flavor
This is a “roast on the grill” technique, not a “burn it over flames” technique. Keeping the chicken over indirect heat reduces scorching and gives you time to build color gradually.
3) Dry-brining boosts juiciness and skin texture
If you take one upgrade from this article, make it this: salt the chicken ahead of time. Dry-brining seasons deeper, helps meat retain moisture, and gives the skin a better chance to crisp because it dries out in the fridge first.
Equipment You’ll Need
- Grill with a lid (gas or charcoal). A smoker or pellet grill also works.
- Two-zone setup (hot side + cool side) for indirect cooking.
- 12 oz beer can OR a beer can chicken stand (recommended for stability).
- Instant-read thermometer (non-negotiable if you want juicy results).
- Drip pan (optional but highly recommended for easier cleanup and tasty drippings).
Ingredients
For the chicken
- 1 whole chicken (3–5 lb), giblets removed
- 1 can of beer (lager or pale ale works great)
- 1–2 tbsp neutral oil (or melted butter)
Easy “Backyard Hero” Dry Rub
- 2 tsp kosher salt (use less if dry-brining overnight)
- 2 tsp smoked paprika
- 1 tsp garlic powder
- 1 tsp onion powder
- 1 tsp black pepper
- 1/2 tsp cayenne (optional, but fun)
- 1 tsp brown sugar (optional; helps browning, but watch flare-ups)
Optional aromatics (nice, not necessary)
- 1 lemon (halved)
- A few sprigs of rosemary or thyme
- 2–4 garlic cloves (smashed)
Recipe at a Glance
- Prep time: 15–20 minutes (plus optional dry-brine time)
- Cook time: ~60–90 minutes (depends on bird size + grill temp)
- Grill temp: 350–375°F for steady roasting (up to ~400°F if your grill runs cool)
- Target temps: Breast 160–165°F; Thighs 170–175°F for best texture
- Rest: 10 minutes
Step-by-Step: Juicy Beer Can Chicken on the Grill
Step 1: Dry-brine for maximum juiciness (optional, but worth it)
Season the chicken all over with kosher salt (about 1/2 tsp per pound is a solid starting point). Place it on a rack over a sheet pan and refrigerate uncovered for 12–24 hours. This dries the skin and improves browning while seasoning the meat more evenly.
No time? Salt it anyway and let it sit for at least 45 minutes. You’ll still get benefitsjust not the full “crispy-skin flex.”
Step 2: Set up the grill for indirect heat
Gas grill: Turn on one side to medium (aim for 350–375°F) and leave the other side off. The chicken goes on the off side.
Charcoal grill: Bank coals to one side (or use a two-zone basket setup). Place a drip pan on the cool side under where the chicken will sit.
Step 3: Prep the beer can (or stand)
Open the beer and pour out (or drink) about half. This reduces slosh and gives you room for aromatics. If you’re using a plain can, you can poke a couple extra holes in the top with a church-key style opener for venting. Add optional aromatics if you like.
Safety note: The can will be extremely hot. Treat it like a tiny aluminum volcano.
Step 4: Season the chicken
Pat the chicken very dry (dry skin browns better). Rub lightly with oil or melted butter. Apply the dry rub all overdon’t be shy. Season inside the cavity too (just keep it reasonable).
Step 5: Mount the chicken
Carefully slide the chicken cavity over the beer can (or place it on the stand). The chicken should sit like a tripod: two legs + can/stand. If it wobbles, fix it nowfuture-you will be grateful.
Step 6: Grill over indirect heat
Place the chicken on the cool side of the grill (indirect zone), close the lid, and let it roast. Resist the urge to peek every 90 seconds. If you’re looking, you’re not cooking.
Step 7: Temperature is the truth
Start checking around the 50–60 minute mark for smaller birds, 70+ minutes for bigger ones. Pull the chicken when:
- Breast reads 160–165°F in the thickest part (avoid bone).
- Thigh reads 170–175°F for the best bite-through tenderness.
Step 8: Rest, then remove the can
Transfer the chickenstill uprightto a tray and rest for 10 minutes. Then remove the can using tongs and paper towels (or heat gloves). Carve and serve.
How to Keep Beer Can Chicken Juicy (The “Don’t Mess This Up” List)
Use a thermometeralways
Color and “juices run clear” are unreliable. Temperature is the only consistent way to avoid dry chicken.
Don’t blast it over direct heat
Direct flames = burnt skin + undercooked interior. Indirect heat gives you even doneness.
Dry-brine when possible
Dry-brining improves both juiciness and skin texture. It’s the rare “extra step” that’s actually worth the hassle.
Cook thighs higher than breasts
Dark meat gets noticeably better around 170–175°F, while breast meat is happiest closer to 160–165°F. This is why the upright method can shine: it helps you land those temps without turning the breast into chicken jerky.
Beer Choice: Does Fancy Beer Matter?
If you want a bright, crowd-pleasing chicken, use a clean lager, blonde ale, or light pale ale. Super bitter IPAs can sometimes leave a harsh aroma. Stouts can be fun, but they’re a louder flavorlike wearing a tuxedo to a backyard cookout. Not wrong, just… a choice.
Want more “beer flavor” than the can method provides? Use beer elsewhere: in a quick brine, a mop sauce, or a glaze. That’s where beer actually gets a real seat at the table.
Flavor Variations (Pick a Vibe)
Classic BBQ
Smoked paprika + brown sugar + garlic + a touch of mustard powder. Finish with a thin brush of BBQ sauce in the last 10 minutes.
Citrus-Herb
Lemon zest, rosemary, thyme, black pepper, and garlic. Add lemon halves to the can/stand for aroma.
Southwest Heat
Chili powder, cumin, oregano, smoked paprika, and a pinch of clove (yes, cloveuse a light hand).
Sweet & Spicy “Game Day”
Brown sugar + cayenne + smoked paprika. Serve with grilled lime wedges for a bright finish.
Oven & Pellet Grill Options
Oven method
You can do the same upright roast in the oven at 375°F. Place the chicken (on a stand) over a sheet pan to catch drips. Cook to the same internal temperatures and rest before carving.
Pellet grill method
Set the pellet grill to 350°F for a steady roast. You can also start low (180–225°F) for smoke, then finish hotter to crisp the skin. Still, temp the birdnot the clock.
Troubleshooting
“My skin isn’t crispy.”
- Dry the skin more (dry-brine uncovered in the fridge).
- Raise grill temp slightly for the last 10–15 minutes.
- Lightly oil the skin before seasoning.
“The chicken tastes great but it’s a little dry.”
- You likely overcooked the breastpull at 160–165°F and rest.
- Use an instant-read thermometer and check multiple spots.
- Consider spatchcocking if you want even faster, more consistent results.
“It tipped over.”
- Use a stand or throne (more stable than a can alone).
- Choose a flatter part of the grate and avoid moving it mid-cook.
- Some cooks brace with onion halves or a drip pan setup for stability.
Food Safety Notes (Because Delicious Shouldn’t Be Dangerous)
- Cook poultry to a safe minimum internal temperature of 165°F.
- Measure in the thickest part of the breast and thigh, avoiding bone.
- Resting helps carryover cooking and keeps juices in the meat (not on your cutting board).
What to Serve with Beer Can Chicken
- Grilled corn with lime and chili powder
- Potato salad (classic) or crispy smashed potatoes (modern flex)
- Coleslaw for crunch and acid
- Pickles (seriouslyacid cuts richness beautifully)
- Cold beer for the chef (this is non-negotiable)
FAQ
Do I have to use beer?
Nope. You can use soda, cider, or even a stand with aromatics and a splash of broth. The upright roast is doing the heavy lifting.
Is beer can chicken “real” BBQ?
Absolutely. BBQ isn’t a membership cardit’s good food cooked with fire and friends nearby. If anyone complains, hand them a paper plate and let the chicken settle the debate.
Can I make it spicy?
Yes. Add cayenne, chipotle powder, or your favorite hot rub. You can also finish with a hot honey glaze in the last few minutes.
Conclusion
A juicy beer can chicken recipe doesn’t need gimmicksit needs smart heat control, a solid rub, and a thermometer that tells the truth. Cook upright over indirect heat, nail the internal temps, and rest before carving. That’s it. The beer can is mostly a trusty sidekick (and a great conversation starter), but the real hero is technique.
Make it once and you’ll understand why this chicken shows up at tailgates, cookouts, and “I swear I’m not trying too hard” backyard dinners across America. It’s easy, it’s showy, and it tastes like you planned your whole weekend around it.
Real-World Experiences: Lessons from the Beer Can Chicken Trenches ()
If you hang around enough backyard grills, you’ll notice beer can chicken has a personality. It’s the dish that makes people gather close, point, and say things like, “Is it… standing?” like they’ve just spotted a rare bird in the wild. And that’s part of the fun: it’s dinner and entertainment.
One of the most common “first-timer” experiences is learning that the grill lid is not a TV show you need to check in on every two minutes. People peek because they’re excitedand because it smells amazing. But every peek is basically letting your grill exhale all the heat you worked to build. The cooks who get the juiciest chicken tend to be the ones who set the temp, trust the process, and only open the lid when they’re actually doing something useful (like temping, rotating, or rescuing a wing tip that’s getting too toasty).
Another universal moment: realizing how important stability is. A wobbly chicken is a suspense film you did not ask to watch. If you use a plain can, you learn fast that “tripod balance” is a real skilllike riding a bike, but greasier and with higher stakes. Many seasoned grillers eventually graduate to a beer can chicken stand, not because it tastes wildly different, but because nobody wants to explain to their guests why dinner is now lying on its side like it had a long day.
Then there’s the seasoning journey. Early attempts often swing between “under-seasoned chicken that tastes like polite sadness” and “rubbed so aggressively it could qualify as a spa treatment.” Over time, most folks learn a simple rhythm: salt ahead if you can, keep the rub balanced, and don’t forget the underside and creases near the thighs. That’s where flavor likes to hide.
Temperature confidence is the biggest glow-up. Many home cooks grow up hearing “juices run clear” and “no pink,” then wonder why their chicken is dry. The moment someone uses a thermometer and pulls the breast at 160–165°F (then rests it) is often the moment they stop apologizing for their chicken. Dark meat is its own lesson: thighs can be safe at 165°F, but people are consistently happier when thighs climb closer to 175°Fsuddenly the texture goes from “fine” to “why is this so good?”
Finally, there’s the social side: beer can chicken turns into a ritual. Someone becomes the “rub person.” Someone else claims they’re “on fire management.” A third person mysteriously appears whenever it’s time to taste-test. And when you carve that chicken and the slices are glossy and tender, the grill turns into the happiest place in the yardright next to the cooler.


